Hurrah! We made it to the last post of the bias facing and bias binding tutorials!
In this post we’re going to look at facing scallops, or inside corners. Learning this technique comes in handy for doing the 1940’s Apron Pattern, but also for binding squared, v neck, or sweetheart necklines.
We’re building upon techniques already learned in the prior binding/facing tutorials, so if you feel lost or missed the previous posts you can find them here.
There are a lot of ways to miter inside corners. For this tutorial I’m going to show you the technique I use. If you use another method please feel free to leave a comment or link!
Mitering Inside Corners or Scallops
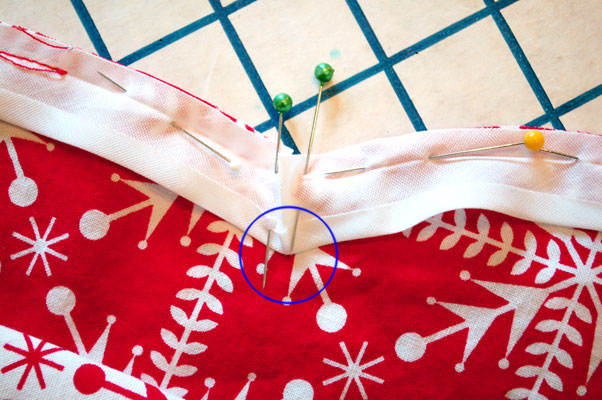
We’ve already learned how to attach bias facing to a straight edge, and we’ve learned how to miter inside corners with bias binding. You’re going to combine those two types of techniques when you do your inside corners with bias facing. Just like with your bias binding, the most crucial part of getting inside corners right with bias facing is going to be that inside point. You can see we’ve pinned the bias facing along the edge (for this one the seam allowance is 1/4″, the same as the bias tape seam allowance). Pin until you get to the corner. See the point inside the circle? That is the most crucial part. We want to get that point right, so that the bias binding will lay flat along the inside of the piece at both the scallop you just did, and the scallop to come, and not pull or pucker at the point. Ease in the excess at the cut edge like a tuck (this is called a miter). Do the same for every scallop, or every corner you need to bind.
Please click the link below to continue reading. If you don’t see a link, you’re in the right place!
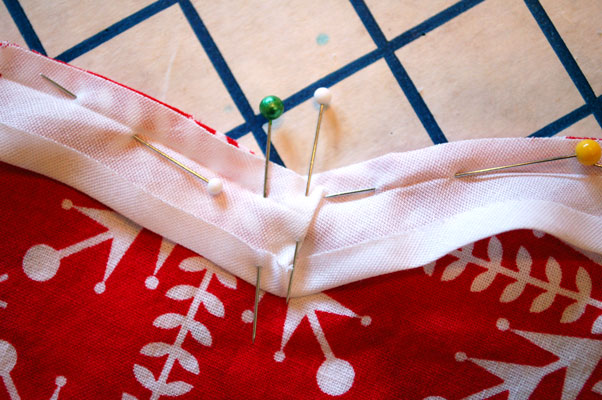
I use another pin to secure down the miter (the tuck) before sewing on my machine, to keep it from moving.
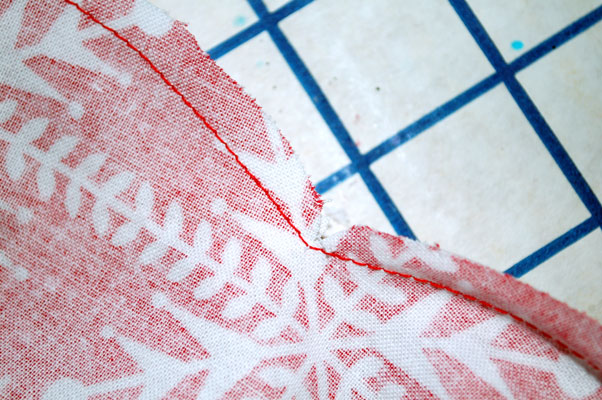
Go slowly, stitching by machine, and pivot with your machine in “needle down” position when you get to your points. When you’re done, clip your points to make them lay flat when you flip your bias facing to the inside.
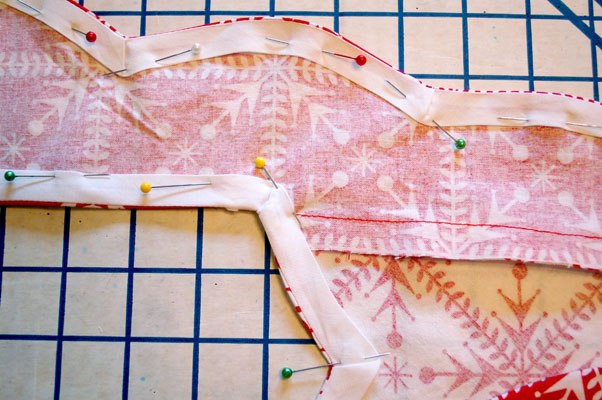
Turn your facing to the inside of the garment. Make sure you get the curves of the corners nice and smooth. If you need to, go back and clip curves or points as needed to make it lay flat. Give the facing a good press to make your edges crisp. Here you can see my scallops and neckline flipped to the inside of the garment, all pinned and ready to sew! Go slowly and stitch by machine, removing the pins as you go.
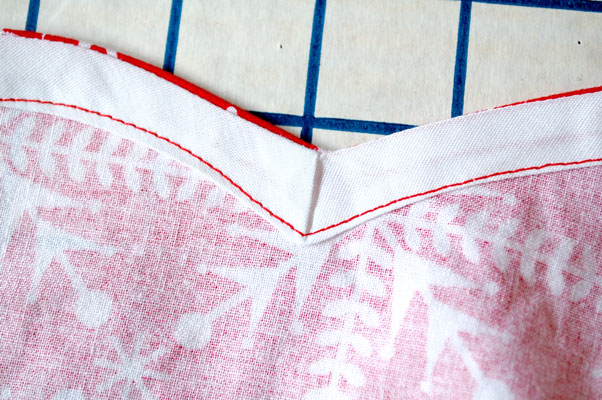
Here you can see a close up on the inside of my scallop after sewn.
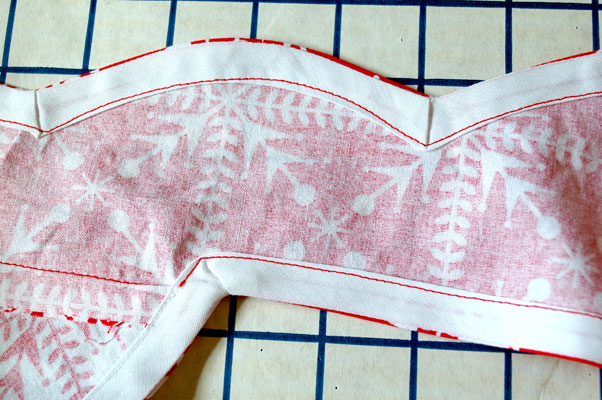
And here you can see another inside shot, showing the neckline edge and the scallops. If you’re doing the 1940’s apron in two tone, make sure you change your thread color to match your fashion fabric! You can see where I stitched with red thread to match my red fabric, then switched to white to match the white fabric. Don’t forget to give your garment a final press after stitching!
I hope you have found these tutorials useful, and I hope they help you to feel confident whenever you have a project that involves bias facing or bias binding!
If you use an alternate method, please leave me a comment or link below so we can all see how you do your bias binding and facing. :)
Hope you have a wonderful weekend!

mala_14
December 18, 2011 at 6:43 pm (14 years ago)Thank you so much for all these bias binding and facing tutorials! They are incredibly informative and I can’t wait to start using them. I always wondered how these sorts of edges were finished. Thanks again for sharing!
Lauren
December 20, 2011 at 3:13 pm (14 years ago)You’re welcome! I’m glad you found them useful :D
alfred beilin
January 3, 2012 at 3:59 am (14 years ago)hello all the best have a gud new year
alfred beilin