Horray! A new pattern! At the time of writing this the Early 1940s Sporting Dress & Jacket pattern is hot off the presses!
The pattern has great princess lines and wide straps. The back is cut low, and I know I will get questions about how to make the dress bra-friendly. So… ta da! Pattern hack tutorial!
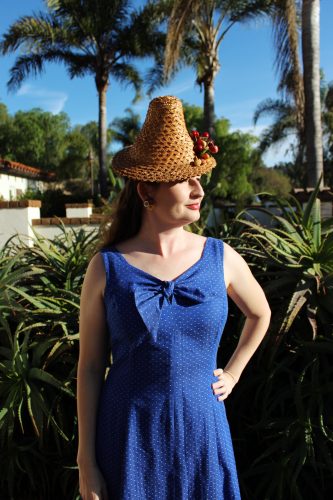
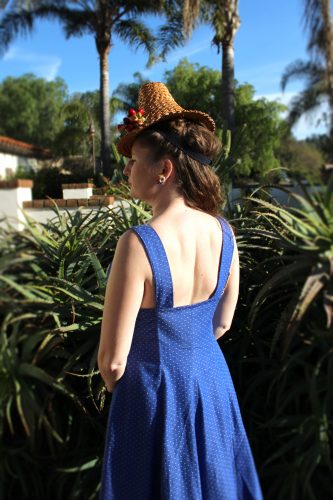
First off, let me say that I *am* wearing a bra with my sample in these photos.
I am quite short in the torso, and for my sample I actually ended up finishing my “wearable muslin,” which basically means I mocked it up in a fabric I wouldn’t mind wearing if it fit the bill. This dotted chambray is super comfy, so it was a perfect choice.
I did not, however, do my normal short torso adjustments, as I wanted to see how long it ran in the torso without alterations. In the end I needed to shorten it about 1″ in length, and my normal adjustment is somewhere between 1/2″-1″. This caused the neckline and back to raise up a bit higher than it would normally. In the photos above I did *not* add any extra height to the back pattern pieces. I shortened it at the shoulders.
I tried this on with TWO bras. The first one showed at the side toward the underarm. The second didn’t show at all. You will want to adjust your straps to hit where will best cover your bra straps.
For those with a torso length that is different than mine, or those who desire more back coverage, here’s a little tutorial for how to raise up the back.
You will need:
- Your pattern
- A pencil
- Paper scissors
- Tape
- A clear ruler
- Muslin or inexpensive fabric in a similar weight to your final fabric to test your alterations.
You probably *will* need adjustments after doing this pattern hack. You may need to take in the circumference to fit your back more snugly.
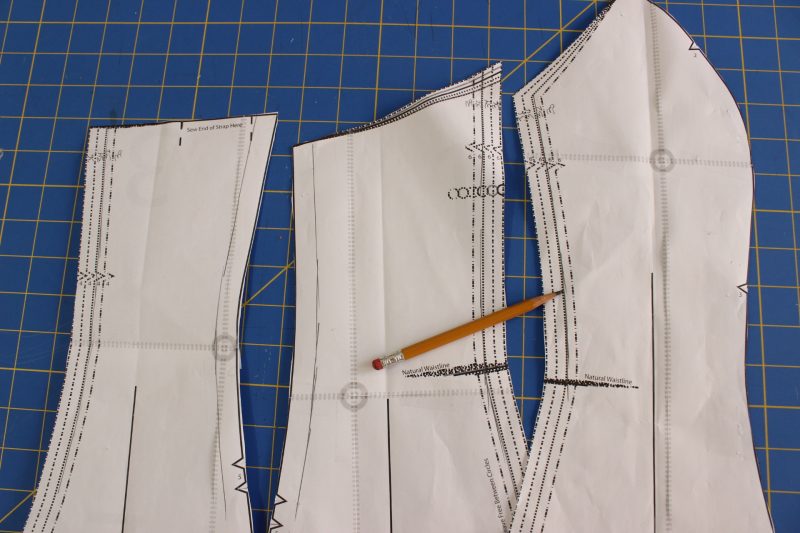
First take your back, side back, and side front pieces. Draw your 1/2″ seam allowance on these pieces using a pencil. If you’re using the printed pattern the color dotted lines will show the seam line. On the e-pattern version, as shown above, no seam allowance line is drawn as it looks too busy in black and white, so you’ll need to draw yours on.
Important to note here that the adjustments will just take place from the “point” at the top of the side front piece, as this is where the underarm starts. You should have plenty of coverage in the front so it’s unlikely you will need to adjust that piece for height.
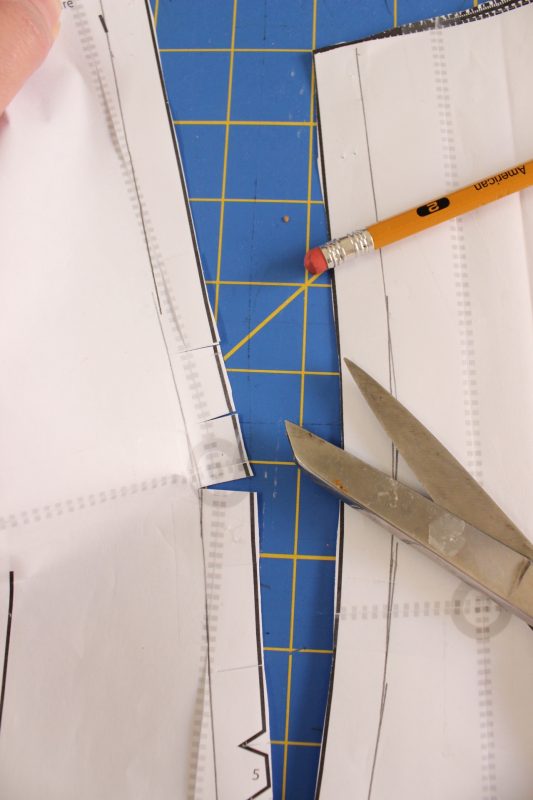
Next, clip in to the seam line at the curves.
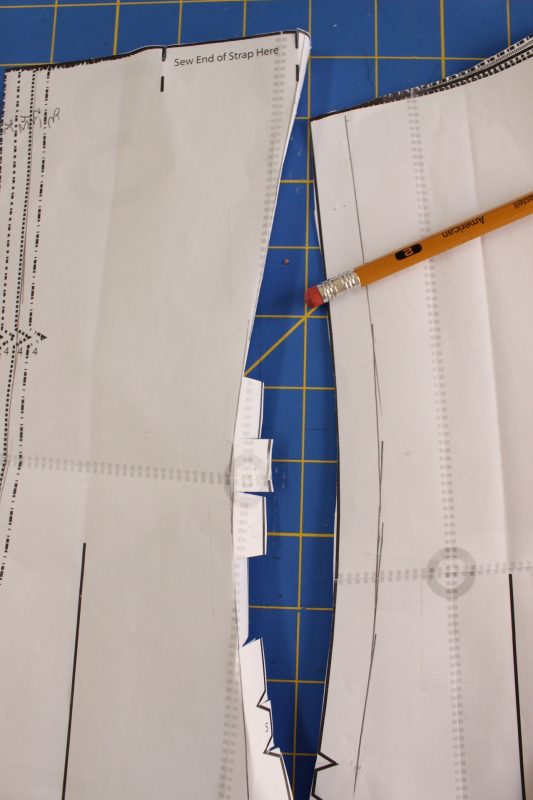
Then turn under your 1/2″ seam allowance.
NOTE- You only need to do this to ONE SIDE of which you’re to join. You see here the piece on the left has the seam allowance turned under. The one on the right has it laying flat.
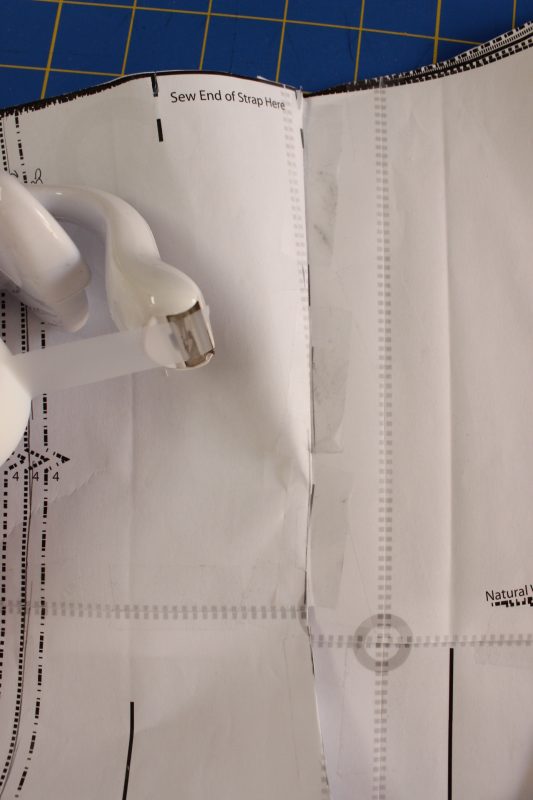
Now align the connecting seams together, matching the folded under edge of one piece to the drawn line of the other. Just like you’re sewing a seam. Tape it to place.
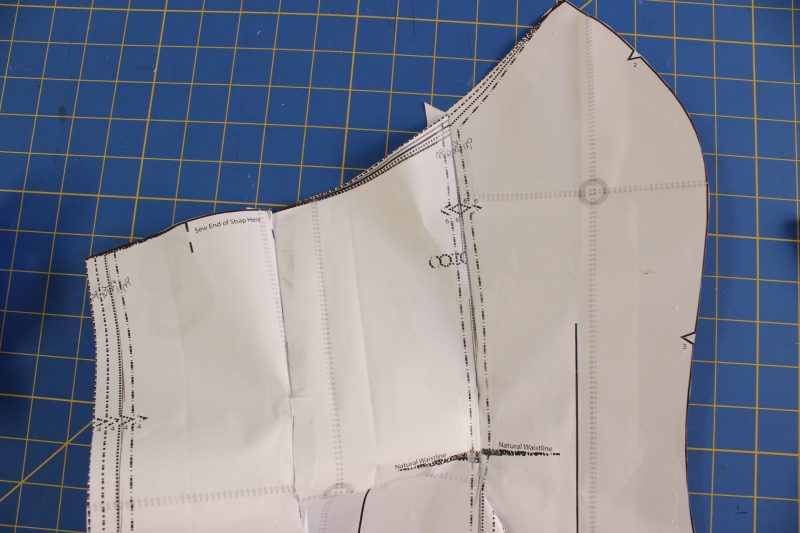
Do the same across all three pieces and it should look like this when taped.
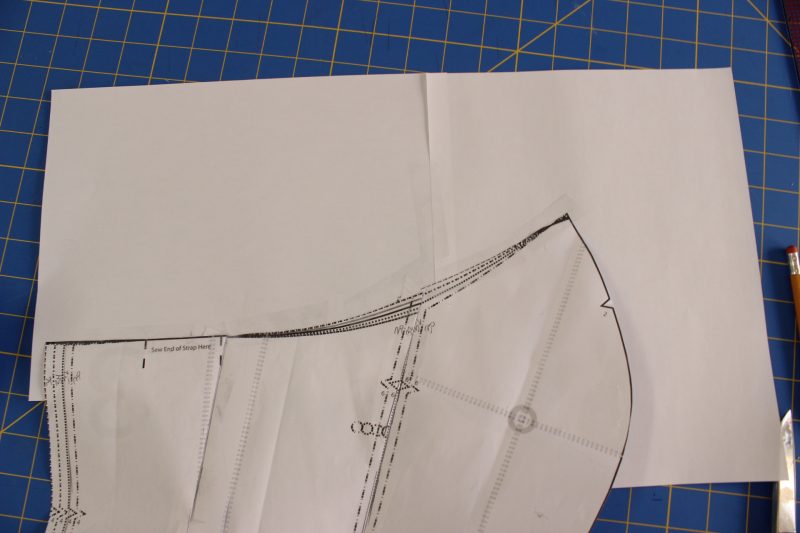
Next grab some paper and tape it underneath the joined pattern pieces. I used two pieces of USA letter size paper here.
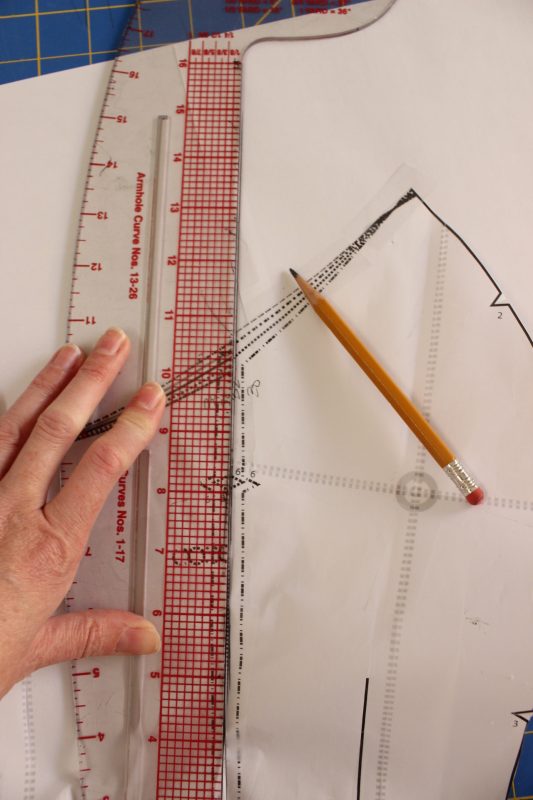
Now, using your clear ruler, line up the seam line of the pieces (where the join was taped) and draw a straight line UP onto the blank paper you just taped.
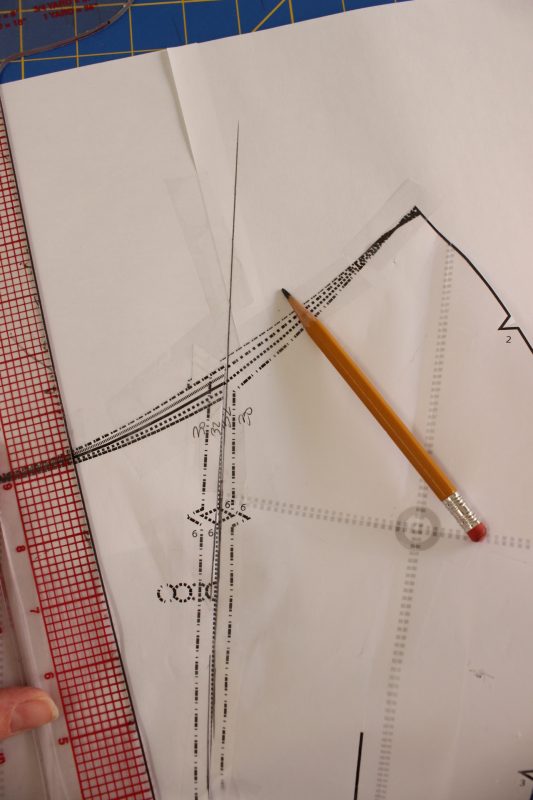
It should look like this after you’ve drawn your line.
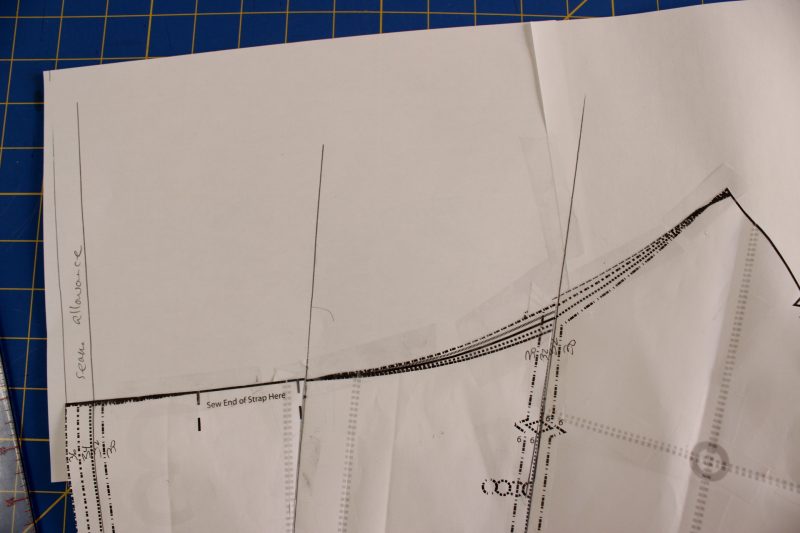
Do the same for all the seams. Don’t forget to draw in the seam allowance of the center back piece!
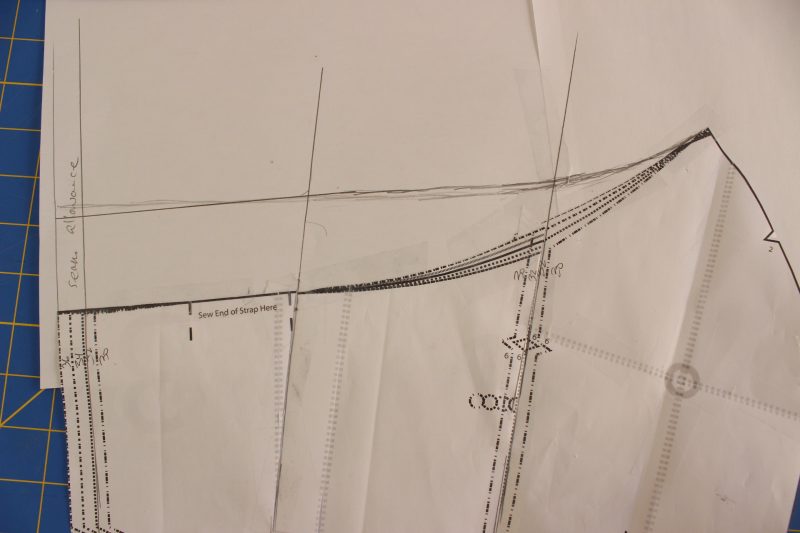
Now draw a line approximately how high you’d like your center back. I drew in my line at a RIGHT ANGLE from the center back, which will keep it from curving funny at center back. This is experimental, and you may need to alter this in the mock up phase, as you’ll need to make sure you’ve got enough movement at the underarm. Use a nice, graceful curve here.
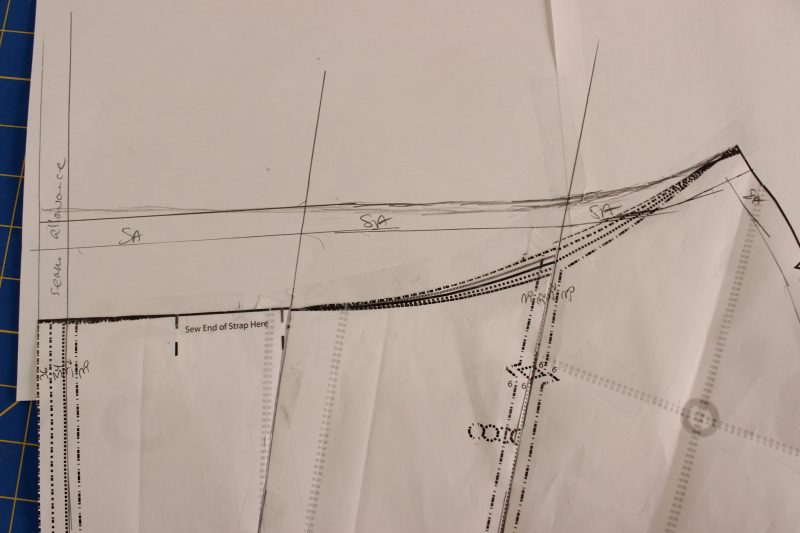
Now draw in the seam allowance. You can see if you compare this with the image above that the stitch line is 1/2″ BELOW the line I drew in the last step. That is because you’ll need your top of that point to meet flush with the center front dress piece or your underarm line will be wonky.
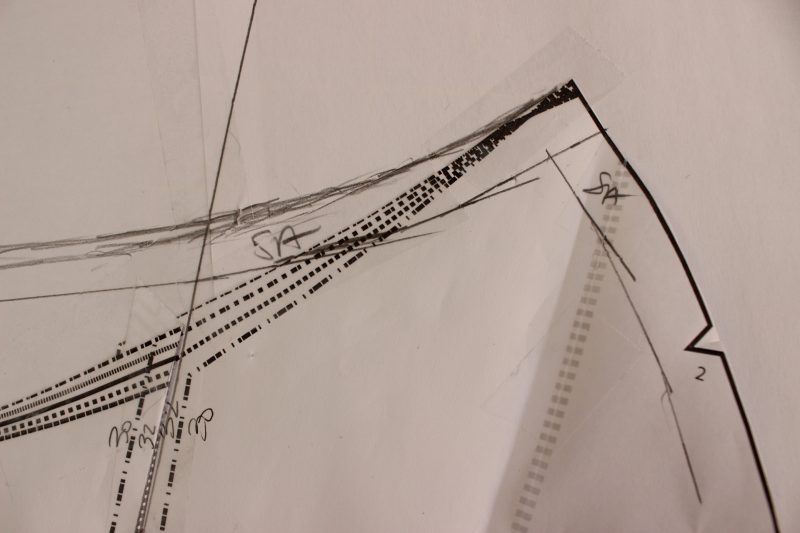
Here’s a close up to clarify. I drew the 1/2″ seam allowance line on the front edge of this piece (where notch 2 is) to help myself be mindful of the seam allowance on that top point.
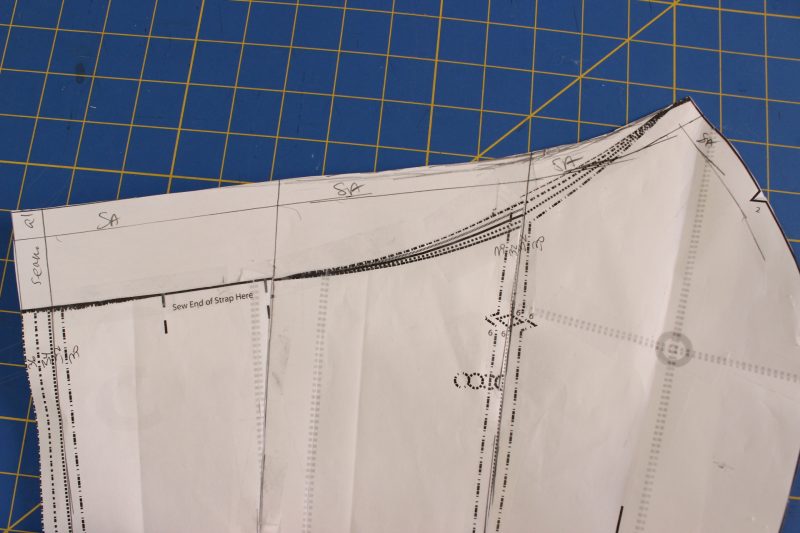
Trim away all the extra paper from the top.

Now clip down from the top edge to where the taped join is of the pattern piece and the added paper.
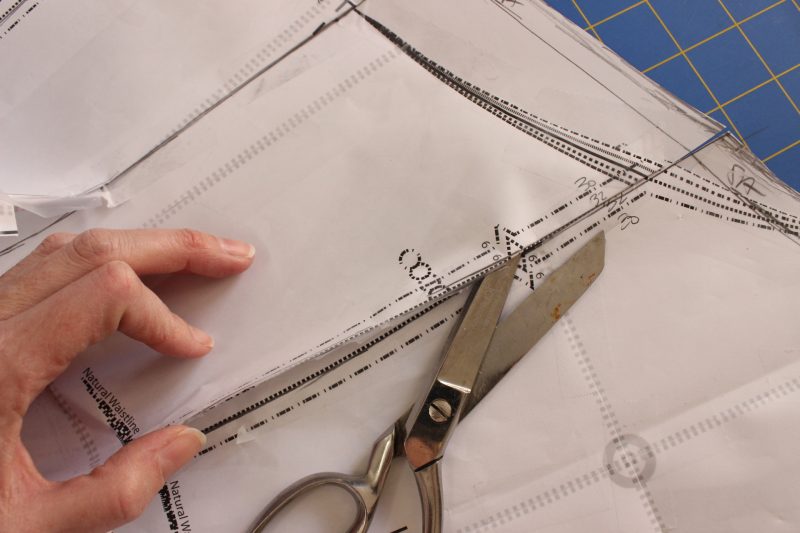
Carefully clip the tape away from the joins of the pattern pieces. Free the pieces from each other. That top join between pieces may need a bit of prying away and retaping. Go slow and remember you can add your seam allowance back on if you accidentally snip some away.
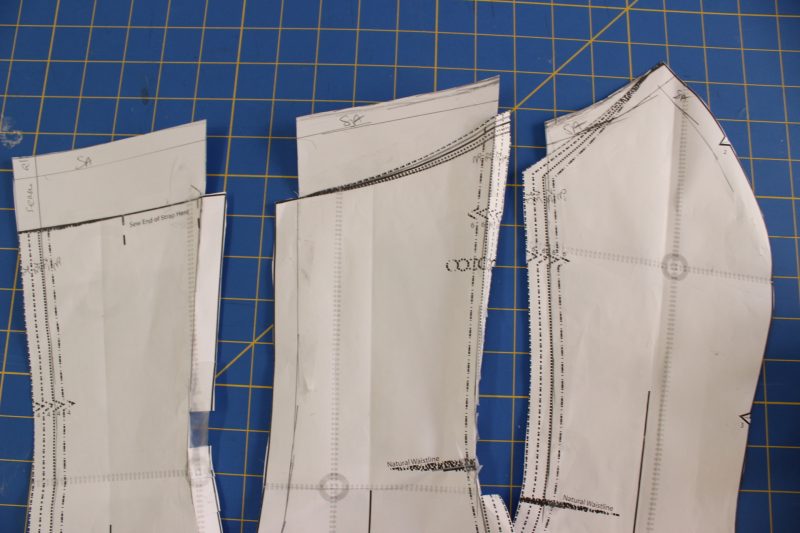
Once “freed”, the pattern will look like this.
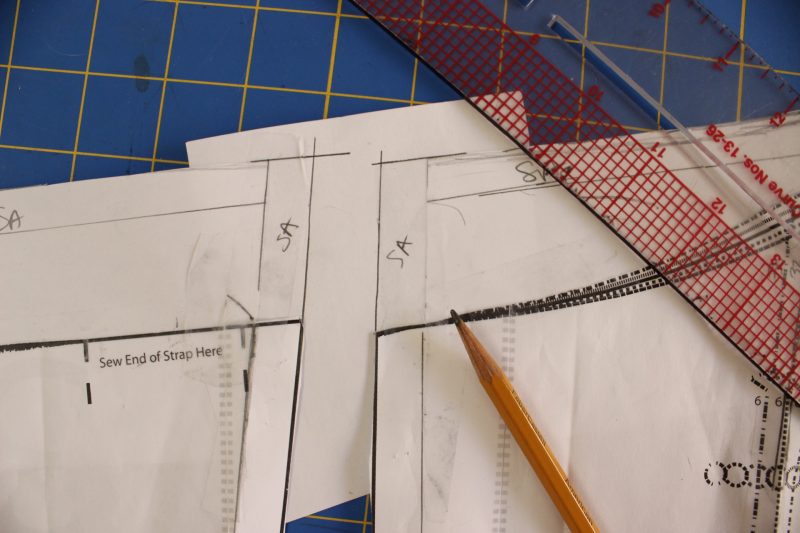
Take some of your paper scraps left over and tape it between the two pieces. Draw your 1/2″ seam allowance on. I like to label mine “SA” so I remember what my lines mean.
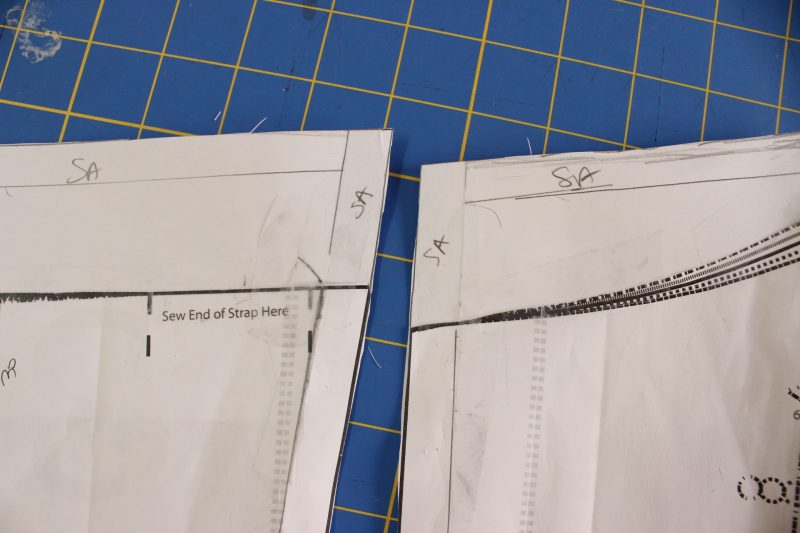
Clip the extra paper away and it should look like this
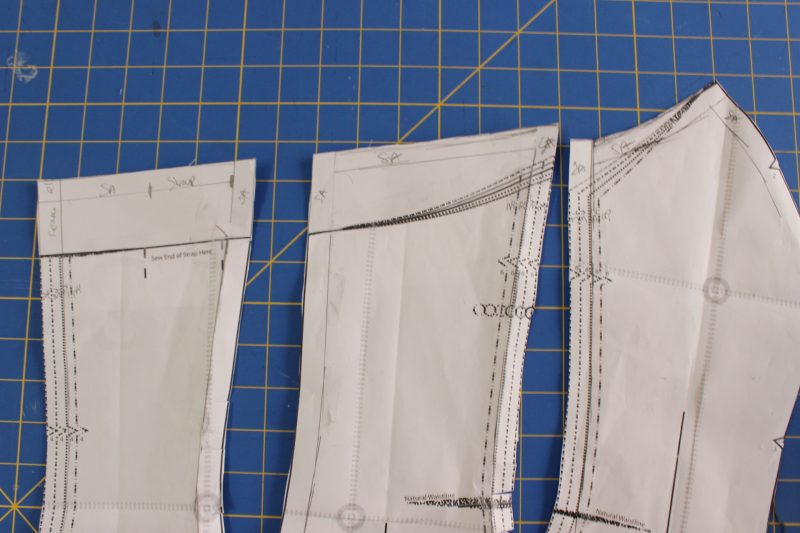
After all pieces have seam allowance added they should look like this.
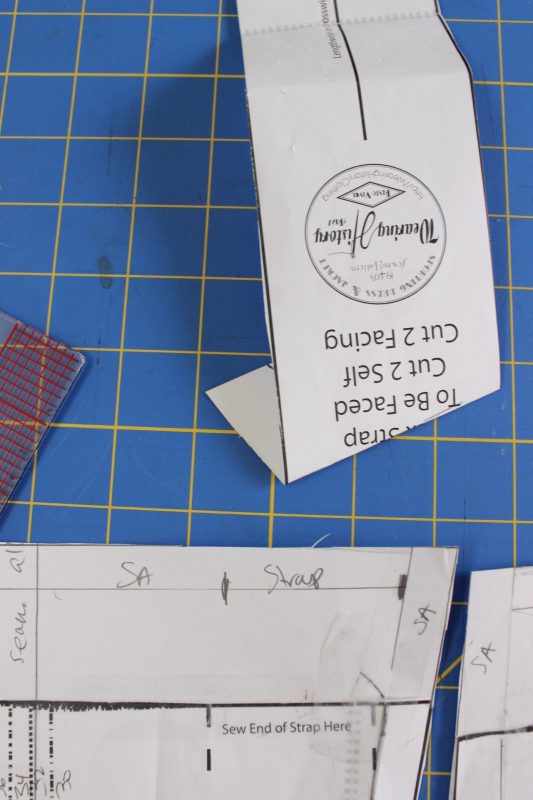
Keep in mind that since your back bodice was lengthened, your back strap will need to be shortened. Test the length when you make your mock up.
When making your mock up be sure to try it on with the bra you plan to use. Move the shoulder straps as needed to cover your bra straps.
Remember that the finished top edge will hit 1/2″ below the cut edge.
Hope that helps! Let me know if you use this tutorial and tag me on social media with your makes!
