This is the last of the tutorials in honor of the 1910s blouse pattern. In this tutorial we will learn how to do French seams.
French seams are a great seam finish and the technique is quite old- most of the original lingerie blouses and dresses I have seen from the Edwardian period have this finish for their seams. I’ve seen it on the inside of lovely sheer chiffon 1920s and 1930s garments, and it is still used today on fine fabrics and sheers where you want a nice clean finish on the inside but don’t want the fabrics to ravel and don’t want an overlock stitch visible through the sheer.
You will need:
- A sharp machine sewing needle (especially if using delicate or lightweight fabrics)
- scissors
- Good quality thread
- a sewing machine (a basic straight stitch will do)
- And, of course, your fabric. I do suggest trying this out on scraps before starting a final garment to make sure you understand technique. Using fabrics with a print are helpful when learning this technique, as it is done by alternating stitching on right and wrong side of the fabric.
Just to clarify, for those new to sewing, the “right side” of the fabric is the side with the print or the side which should be visible when worn. The “wrong side” of the fabric is the side which will be next to your skin and invisible when worn. This is also called the “outside” or the “inside”, especially in vintage instructions.
For this tutorial we are using 1/2″ total seam allowance, which is what I use in most of my patterns. Since French seams are completed in two basic stitches, we will divide that number in half, and each seam will be 1/4″ from the edge of the garment. It will make more sense as you read below:
1- On the RIGHT SIDE of the fabric (fabric layered wrong side to wrong side), stitch 1/4″ from the edge. I use a special 1/4″ foot for my sewing machine when doing this step, as I can just line up the seam allowance with the edge of my foot. Be sure to be accurate with your seam, as using a smaller or larger seam allowance will cause pieces not to line up correctly when finished.
2- Trim your seam allowance to approximately 1/8″. I usually eye half of the width and trim it away. This is an important step, as it will prevent any threads from being visible from the outside of the garment.
3- Open the garment, with the seam allowance still facing up, and press the seam to one side using an iron.
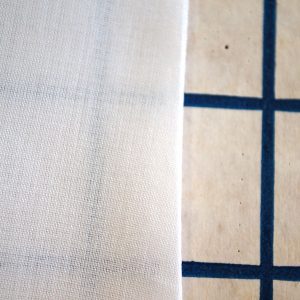
4- Fold your piece right sides together, wrong sides facing outward, sandwiching the seam allowance between them. Your garment will now be right side to right side (as it is when you sew a basic seam). The edge you just stitched should be butted right up to the fold, nice and crisp. Press again to create a nice, crisp, folded edge.
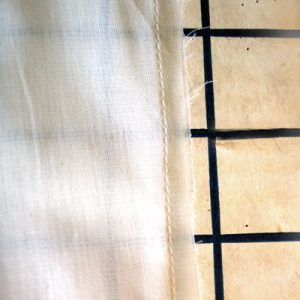
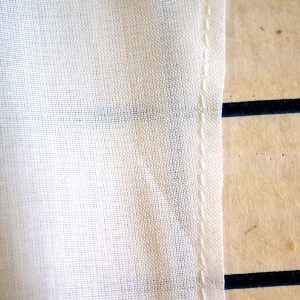
5- Stitch 1/4″ from the edge. This stitch encases the seam allowance, and from the outside it looks just like a normal seam. Press your seam, then open your garment and press the seam to one side. It’s a nice and small and tidy seam on the inside!
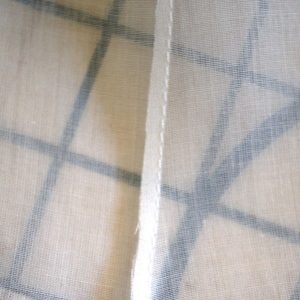
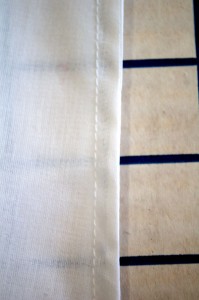
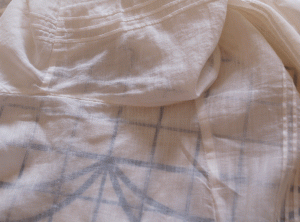
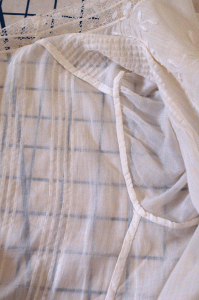
As a visual, these photos are re-posted from one of the close up posts of an original garment. In the first photo you can see the outside of an original 1910s blouse, and on the inside you can see the seam finishes. Two of the seams in the last image are French seams (not the curved seam, but the others).
Outside detail. You can faintly see the French seam through the fabric.
Inside detail, with the seam finishes visible.
That’s it! They’re pretty simple once you get the hang of them, and you’ll find they will probably become one of your favorite seam finishes for delicates or sheers.
I hope you have enjoyed these tutorials and hopefully they will be useful for your sewing creations!

Jessie Heninger
April 5, 2012 at 10:51 am (12 years ago)I love french seams and because I don’t have a serger I use them a lot to keep the inside neat and the fabric from raveling. I was actually kind of miffed when I discovered how easy they are “why hadn’t anyone told me that before?” lol.
Cait
April 5, 2012 at 9:00 pm (12 years ago)I totally felt the same way when I finally attempted French seams! :)
Lauren
April 6, 2012 at 9:54 am (12 years ago)Lol! I agree! They look so complicated until you try it yourself! I learned the hard way about trimming away the excess fabric, though! ;)
Cation Designs
April 5, 2012 at 8:45 pm (12 years ago)Thanks for sharing such a good pictorial! What I wonder, though, is how to do French seams on curved pieces, like the sleeve on the blouse you show. Can you offer any insight there?
Lauren
April 5, 2012 at 9:16 pm (12 years ago)You’re welcome! Thanks for the comment!
It is possible to do French seams on a curved seam, but it is a little fiddly. The original pictured above is actually not a french seam on the armscye (though it does mimic it), but the other two seams are. I did French seams on the armscyes of my blouse sample for the pattern and it went together just fine. I just made sure to clip my corners of my first small seam allowance before turning and pressing. For extreme curves it may not work, but for gradual curves it will work with patience. Sometimes I just choose to bind those seams with bias binding. On the lace blouse I used English net to bind the seam allowances, and it worked out just fine.
Cait
April 5, 2012 at 9:01 pm (12 years ago)Another lovely and super detailed an helpful tutorial :) thanks!!
Lauren
April 5, 2012 at 9:16 pm (12 years ago)Sure thing! Glad to help :)
Dawn
April 6, 2012 at 4:34 am (12 years ago)I love French seams. I figured them out from a verbal description but it would have been handy to have seen your pictures to go from (I am very visual!) If you want to get really fussy about the insides of your garment, you can cover the arm hole seams in bias tape. My experience is that, by the time I get to that part, the garment is wearable and I never get around to doing it ;-) I suppose I would if I knew the garment was going to get a lot of wear and wash and I was worried the sleeves would fall off!
Lauren
April 6, 2012 at 9:53 am (12 years ago)I love them, too. There’s something so rewarding about it when finished and seeing the neat little seams!
I agree re: the armholes- I often finish them with bias tape, too- usually store bought if it’s opaque and self bias if it’s a sheer or semi-sheer :)
Eileen
April 6, 2012 at 2:29 pm (12 years ago)Wow, thank you so much for this great trio of how tos! I can’t wait to make a shirtwaister now with lovely seams and lace insertions!