
I’m very excited to announce the fourth pattern for the Pattern Preservation Line was just released!
This pattern is based off of a very rare period original, in an even rarer size 42″ bust (the largest this pattern was made in!
The pattern is currently on my website, and also on Etsy in both e-pattern and printed pattern formats.
For more info, read below! I posted this last week on Patreon, and happily now am sharing my observations on the trusty old blog:
I have had this original antique pattern for likely five years or more, and finally, since creating the Pattern Preservation Project as a new line, have allowed myself to open it up and delve into it.
I don’t usually share “behind the scenes” posts, as I can easily become sidetracked, abandon projects, forget them, or even pick them up and put them down for years and years. I have had this original antique pattern for likely five years or more, and finally, since creating the Pattern Preservation Project as a new line, have allowed myself to open it up and delve into it, since it helps streamline my process with older patterns. Otherwise, I can make the process take absolute ages, since I can fuss with things for a lot longer than what actually needs to happen with historical originals. The whole point of this project is preserving, not perfecting, and for my hyper-focused pattern brain, I needed that to keep me moving forward.

This particular pattern is from Ladies Home Journal patterns, which can be a little extra quirky to work with. Apparently, the original makers didn’t think so, though, because they printed at the very bottom “This Is a Perfect Pattern”. Very tricky, in an era before printed patterns, since there was a margin of error in the perforation process! As I can well attest to, having worked with antique for such a long period of time
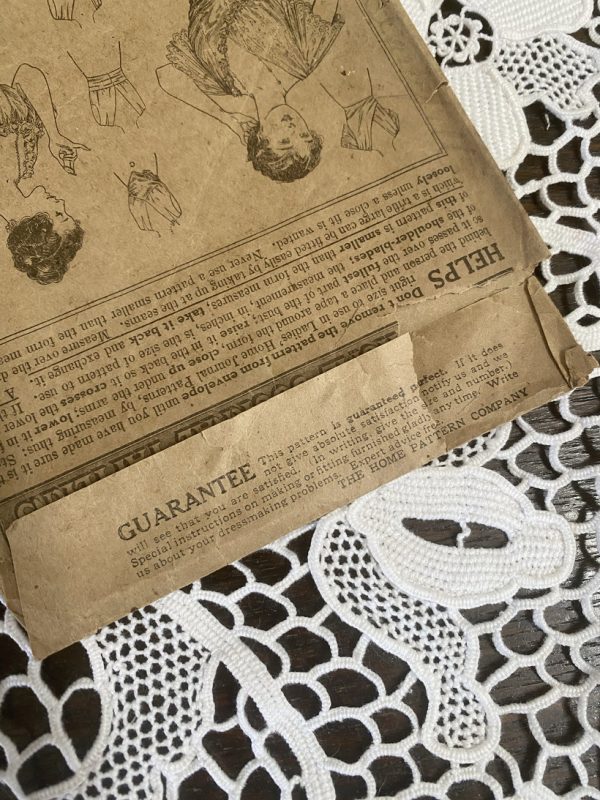
Since Ladies Home Journal no longer exists, I suppose that means the warrantee is off, though I doubt they thought someone would be making this pattern up 109 years later. Lol.
Although I said I wasn’t going to be mocking up patterns for this new line, in order to streamline the process (I honestly have been treading water a bit with regular life responsibilities for a while, so again I needed to give myself permission), I really wanted to see how this would mock up, after staring at it for a number of years.
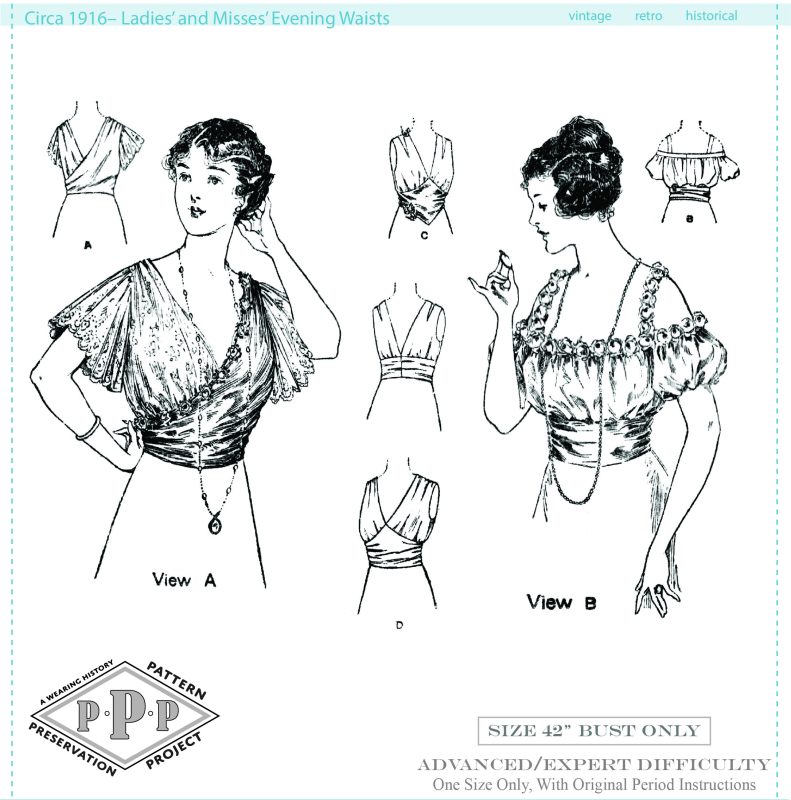
This pattern is from 1916, and if you’ve been around the antique pattern world for a while, you know any evening bodice or gown patterns are exceedingly rare. And even more rare is the fact that it’s in a 42 inch bust size!
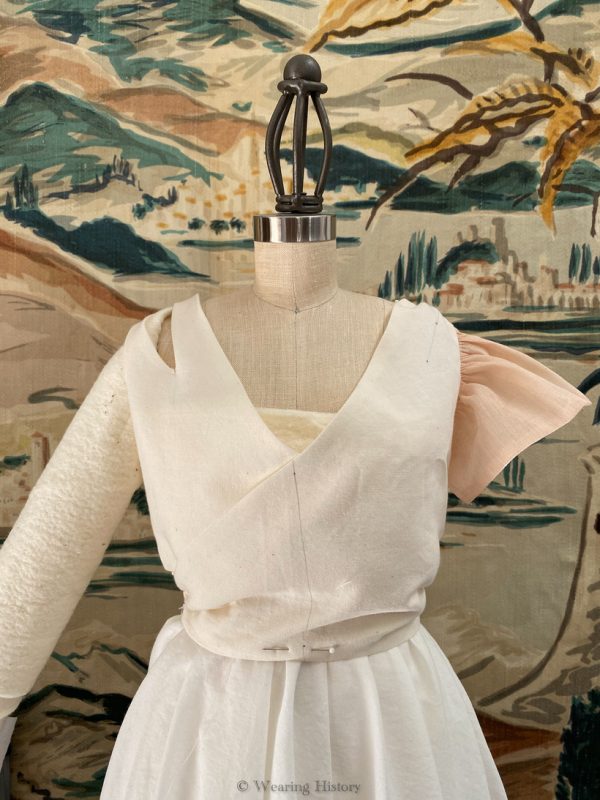
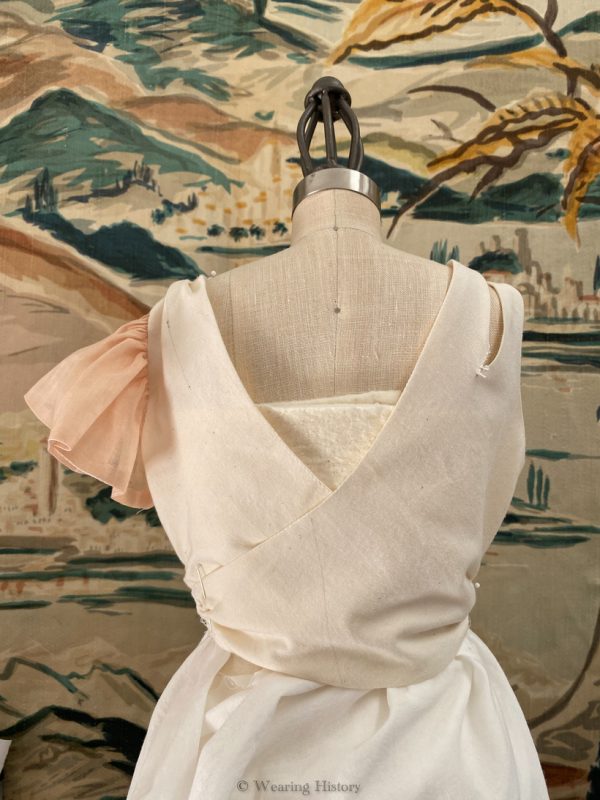
And so, I grabbed my little half-scale dress form I scored last year on the eBay, and mocked this up.
The crossover bodice is quite interesting, as it has three different views you can make. There’s the view with flutter sleeves and gathered shoulders, there’s the gathered shoulders with girdle, and there’s the slit shoulders and girdle.
I will say, this is quite a lot more revealing in actuality that I would expect from a home sewing pattern of this era. Although I did have to pad the form out to get a somewhat similar bust size, it fits quite low in front and back, and the shoulder width means it would perch just on the shoulder edges. Quite shocking! If I were to make this up for myself, I would likely add a decorative camisole underneath (which was a thing the 1910s loved to do). It would be pretty in a lightweight silk with a metal lace edging at the top. This could quite easily be done with any camisole pattern, but I would make one with spaghetti straps for under this blouse, being sure the straps align with the neckline of the blouse.
I also found the neckline will most likely need to be taped on this blouse. If you don’t know what I mean, you can see how I used this method for the 1939 wrap dress on YouTube, which has a similar cross front and back styling. I suspect some figures may need to take a tuck out of the front and back bodice to get it to fit more snugly with the body.
I found the shoulder shape does not adapt that well between the slit bodice and the gathered shoulder bodice, though both are adapted from the same pattern piece (a trick that antique patterns used to do to cut down on paper use and save money). Again, by altering the shoulder angle, by taking a tuck, this could adapt where it sits on the shoulder. On the side with the slit bodice you can see that it’s barely at the shoulder edge, and the neckline gapes a bit. Though, as I said, this is a significantly smaller form than the bust size of the sewing pattern, so it may lay better on an actual 42″ bust body than a 34″ padded out form.
And lastly, for this view, I found the center front mark to be a little tilted. This can vary greatly depending on a person’s physique, but is worth looking into, and adapting, depending on the end wearer’s build and neckline preferences.
Since it wraps at both front and back, this means the end maker can decide how, and where, it should fasten. Old patterns did not give any construction finishing detailing. For my part, if I were to make it and wear it, I would prefer it cross at the front for easy dressing. I could then tack the back neck at the crossover to prevent gaping- especially if I were planning to wear this dancing.
Unusually, as mentioned, this does not have a base lining- as so many 1910s blouses did! I personally would wear it with a camisole and pin it to place. I’m sure many of our 1910s counterparts did just that when they made similar bodices, or discreetly pinned it to their corset cover or chemises
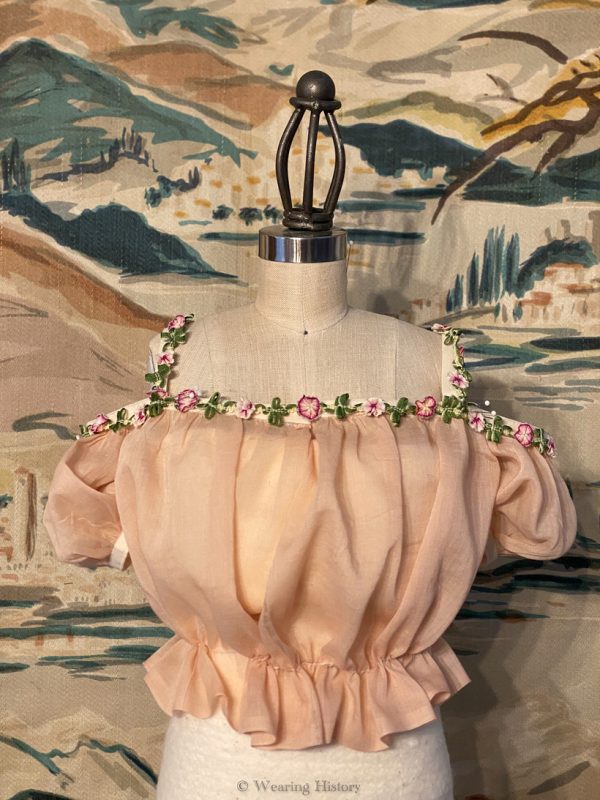
For the second view, the gathered bodice, it was surprisingly simple to put together! I feel like the gathering gives a lot of flexibility for fit, as there is not a standard “stay band” included for the waist. This means that it is easy to use a drawstring, or add your own rectangular stay band that matches your own unique waist size.
The sleeve is attached to the bodice, and then the band is attached to the entire neckline and sleeve in one go. The very vague instructions (more like rudimentary diagram), say elastic can be added to make it hug closely to the body. I did find the fit quite wide for the padded out form, so it’s likely the end used may need to have quite a bit of elasticity, or simply take a tuck in the width of the band where needed. I did a tuck for the image and you can’t even see it underneath the pinned-on trim.
The shoulder straps, of course, would also need adjustment based on the individual’s preferences.
The sleeves are gathered to a band, which would be pushed up on the arm to get the “pouf”, but I think elastic in a casing might be even more effective.
You may ask “but what do you wear underneath?,” and I can say, with certainly, that I have seen “knit vests” advertised that have shoulder straps that can be tucked into the bodice. I expect that’s what was worn underneath this particular style, as the narrower straps would be harder to hide camisole straps, even with the little pins that were “Strap guards”, so widely used in this period. For more about knitted vests, see this prior blog post. I will likely cross-post that here at some point!
For the decoration- of course, this is half-scale so ombre ribbon trim looks ideal. For real trim, there were beautiful rose trims available in this period through mail order or at sewing shops. It’s likely a modern equivalent would need to be handmade. But what a fun project that would be!

Ah, before I forget! The “girdle” is a bias bit of fabric, pointed at top and bottom, that would have a “stay” gathering it at center back. I found this to work just fine for the mock up, though the bias means you will need careful finishing. It may be fine to finish with a self-bias facing all around the top and bottom edges, and hook and eye the center back closed. The corset would provide some structure to the body, so boning stays may not be needed. Alternately, I think a “cottage core” style under bust corset would be darling with this- if not period accurate. But the 1916 period was full of historical fashion inspiration, so I think our historical counterparts would agree!
Isn’t it fun to see her made up, and know she does look relatively like the pattern cover images? Even after all these years of using and making historical patterns, sometimes what I see flat doesn’t make sense until I see it in actuality. Seeing things in 3-D really does help!
That was a long-winded post, but hopefully some will find this as interesting as I did during the process.
I hope you have a marvelous week!