In this section of the bias facing tutorials we’re going to learn how to face inside curves. In the 1940’s Apron pattern which prompted these tutorials, there are no extreme inside curves to bind so you won’t need to do this. However, bias facing for inside curves is prevalent in vintage sewing- you usually see it used for necklines (like the Sunkissed Sweetheart pattern) or for armscyes (like the 1930’s Jumper Dress pattern). Here I’m showing how to sew an inside curve with a sample so you can get an idea of what do do for your project.
We are building upon techniques learned in the previous posts. If you feel like you’re missing out on something make sure you go back and re-read the previous posts in this how-to series.
Bias Facing for Inside Curves
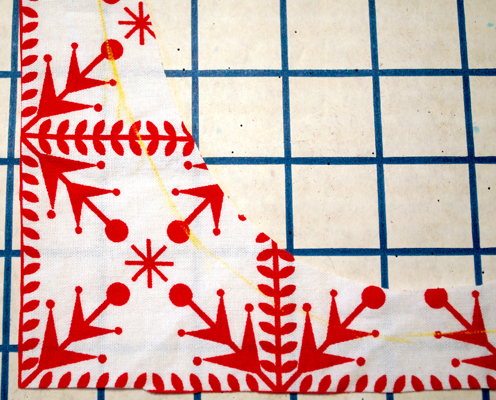
First thing you’re going to do, like in the previous posts with bias facing, is figure out where you want your seam line to be. For this hypothetical project, we’re using 1/2″ seam allowance, so I drew my line 1/2″ from the cut edge of the fabric. Important! Test a scrap of your fabric with your marking method to make sure it will come out when the garment is washed. If you are making a garment using a fabric that will not be washed by machine (like dry clean only materials) you will not want to draw on your seam line on your fashion fabric. Either pre-cut your edge or draw the line to match up with the cut edge of the bias binding, as described in a previous post. For all following instructions, substitute either method for the one that shows drawing on seam allowance lines.
Click the link below to continue reading. If you don’t see a link, you’re in the right place!
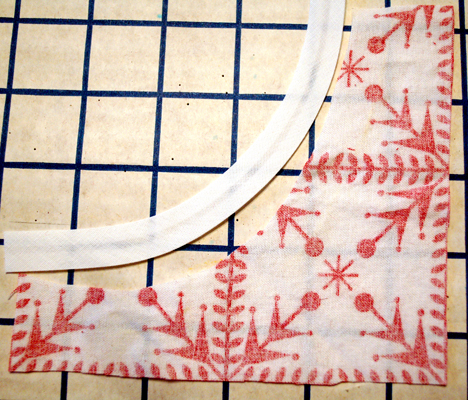
Using the technique of pressing the bias to a curve we learned in the previous post of bias bindings + curves, press your bias with steam match your pattern piece to be faced. You will want your bias to be longer than your fashion fabric (which I forgot to do in these how-to pics). Leave a little bit of a tail at either end. You can cut them off later.
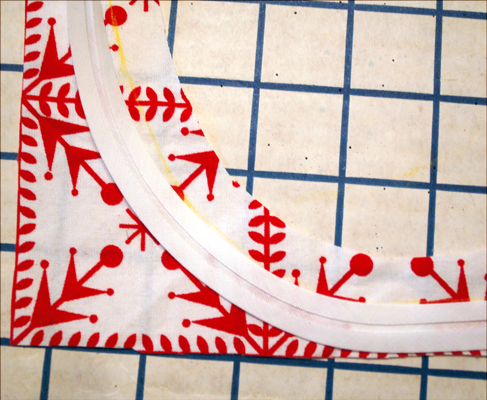
Match the bias on the right side of the piece to be bound also. Here you can see the pressed curve of my bias matches the dawn stitch line of my self fabric very nicely.
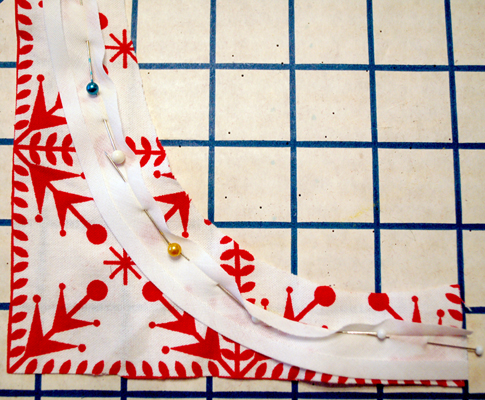
Pin your pattern piece to the curve, matching stitch lines, as we did in the previous posts.
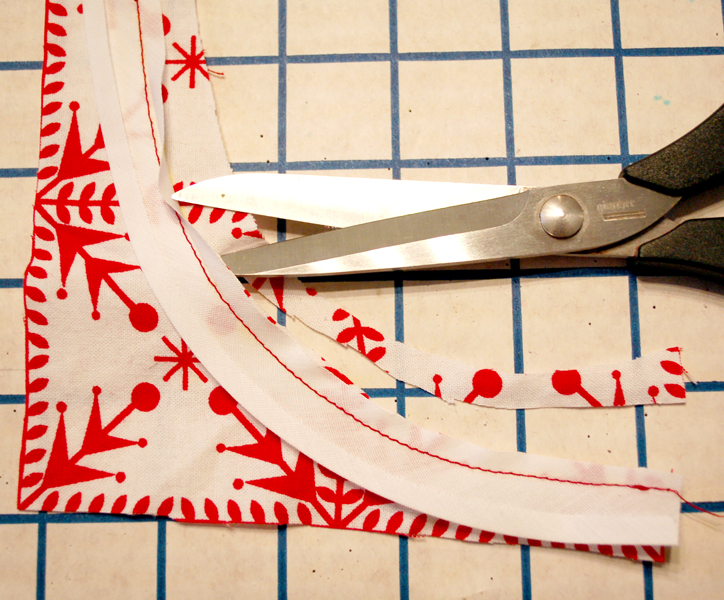
Stitch this seam, then trim away the excess seam allowance on the self fabric piece.
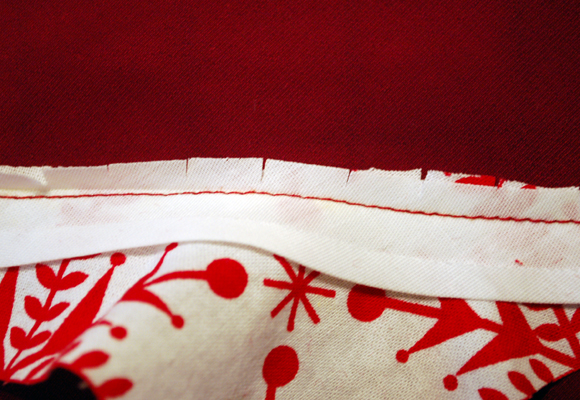
Clip your curves, going close to the stitch line, but not all the way right up to it. When you turn your facing to right side out it will make your seam allowance fan out and keep it from bunching underneath. Clipping curves helps them to lay flat.
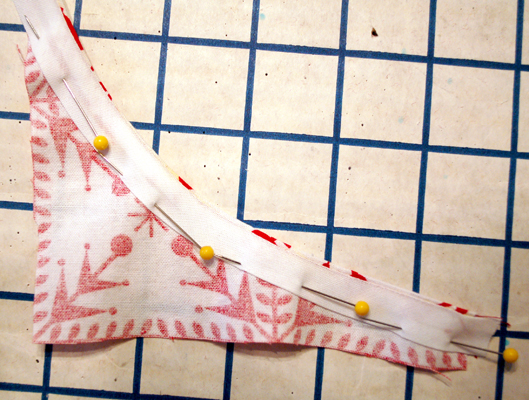
Pin your bias facing to place. DO NOT press seam allowance upward, as we did in previous posts, as this will undo the nice pressed curve we did earlier in this post. Pin the facing to place so it lays flat and smoothly.
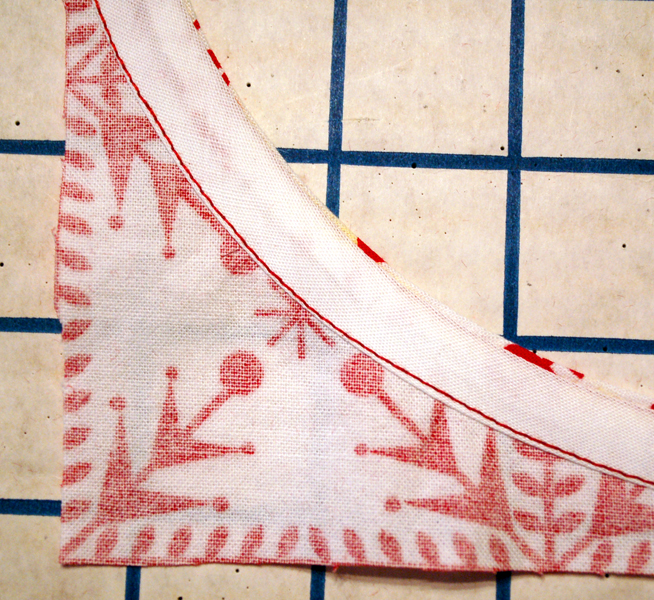
Stitch your bias facing down, close to the bias fold edge. Give your garment a final press.
That’s it! Now you know how to face inside curves with bias binding. This technique is really handy for necklines and armholes.
Next up we’re doing inside curves, and that will be the last post of my bias binding/bias facing how-to series. After that we’re back to regular blog posts. Thanks for being patient as I post these tutorials and I hope they’ve been useful :)

BoPeep
December 16, 2011 at 11:25 am (14 years ago)Thanks for all these! I’ve been using bias tape and making my own binding for years now, but it’s always nice to revisit the “proper” way to do it!
Lauren
December 18, 2011 at 2:16 pm (14 years ago)You’re so welcome! Thank you for the nice comment :)
Lauren
December 19, 2011 at 5:57 pm (14 years ago)Thank you *so* much for taking the time to put these tutorials together: they are unbelievably useful! I’ve always wondered how to do this, and was thinking of doing it for a sleeveless top (if I ever get around to sewing it…), and would not have known to iron the curve beforehand, so you’ve just saved me no end of trouble, I think. Will bookmark these for future reference!
DD Hill
December 20, 2011 at 11:43 am (14 years ago)I really like that you trimmed the excess seam allowance and clipped the curves. This will reduce the bulk and help the curve lie nice and flat. Thanks for the very helpful tutorial.