This is the last installment in the series for bias binding using the one-step method of attaching both ends of the bias at once (not the sew one side, flip over, then sew the other side as used most often now-a-days). In this blog post we’ll learn to bind inside corners. After this you should be all set to sew the bias bound version of the 1940’s apron pattern! Of course, all of these techniques can be applied to any sewing or craft project you are making that needs to have bias binding attached.
Mitering Inside Corners
We previously learned how to miter the outside corners, and attach bias on curves, so now we’re ready for the rest of the apron construction! This method can be used for the scallops but should also be used for a sweetheart neckline.

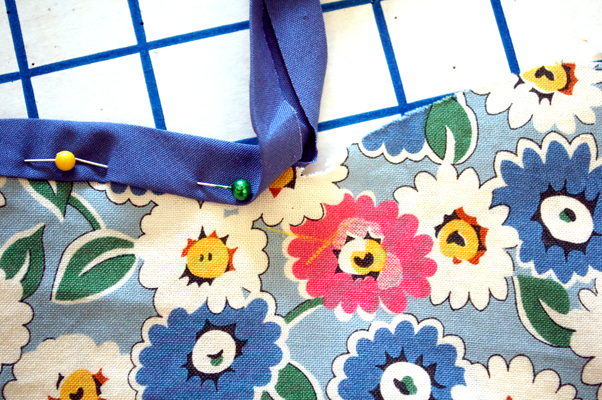
Here you find me nearing my first scallop to be bound. See the point on the outside? The area you will need to bind will actually be a bit more of a drastic point. To help aid with getting this point right on my bias binding, so it lays flat and smooth, I have given myself a cross line to match (in yellow on the piece). Of course, make sure your method of marking will come out of your finished garment! To draw my cross marks I used a clear ruler and measured in 1/2″ from one edge, drew a line, then 1/2″ from the edge of the next scallop, and drew another line (if your bias binding is a different size, substitute that measurement for the 1/2″). Where those two lines intersect you are going to make your point. The excess will be folded in, so it rounds the corner nice and smoothly. Here we go…
Click the link below to keep reading. If you see no link you’re on the right page!

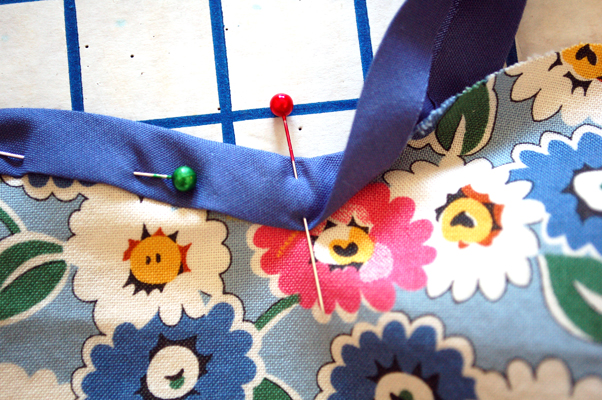
Match your bias up the cross mark. There that line intersect give yourself a cross pin, going through all layers. This will hold your pivot point in place and help you get your miter right!

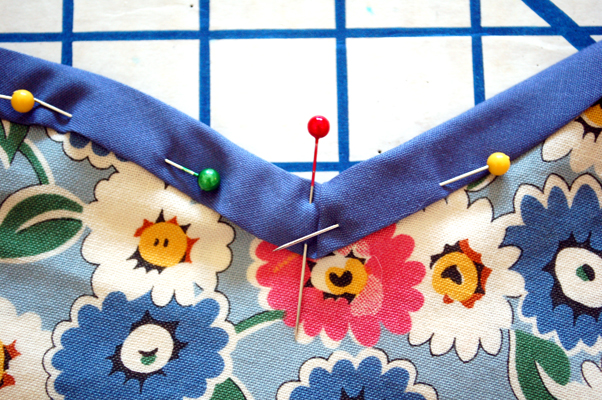
Now you fold the bias up to go along the next curve. See the inside point where you made your cross-mark? That’s the crucial part of this construction. Take the unsecured end of bias you’re going to be binding this curve with next and line it up, keeping the “point”, and easing it. There should be some excess binding there at the outside edge. Using your fingers, make your bias binding fold over the excess binding (so there’s a tuck on the inside of the binding). This sometimes is a bit tricky, so just hang on and try it until you get it right. If it’s a small scallop you might have barely any tuck there. If it’s a big corner, you might have more. Keep on pinning all around the piece to be bound using this method. Use lots of pins. You can use another cross pin to hold your tucks. I forgot to do that in the pic. As you slowly sew the bias down as you did in the previous posts, remove your pins. Don’t forget to give it a good press after you’re finished sewing!
That’s it! Now you’re all set for doing binding all in one step!
Next up for tutorials we’ll be doing bias facing, but since you’re old pros at binding by now the facing will be a breeze! It’s the same concepts of mitering corners, but you face the garment with bias tape instead of binding a cut edge.
