Intro to the Bias Binding/Bias Facing Tutorial Posts
As promised in my post yesterday about the new 1940’s Apron pattern, here’s the first tutorial for attaching bias binding.
Pre-made bias fold is pretty darn old, and whoever came up with the idea of pre-packaging pre-folded bias tape was a genius. I first started using bias tape with quilting- where you often make your own bias tape from fashion fabric. It doesn’t take a long time to make your own bias tape, but it is kind of a pain in the butt if you just want to get to sewing!
A lot of patterns from the 1920’s through the 1940s call for pre-made or self-made bias tape (often called bias facing or bias binding). Bias tape was most often used to finish edges, though it could be decorative as well. In the 1950’s it became more popular to face pieces with self fabric and patterns included separate pattern pieces for this purpose, but in the earlier pattern many times facings were not included and you were told to finish edges with bias tape or seam binding. Take a peek into a 1940’s dress if you have one in your closet and you may see this (or self fabric bias instead of tape). This actually helped conserve fabric, as every little bit you could cut out of fabric usage was the mode of the day in the 1940s! Pattern companies had to stick to rigid codes of how much fabric their patterns took to make, just like ready to wear clothing makers. Just think of it- the Great Depression and called for ingenuity (lots of books were put out in the late 1920’s to early 1930’s of how to do fashions and home decor with bias tape as accents), and then WWII fabric rationing. Bias tape totally makes sense!
Bias Binding
These days most people attach bias in two steps. First you attach one edge, then encase the seam you just made by turning the bias over to the other side and stitching it to place. In earlier decades this was just one of the methods to be used. The other was to attach the bias binding all in one step, which I’m going to show here, and what the pattern the 1940’s apron was based on called for. It’s actually a quicker method and uses less thread- and since aprons were meant just as a handy household item, high sewing techniques were not always called for. An apron was a useful item. As long as it was sturdy and did the job, that was what was needed!
THE BASICS
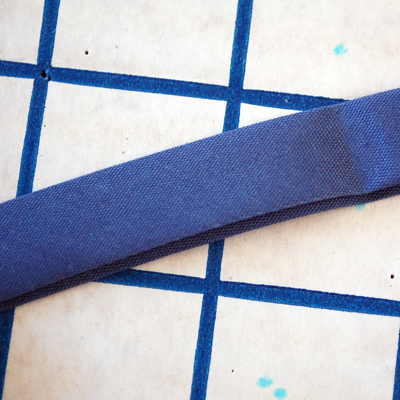
For bias binding we are using pre-packaged DOUBLE FOLD 1/2″ bias tape. This is how the pre-made bias binding comes- notice that one side of the fold is longer than the other. You want the longer side to be on the WRONG side of the fabric. The shorter side should be on the RIGHT side of the fabric (the side of the fabric which your print is on, or the outside of the garment).
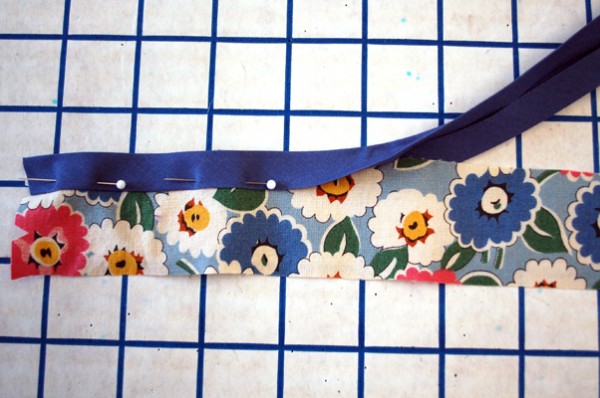
Here you can see pinning the bias to the fabric. You want the inside fold of the bias to meet with the cut edge of the fabric so it sits in there snugly. Sandwich your fabric between the bias tape. Straight edges are super easy. Just do this and pin it to place.
Many more pics! Click the link below to keep reading! If you don’t see a link, you’re on the right page :)
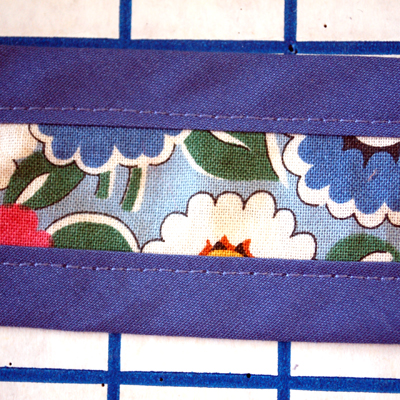
After this you just stitch through all layers at once, close to the edge of the bias. Easy right? For gradual curves you do the same thing. You just ease it in so that it lays flat and don’t forget to use pins. I am an avid no-pin user (when I can help it, just ’cause I’m lazy), but I find pins totally necessary to attaching bias successfully. Make sure when you sew your bias you do not pull it tight, as it will make the fabric pucker after you’re done. And don’t forget to leave yourself a little on the end of each piece. After you’re finished stitching them you can trim off the excess.
MITERED OUTSIDE CORNERS
Corners get a little more tricky. Here we are finishing the apron tie ends. Since we are using 1/2″ bias tape for this project I am going to use instructions suitable for that. Whatever size bias you’re using, just substitute this method for that measurement. Folding the corners in when sewing on your bias binding or facing is called “Mitering”, so they are called “Mitered Corners”.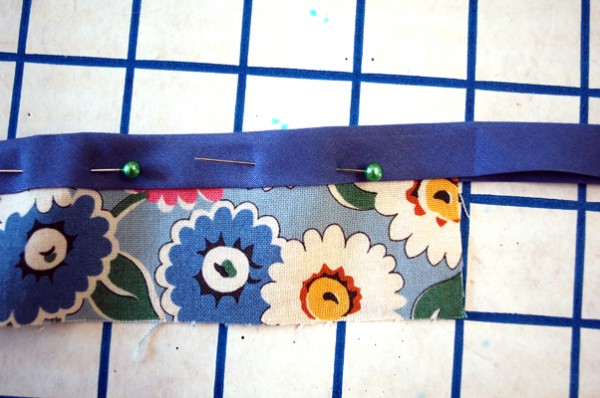
When you get toward the end of the edge to be bound, leave your last pin a little further back more than your seam allowance of the next seam to be bound (in this case, the seam allowance is 1/2″, so you will make sure your pin is a little further back than this.
Now, this next step I’m showing with a ruler so you can get a better idea of what to do. Once you’re familiar with doing bias you can leave the measuring off and just go by eye.
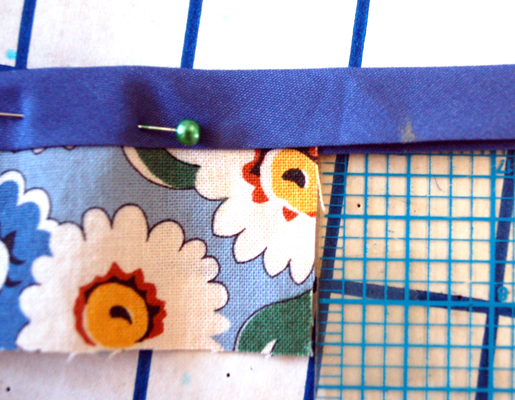
Using a ruler, make yourself a mark 1/2″ past the fabric edge on your bias binding. Make sure your method of marking will come off of your finished garment! In the next steps you will match this mark up with the edge of the bias, so the fold hits at a 45 degree angle. Watch…
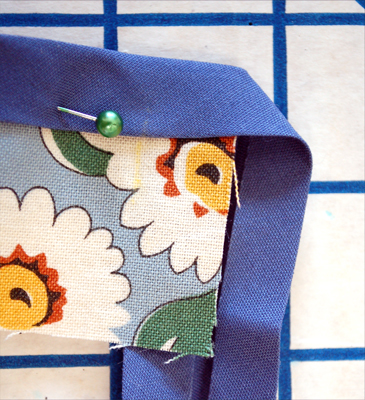
Open up the bias flat on the edge you’re going to bind next (See towards the bottom of the pic, the bias is open, with the fabric on top). You’re going to butt that cut fabric edge right up into the fold, like you did previously, but this time the corner you’re going to bind should make the binding hit at a 45 degree angle when you fold it from the edge the mark you just made (see at the top?), and when you see it on the WRONG side, it kind of looks like an arrow:
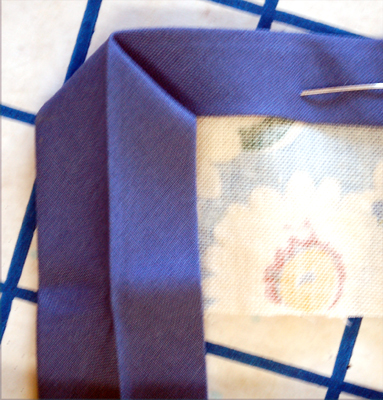
Sorry, this picture came out blurry, but you can see what I mean. Looks like a point or arrow from the back side, or WRONG side of the piece being bound. You can see my little yellow mark on the left side of the arrow, so you can see the angle I’m talking about.
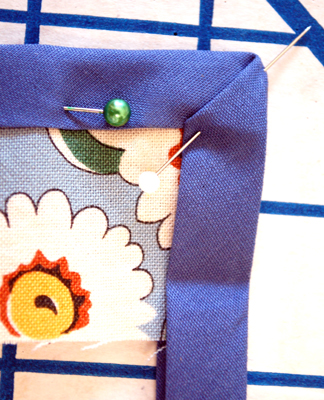
Back on the right side of the fabric, fold that open bias down, and you’ll get this. The intersecting point of the bias binding should be where your little mark you made with the ruler hits. Put a pin here to hold it to place. The follow the same steps you just did when you round the other corner.
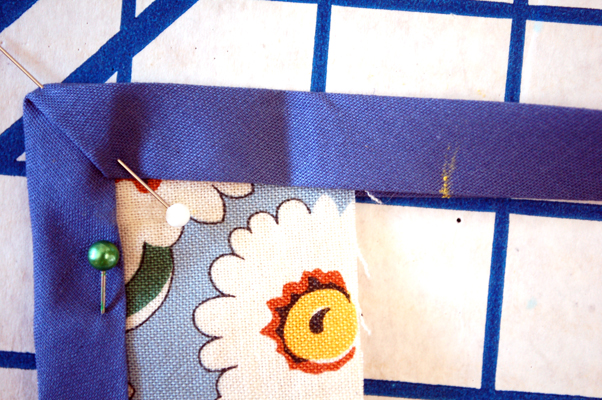
Make a mark 1/2″ past the edge.
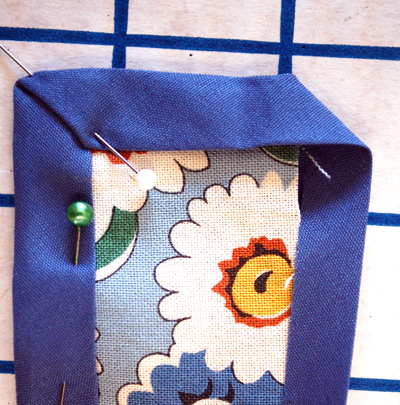
Open the bias on the other side and make your “arrow”.
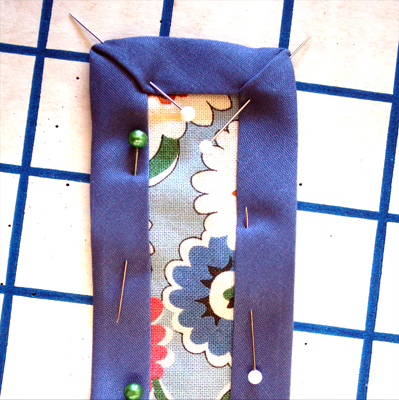
Fold the bias over the raw fabric edge, encasing it, and pin the remaining straight edge.
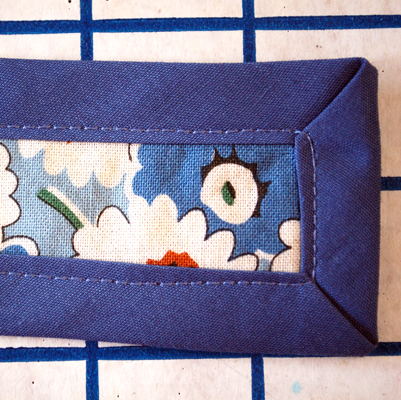
Now you just slowly stitch the bias tape onto your piece close to the edge, removing pins as you go. When you get to your corners I find it helpful to turn in the “needle down” position, and sort of pivot the piece around the down needle, then keep stitching. My stitching a little wobbly here, but you get the general idea ;)
So that’s it! The first tutorial for bias binding, including basic edges and outside corners. Stay tuned for more tutorials coming up.
And, like always, there’s many ways to accomplish the same goals in sewing, so if you have an alternate technique you use to do this feel free to leave a link or comment telling us how you do it :)
Have a blessed Thursday!

wacky tacky
December 8, 2011 at 3:53 pm (14 years ago)Thanks for the step by step instructions. It never occurs to me that there is a “right” way to do things, so I just muddle my way through and hope it works out. Often times, the right way is a lot easier than my crazy, counterintuitive thought process.
ReadyThreadSew
December 8, 2011 at 3:55 pm (14 years ago)Great tutorial. When I sewed my first apron that had bias binding I could NOT work out how to do the corners. Every tutorial I found online was based on doing the two step method, so I just sort of fudged my own way of doing it that was in no way perfect but, as you say, an apron is a useful garment so I was happy enough with the end product. Ever since then I’ve used the two step method, but now I may go back to the one step using this tutorial. Thanks so much for taking the time to post it.
Julie
Beth
December 8, 2011 at 10:54 pm (14 years ago)Great tutorial! Way easier than I would have done. You’re a fan of no-pin sewing, huh? That’s something I simply MUST learn. :)
Debi
December 9, 2011 at 12:35 am (14 years ago)Fabulous tutorial!!! Thanks so much!!!
Heide
December 9, 2011 at 10:00 am (14 years ago)Very nice turtorial! It just finially dawned on me this year that I could miter bias tape! lol! I had just been doing it a-la-1930s, rounding all corners! It is nice to know you have options.
Miss Crayola Creepy
December 9, 2011 at 12:52 pm (14 years ago)How helpful! I just started quilting and binding is a lot trickier than it seems! Especially attaching the loose end pieces.
Just found your blog and I love it! :)
Sarah Allen
December 9, 2011 at 2:30 pm (14 years ago)Great Tutorial. Going to bookmark this one.
Isis
December 12, 2011 at 12:07 am (14 years ago)Excellent! I hate doing mitered corners, but this makes it very clear. :)