
This is the last tutorial for the Bathing Beauty Pattern. The other steps are pretty straight forward, so with the help of these two tutorials (the gussets and the godets), construction should be simplified!
In this post we’ll sew the godets (or insets). The godets are the triangular insets that attach to the skirt to give it a flare. You can do this in the same fabric as the rest of the suit or in a contrast. I used the wrong side of the fabric as my right side, and I used the right side of my fabric as the inset contrast.
I’m doing the original period way of inserting these godets. In the period, you’d turn under the seam allowance of the skirt and then do a lapped seam to attach the godet.
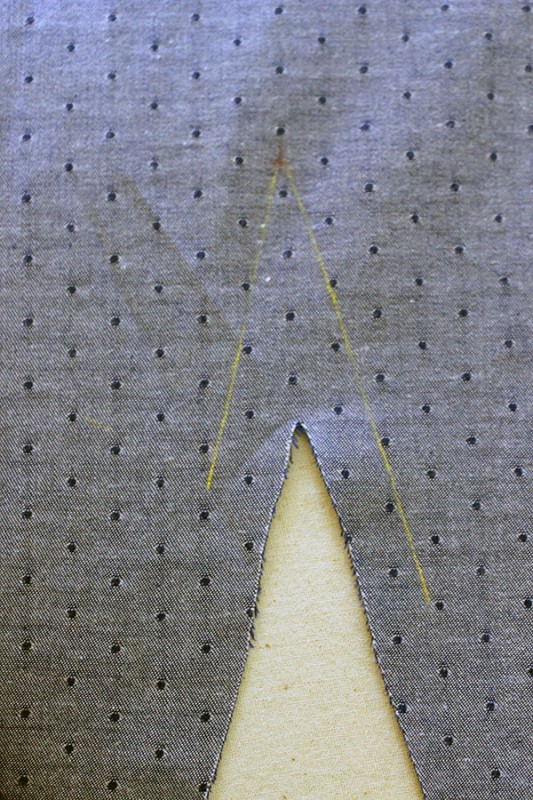
You will have dots to mark on your pattern that mark the top of where the godets insert. It’s very important before doing this to make sure your marking methods will come out when the garment is laundered. Test them on a scrap of fabric first to make sure. To make my sewing simpler, I also drew myself lines in chalk that went down from the dot, using the seam allowance given on the pattern as a guide to show me my stitch line.
If your fabric frays easily, you should consider interfacing at the point with a small circle of fusible interfacing now- before you stitch and clip (sorry, I don’t have a photo of that, as I didn’t do that on my sample).
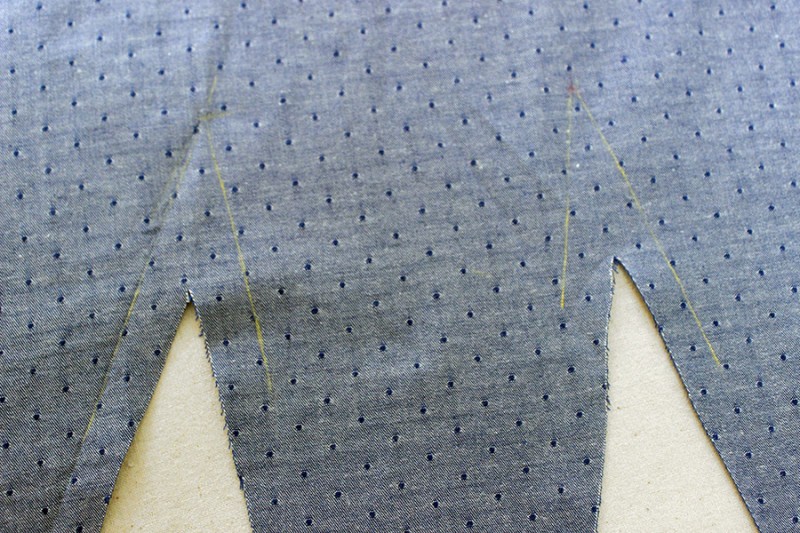
I continued to draw those the lines on all places where godets are inserted.
Next up you’ll stay stitch the entire cut edge, all the way up to the dot. This will stabilize this edge and prevent stretching, since it’s not cut on the straight of grain. After you stitch, clip at the top close to the dot. Be careful, though! This point is easy to fray.
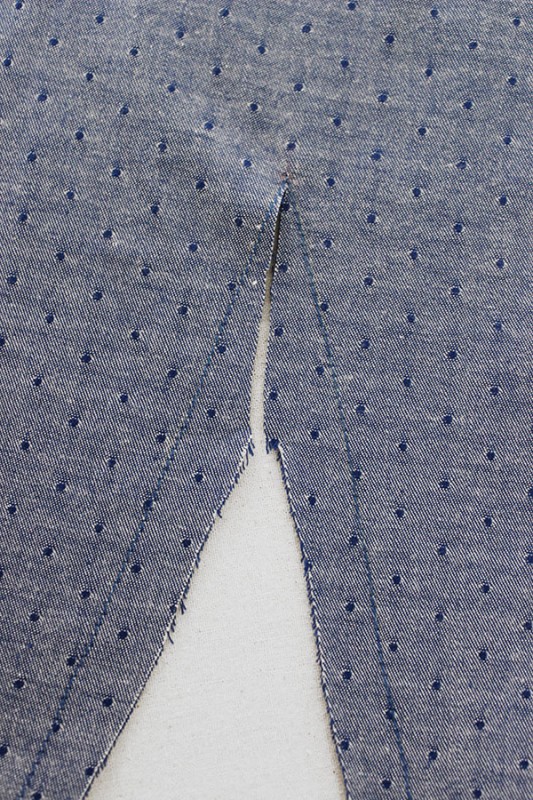
Next, press that edge under (remember, I’m using the wrong side of the fabric as my right side).

Now, match up those seam allowances of the godet piece and the skirt but layering the skirt on top of the godet and pin.
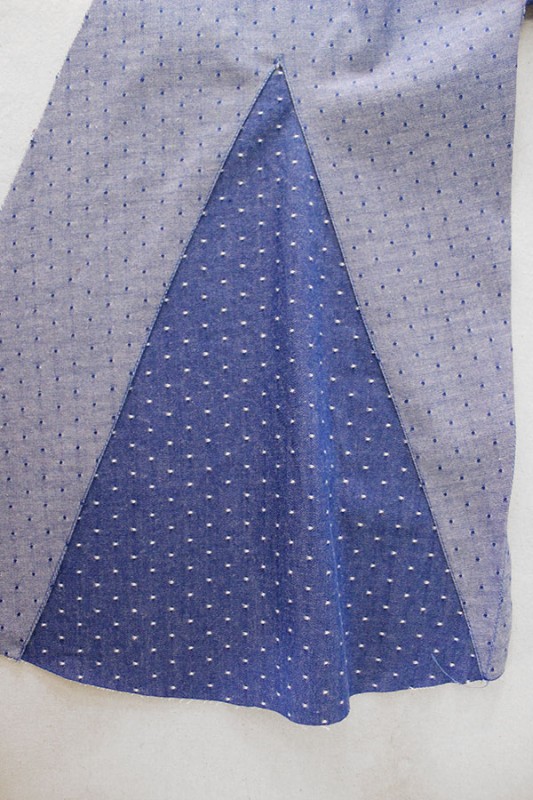
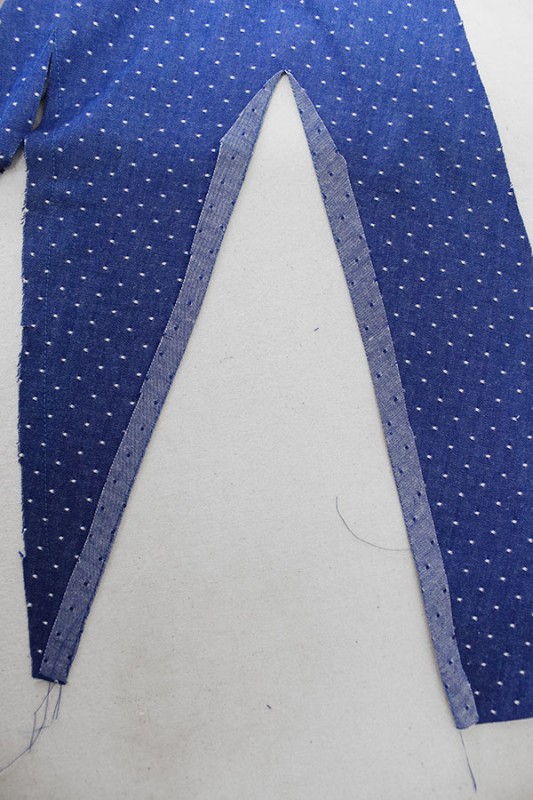
Now stitch close to the edge, all around those edges you just pinned. This application is called a “lapped seam”.
Do the same for all the godets. And that’s it!
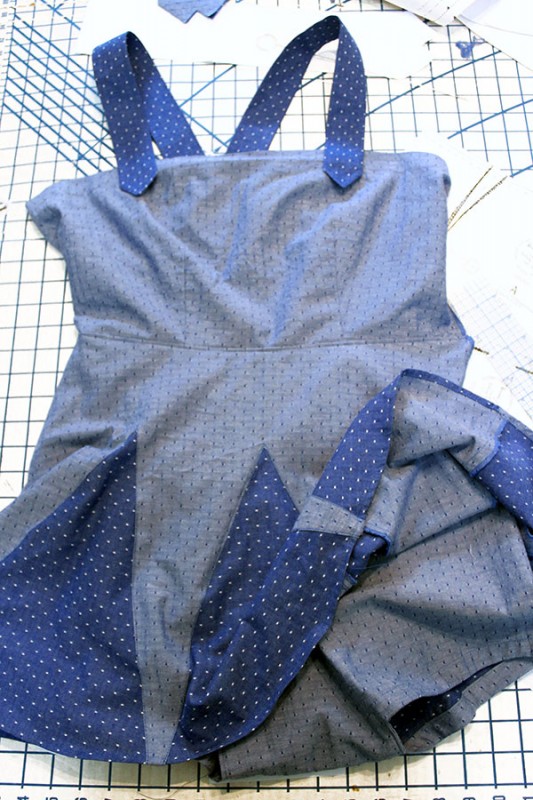
Here’s what it should look like when done! And you can get a little peek at the shorts underneath, too :)
If your fabric ravels easily you may consider applying the godet on top of the skirt to avoid fraying from clipping (which would mean doing the reverse of these instructions by turning under the godet seam allowance and then applying on top of the skirt).
Hope you found this tutorial helpful!
Remember, you can get the pattern to sew yourself on my website :)

uglybeat
August 12, 2015 at 6:51 am (11 years ago)Ahhhh! This is so helpful! thank you. I bought the pattern about a month ago and want to make it soon. I would like to wear it as a mini-dress instead. I’m 5′ 4″. Do you think it’ll be long enough without alterations? (I tend to wear things pretty short anyway!)
Lauren
August 18, 2015 at 11:45 am (11 years ago)Oh goodness! I’m sorry I missed your comment!
If I was you, I’d lengthen it a bit. Otherwise you’d chance getting the wind blowing your skirt up and exposing your panties! For lengthening, I suggest doing it right across the middle of the skirt and godet pieces, then redrawing the angled line. You can’t add to the bottom, as the points wouldn’t line up. Hope that helps!