
This is the second tutorial for the Veronica 1940’s Coat Pattern.
In this tutorial I’ll briefly cover how to tape the collar. There are many ways to accomplish this, but I’m going for close to the period way outlined in the pattern.
Notes on Fusible Hymo
For the front interfacing, usually it calls for muslin in period patterns. I opted to use a fusible hymo (hair canvas), purchased from B Black and Sons. If you chose a hymo, make sure you match the weight to the weight of fabric you’re using (lightweight for lightweight fabric, mid weight for mid weight fabric, etc). You can also purchase your cotton tape from a tailoring supply company such as B Black and Sons, if you don’t already have some. Twill tape is a little bulky. I prefer actual cotton tailoring tape, as it’s narrow (under 1/4″ wide) and not thick so it doesn’t add bulk.
I chose the fusible interfacing because it mimics the effect of pad stitching without actually having to do pad stitching. It’s a modern convenience and this was my first time using it, but I was very happy with the result.
If you use a fusible hymo, one side will be fusible. Make sure you tape on the side of the hymo WITH NO FUSIBLE. If your interfacing is not fusible, you don’t have to worry about what side so much. You just want to make sure when you attach it that the tape is facing TOWARDS YOU, instead of towards the fabric.
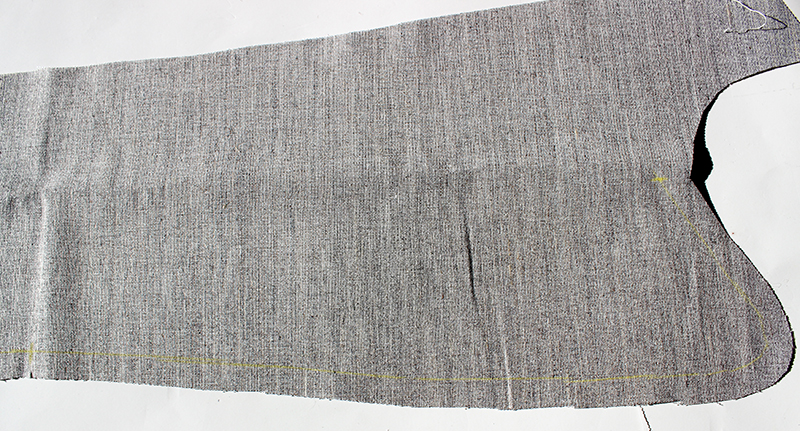
Cut your fusible and your fabric facing with the front facing piece, then proceed as indicated here or in the pattern instructions.
Taping The Collar
- First you will have to mark where the tape is applied. This will be marked on your pattern where it starts and stops, but you can see here I gave myself cross marks on my interfacing. Also mark 1/2″ from the edge of the interfacing so you have a guide for where the stitching line is. Remember, we have 1/2″ seam allowance, so this line is marking where that seam will be sewn.

2. Pin your tape carefully from the cross mark of the start and stop of the tape line. Give yourself plenty of ease around the corner. Make sure that the stitch line is unobstructed and doesn’t add bulk, by pinning your tape so that the edge hits just on the inside of that line. Do not pull the tape tightly, as it will not lay properly with your fabric. In my image above there is a slight pucker, but it is only from where the pins are attached. It is not pulled tightly.
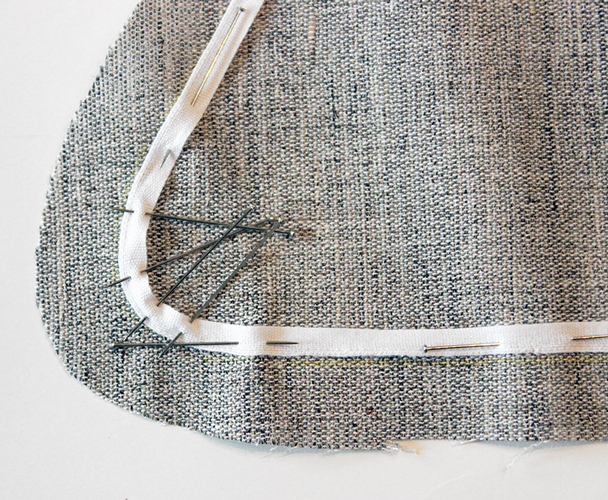
A close up of how I found pinning the curve the easiest. Since the cotton tape is not cut on bias, you will need to give plenty of ease around that curve to make it lay decently flat. Also note that you can see how I pinned the tape just the inside of the yellow line.
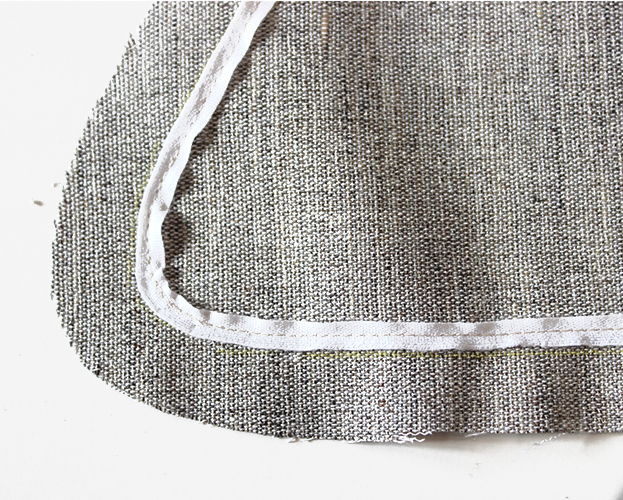
3. Machine stitch your tape into place. Remember, this is attached to the hymo ONLY. I tried to aim for the center of the tape when stitching. Some modern tailors prefer to zig zag the tape to place. Since most people in the 1940’s did not have capabilities to zig zag on machine, they would have straight stitched this to place. Feel free to test both methods on a scrap and see what works best for you. Make sure you go slowly around that curve!
4. Pin and/or press your interfacing to your fabric. If your interfacing is not fusible, baste it to the facing piece.
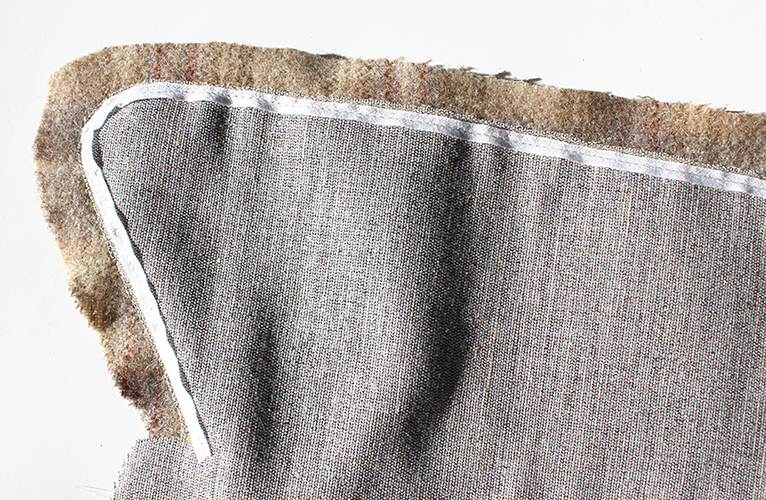
5. Stitch the facing AND interfacing to the main coat body, starting at the marked line (just at the “V” there at the top. Make sure when you stitch that you do not stitch on top of the tape! You want to be just on the edge of it, along the marked seam allowance line. Stitch all the way around the collar and down the coat.
6. Clip away the extra seam allowance of the interfacing, getting close to the stitching. If your interfacing is NOT fusible, allow a little extra there (about 1/8″), so it does not unravel as it is worn and/or dry cleaned.
Set this aside while you work on the other collar portion. After you attach the top collar, you’ll trim your seam allowance to 1/4″ or so, and turn and press it. Getting rid of extra seam allowance bulk is key in getting a nice, tailored look to your collar. Just don’t clip too much away or it will unravel!