
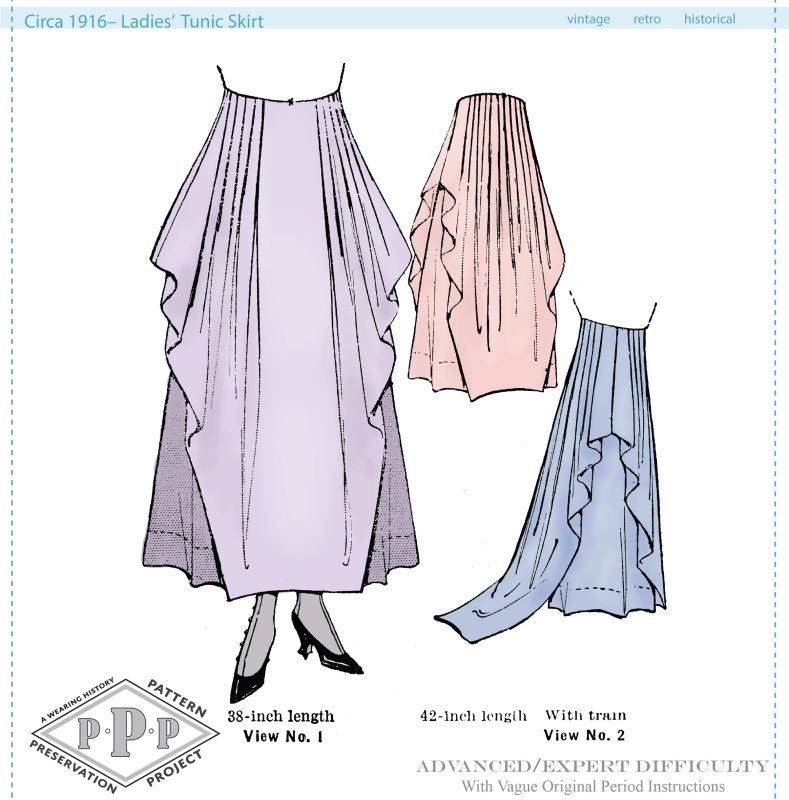
This is a visual for the 1916 tunic skirt pattern, #PM6907. Although I didn’t record each step, these photos will help clarify how I finished the waistband and waist edge.
It’s important to know that this skirt has an underskirt that is composed of a “foundation” (yokes), and “Lower Section”. This is attached to a standard rectangular waistband.
As was typical of patterns in this era, no facing pieces or fastening instructions were included at all. This means you must invent your own method of fastening.

The foundation skirt closes at the side. It’s left free above the notch. Although don’t include finishing instructions for a placket in these images, I would do a standard snap placket on the side of the foundation skirt. A quick digital sketch is included on the pattern sheet.
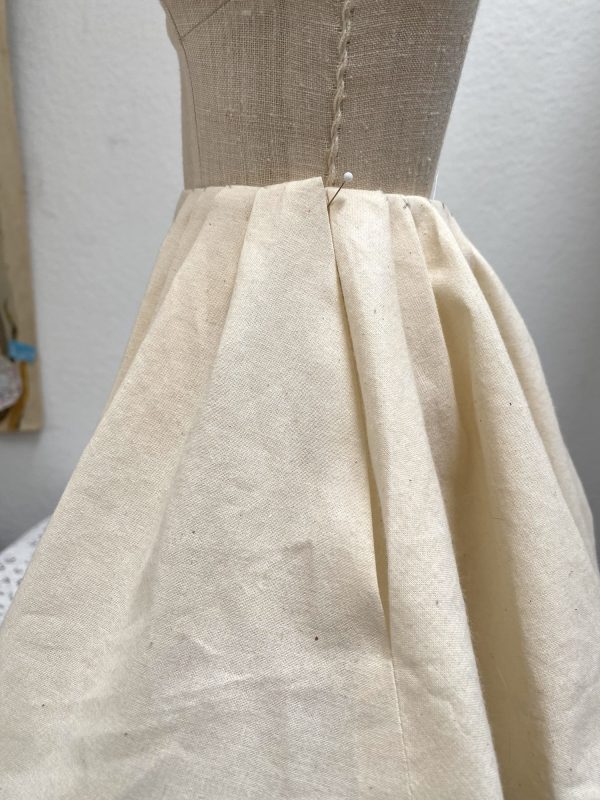
That waistband hits about 1 3/4″ above the natural waistline. This waistband piece is not shaped. You may need to add little darts for shaping if you have a drastic curve in your waist shape with a corset.
It’s important to note that the waistband here should fit snuggly. If it’s too loose, the skirt will collapse from the weight of the tunic portion. Skirt waists in this period were often boned. But I would not add any boning at all until the very final step, after the fasteners have been added and the waistband finished inside. You will need to have enough ease to allow for the turning under of the pleated tunic portion. A mock up is very important for this reason, even if the mockup isn’t full length (at least do the upper porton to check waist fit and construction).
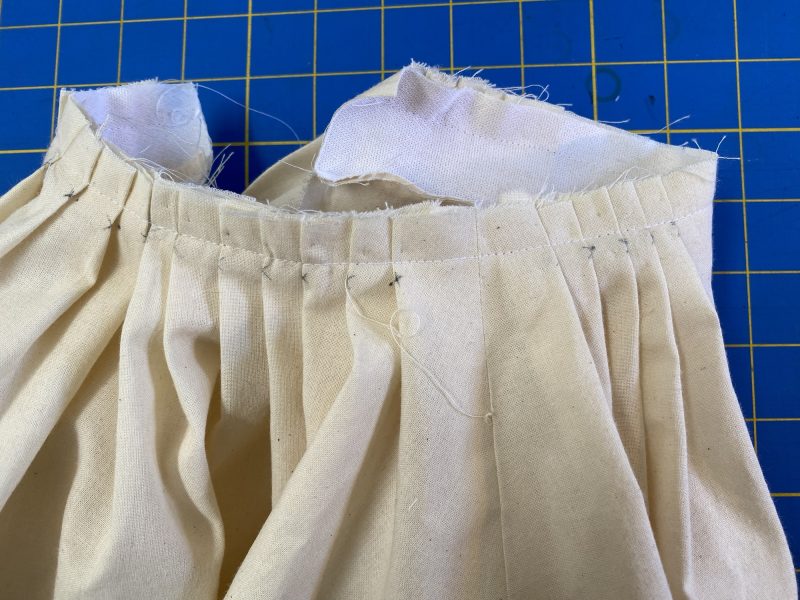
The tunic portion is pleated to the top of the waistband after the side seams are finished. The tunic should also open on the left side above the notch. I suggest finishing this tunic opening edge with a very small rolled hem of self facing before pleating it to the skirt. Back off the staring point of pleats to the seam allowance (3/8″ in from the cut edge). That allows for the underlap finishing for the foundation skirt.
You can adjust the tuck depth as you pleat it in to the waistband. Since a variety of waist sizes are given for each piece, you really want to go off of the waistband circumference instead of the tuck marks on the pattern. The tuck marks retain their original position on the sewing pattern, and in an era before printing, these markings were more like “guidelines” than set-in-stone. Don’t feel bad or worry about adapting the tuck depth and placement to your needs!
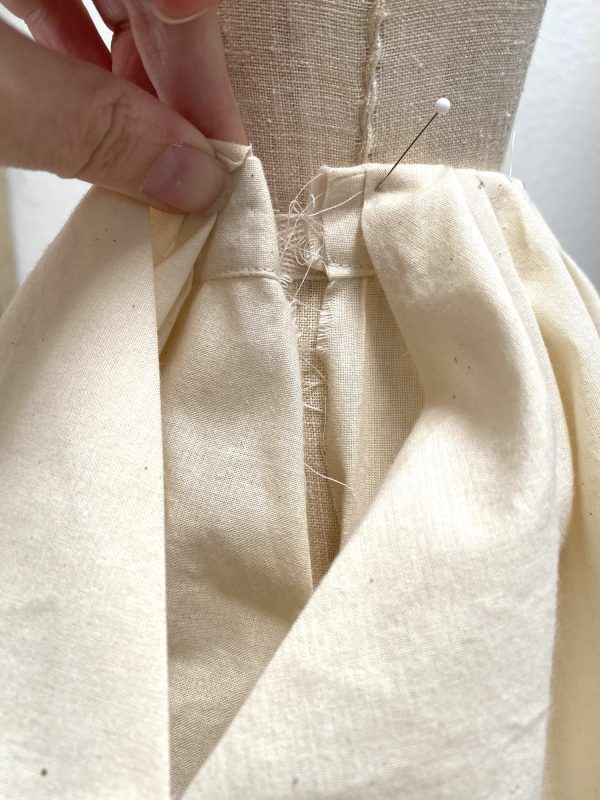
Notice here that the WRONG SIDE of the tunic is going to the RIGHT SIDE of the waistband (foundation skirt). We are not doing right sides together.
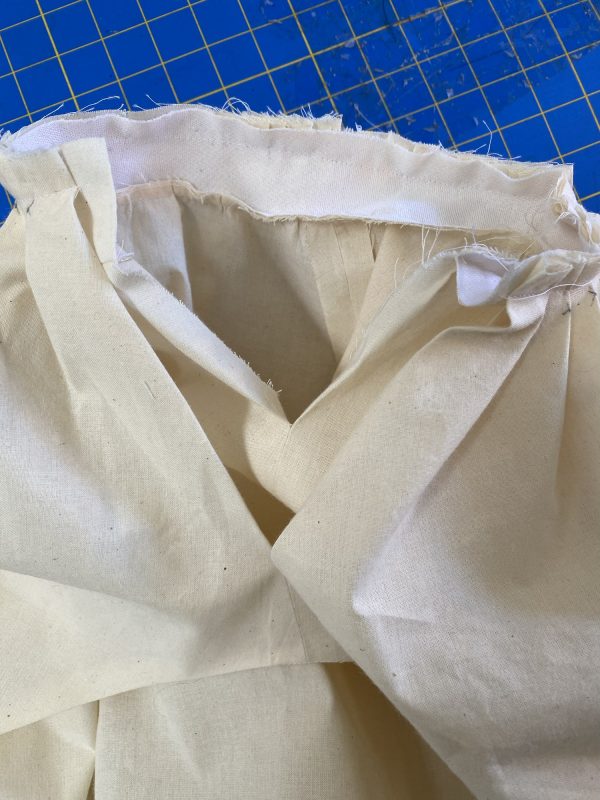
This is a view of the inside of the belt after the tunic was pleated on top. I used fusible interfacing in place of canvas for the waistband on my half-scale sample.

I neglected to put a photo of the waistband facing from the right side of the skirt, but, essentially, you place the skirt waistband facing piece right sides together with the tunic, aligning the top edges to fit flushly together. NOTE= I did not allow for a finish on the waistband front side seam here. You may need to adapt the closure for the front side seam edge of the waistband. Experiment during your mock-up, as the original period pattern did not instruct us how to do this!
This view from the inside of the skirt shows the waistband facing sewn to the top edge of the skirt.
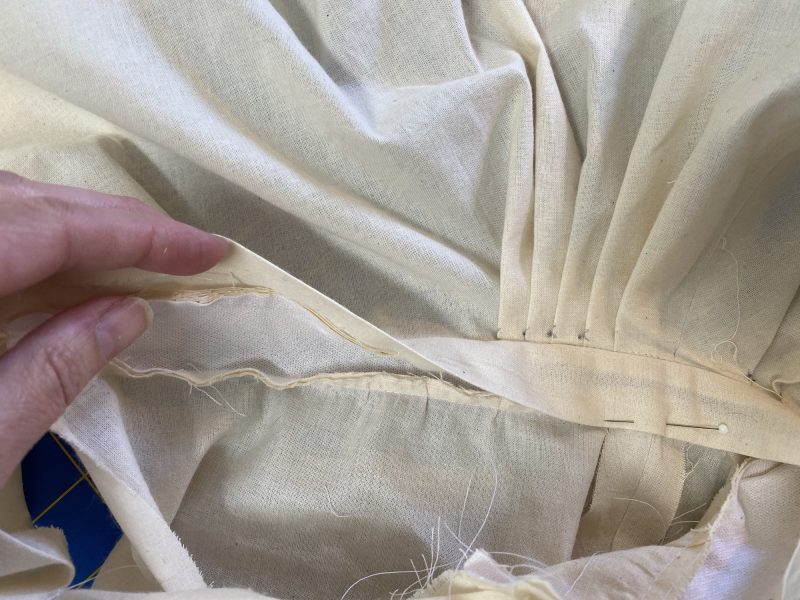
You will then spread the tunic UP and away from you, so you can work smoothly with the foundation skirt. Just pretend the tunic isn’t even there, and you’re just setting a regular rectangular waistband with a seam at the top edge.
Turn under the remaining free edge of the waistband facing 3/8″, then press it DOWN, towards the waistband on the foundation skirt. This will finish the top edge and encase the waist seam! My fingers here are holding the waistband facing up so you can see what’s going on. The pin is where it laps just over the waist seam, encasing that raw edge. Perfect finish!
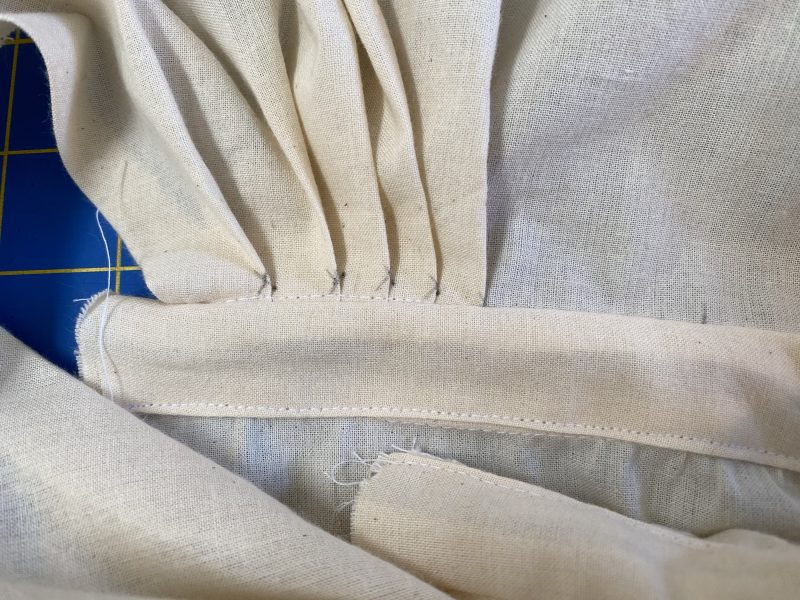
My mockup stitching is a bit sloppy here, but you can see from the inside when the waistband is finished, either by hand or machine sewing, that the inside has a nice, clean finish. REMEMBER- your tunic should be UP and AWAY from you. You do not want to catch the tunic when you’re finishing this seam!
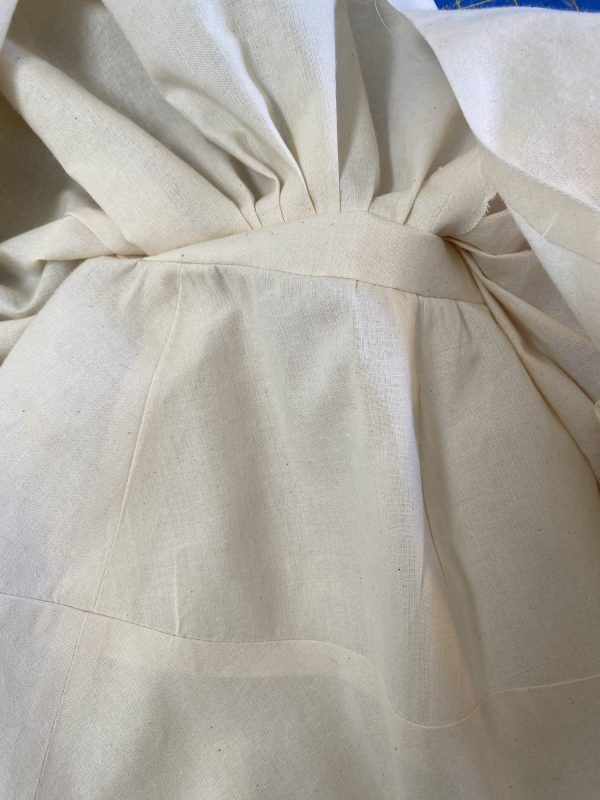
From the RIGHT SIDE, when you lift the tunic and look at the foundation skirt, it should look like this. Nice clean finish of the waistband, and nice finish of the foundation and lower section join.
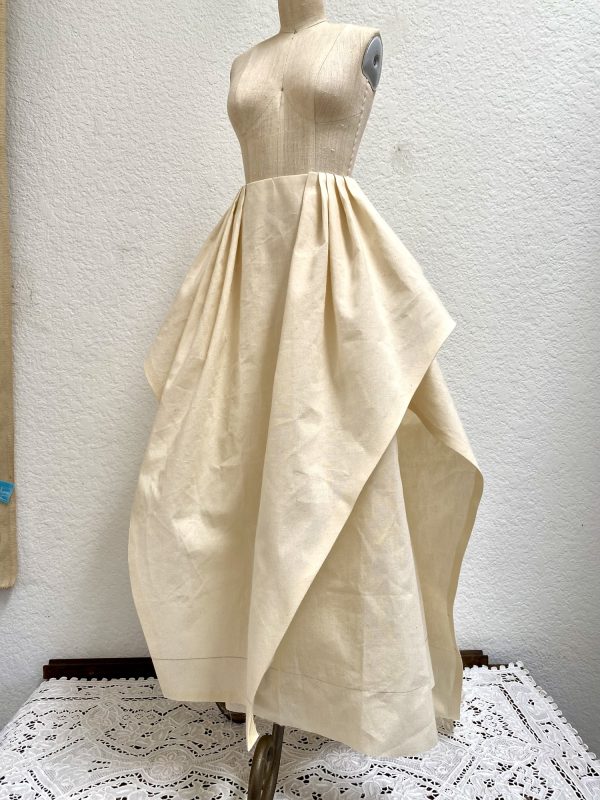
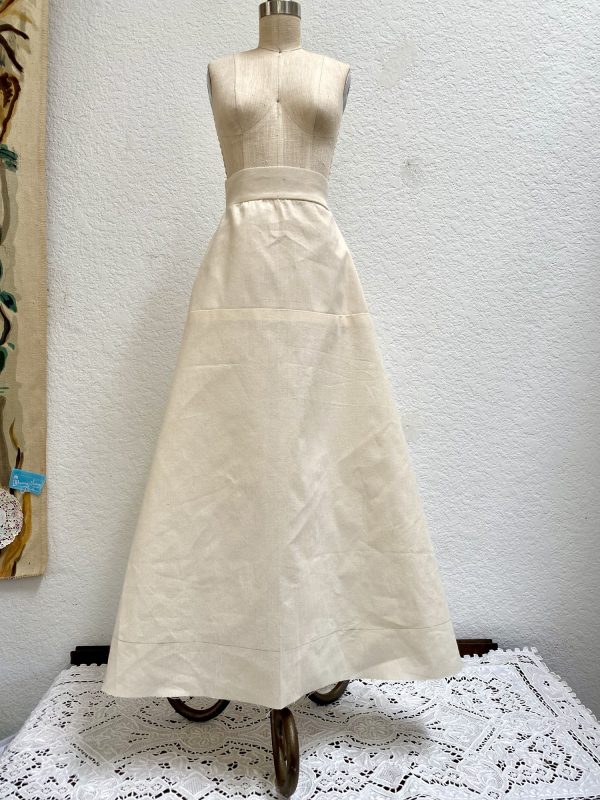
When the skirt is on, it looks like this. That waistband is unseen, and only serves the purpose of supporting the high waist of the skirt, leaving the tunic portion to fall from that top edge, unrestricted.
At the side the closure will be almost invisible. There will just be the turned back edges of the tunic portion visible. If this tends to gap, you can hide little hooks and eyes at the opening in strategic places.

When we peek inside the tunic side opening you can see the skirt side opening.
And a peek at the foundation skirt opening reveals this. I would, personally, finish that side front edge with a facing. I would add an extension at the back side opening, where you can see the raw edge in the photo. Close the belt with hooks and eyes. The placket extension can then close with snaps.
I hope you found this photo visual helpful for understanding how the waist treatment works on this particular pattern. It took me quite a while to figure out how it worked!
You can find the pattern in both my Etsy shop and my website.
Happy sewing!