
In this article from Needlecraft from April, 1912, two lovely corset covers are pictured. As this magazine was aimed at people who wanted to make their own, this article features descriptions of how to do both Bermuda fagoting and Teneriffe lace . Luckily for us, the lovely Lina at Sew Historically has a pictorial tutorial on her blog for how to do Bermuda fagoting. I have found images on Teneriffe lace both at the “Vintage Crafts and More” blog, and on Youtube.
I would like my fellow fashion history lovers to pay special attention to that first paragraph, which explains so much about WHY beautiful undergarments were de mode in the Edwardian-1910s era. It’s a very important part of getting the aesthetic right. Edwardians were all about details and dimensions.
Dainty Corset-Covers
by Marie Van Alstyne
With the sheer lingerie waists which are still holding their own- and more- and are likely to continue in favor for seasons to come, a pretty cores-cover is a necessity. “If I had but a certain amount of time to spend on both garments,” remarked a wise woman in my hearing the other day, “I should put more of it on the corset-cover than on the waist, realizing at the same time that every stitch in the way of dainty decoration is adding to the effect of the outer garment.”
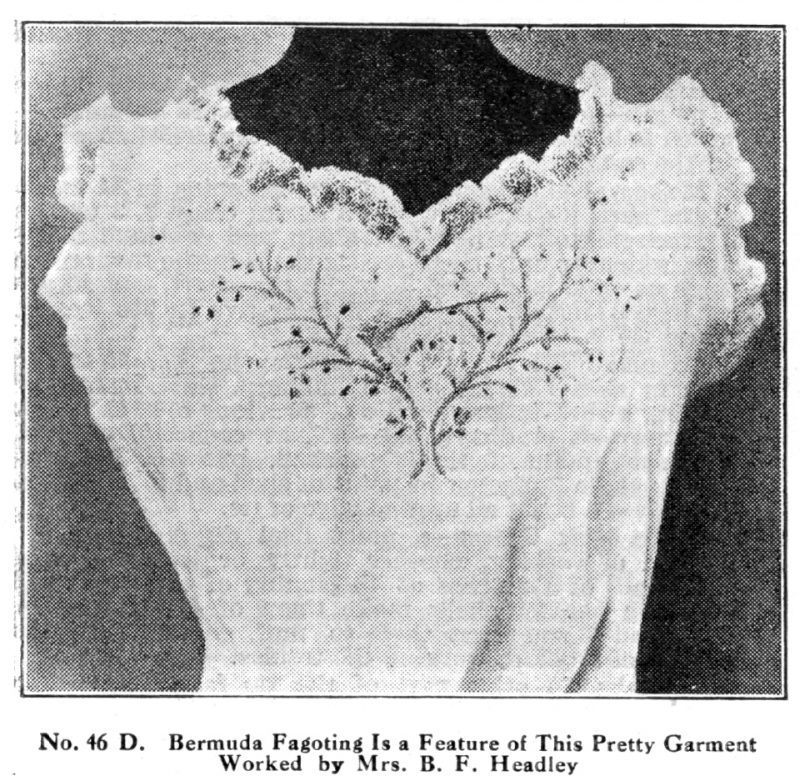
In the first of the pretty corset-covers illustrated Bermuda fagoting is a feature. This is used for the steam of the flower- and leaf-sprays, giving a most delicate, airy effect, and is combined with solid and eyelet-embroidery. The roses are buttonholed deeply, or worked in over-and-over stitch where not to be cut at the edge, the petals filled with French knots, and in the center of each are two oval eyelets. Thought these, in the six roses which form the front of the yoke and are cut out at the edge, the lingerie ribbon is run, continuing through similar eyelets entirely around the neck. The large leaves are done in solid embroidery, the smaller ones are fashioned as eyelets. At the back is a smaller spray of roses, stems and leaves, and the edge is buttonholed in scallops, and finished with a frill of Valenciennes lace.
Bermuda fagoting, or “big-needle-stitch,” as it was called by our great-grandmothers in days gone by, was fully described and illustrated in Needlecraft for January, 1910. The work is open, resembling hemstitching, but is not made so by the drawing of threads. Use a large needle with very fine, strong thread, tying one end to the eye of the needle to prevent it slipping out. Bring the needle up through the material at one side of the stampede line, leaving a short length of thread to tie, as a knot would follow the needle; carry the needle directly back from you about one sixteenth of an inch, put it down through, tie, bring it up where it first came out, then down where it first was pushed through, and repeat, making three stitches in the same place, and drawing them tightly in order to separate the threads of the fabric and form a tiny hole. Now bring the needle up on the other side of the line, at a point diagonally opposite or between the points of “coming up and going down” of the first stitch, and repeat. A little practice will enable one to do the work quickly and evenly, and it is a stitch that should be added to the repertoire of every needleworker. From it has come the “punch-work” embroidery, now so popular.
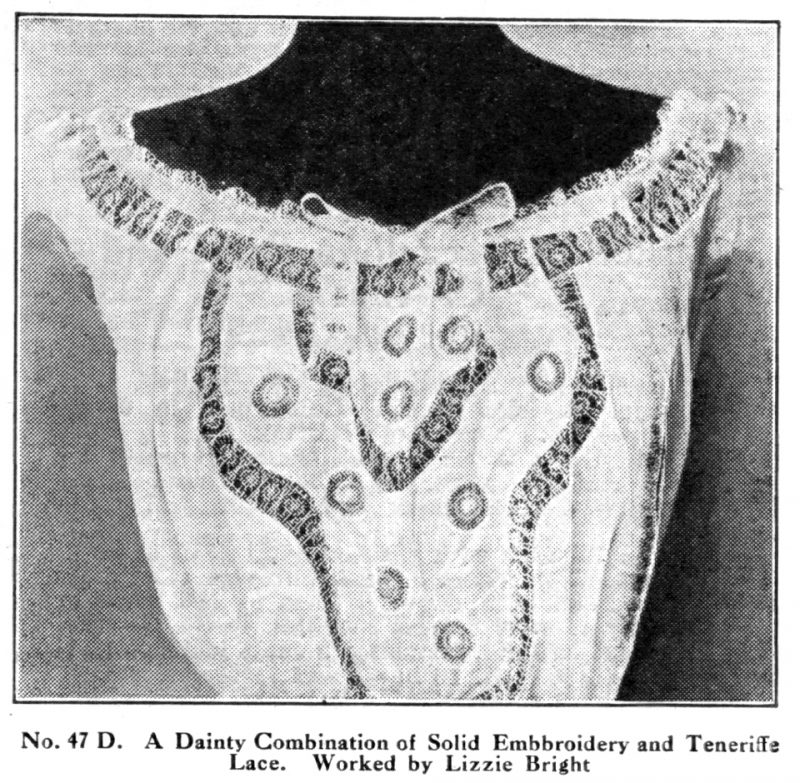
The second corset-cover combines solid embroidery with Teneriffe wheels and insertion in a very charming fashion. The wheels completed are one inch in diameter, and consist of thirty-two pair threads. Explicit directions for Teneriffe wheels have been so often given it seems needless to repeat them; if needed, they will be found in Handbook of Needlecraft, which is presented with a new subscription to Needlecraft at twenty-five cents a year. Knot all threads together in center of wheel, eave around (over and under the pair-threads, not single threads) three or four times, pass out one fourth inch, knot each pair, then form a circle of tiny points bt passing the needle under the knotting- and over the pair-threads, back and forth, two or three times, pass out one eighth inch and knot each pair, taking one thread from each of two pairs in previous knitting to divide them. Baste the wheels neatly in place, when ready to apply them, cut the fabric beneath, slashing it to the edge in different directions, fold back the tabs thus formed, buttonhole closely the edge of wheel and cut away the superfluous cloth.
The insertion is, as a famous novelist would say, “another story,” although made on exactly the same principle as the wheel. It has all the effect of delicate Mexican or drawnwork. Procure a piece of stiff paper or cardboard about one half inch wide than the completed insertion or lace is desired to be- in the present instance it should be about one and one-half inches in width; place a row of machine-stitching on both sides of this foundation, about one fourth inch from the edge. The stitch should be longer than for ordinary sewing unless the lace is to be made of very fine thread, the number of cross-threads being regulated by the shortness of the stitch.
Take a thread at least three yards long and work from one side to the other, catching under every machine-stitch- or under every other stitch if you wish the work more open. A new thread may be joined on at any time, as the knots are easily hidden by the weaving, but It is wise to start with a thread as long as can be readily managed, in order to save all the joining possible. This forms the foundation and a strip should be made as long as the quantity of insertion may demand.
The work is now fairly begun and any of the great variety of drawnwork-stitches may be employed. For the insertion used in the corset-cover, knot the cross-threads in clusters of eight threads and four threads, alternating, the knotting-thread passing through the center. Knot each pair of threads along both sides about one-eighth inch from the stitching; knot first cluster the same distance above the last knotting, taking first part of threads and second pari and first of third, and again the last of third pair and the fourth pair. Cross space and knot the four-thread cluster in the center, cross space and knot next cluster, taking two pairs to a knot, just above the next cluster, taking two pairs to a knot, just above the center. Repeat throughout, always knotting the small cluster in the center. With the next thread knot first cluster twice (two pairs to a knot) between last knotting and center; cross space, knot small cluster at center cross space, knot next cluster between last knotting and edge in the same manner as you knotted first cluster in previous row, and repeat. Reverse these two rows, knotting the opposite side of each cluster in like manner, always knotting the small cluster in the center, around which, when the knotting is competed, weave a tiny wheel, pass out one eight inch, knot each knotting-thread, and the pair-threads of the cluster all around, weaving the circle of tiny points as described for the wheel.
For the lace which edges the neck, and which is jointed to a a row of insertion by having a wider foundation (double width) ad catching the cross-threads of the lace under the same cross-threads of the latter, so that the two sets of cross-threads are linked together- knot one large, one small and one large cluster together, and proceed to finish them exactly as described; then take the next three clusters in the same way, leaving and open space between in which to run the ribbon for drawing in the heck. A band for the waist is made in the same way, but a trifle narrower, and omitting the vibe wheel and circle of points around the center of the small cluster.
When the work is completed, carefully snip the machine-stitches at the back of the paper and remove the lace. IT is a good plan to first lay it face down and press the back with a moderately hot iron, which stretches the threads and largely prevents the drawing up or puckering so characteristic of such work when not carefully done.
Baste the insertion carefully along the lines where indicated, drawing the threads a little closer together on one edge where a curve is to be formed, cut the fabric between the lines, under the center of insertion, fold it back to the edge, and stitch close to insertion on both sides. A very narrow hem may be felled, or the superfluous cloth be cut close to the stitching.
The designs shown may be easily arranged for chemises, combination garments or nightgowns, or with a little change will be found very lovely for waists.