
After quite a challenging late Spring and busy summer, I have finally finished up my sample for the pattern that came out earlier this year!
This is from the “Eliza 1910 Dress Pattern”.
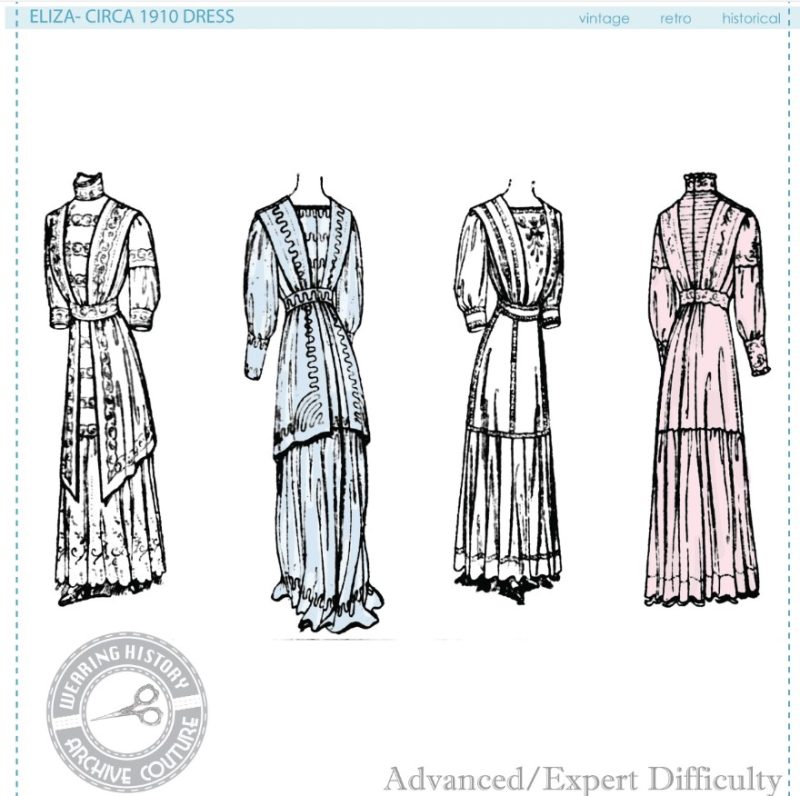
This pattern is from a period original and includes only the original size, which is Size 36″ Bust, Waist 25″.
I *do* rate this as “Advanced/Expert”. This pattern is quite a challenging one to put together, especially for those unfamiliar with vintage and antique sewing techniques. The instructions are from the period original and very, very sparce. But you can read more detail about that in the pattern descriptions, if you so wish!
I would actually be doing a great disservice if I said it wasn’t that difficult. It left me scratching my head a few times as I was trying to figure out how to present this one, and that doesn’t happen terribly often anymore! I actually did have to draft a portion of the skirt, which was missing from this pattern, and that is included. It’s based off of the back cover illustration, and I made sure to mathematically place the pleats in such a way as that they fit into the skirt.
For the most tricky part of construction I did a video. You can find that here: I walk through making my bodice mockup.
After I made my mock up of the bodice I tried it on. Enjoy my very “Punky Brewster” outfit here ;)
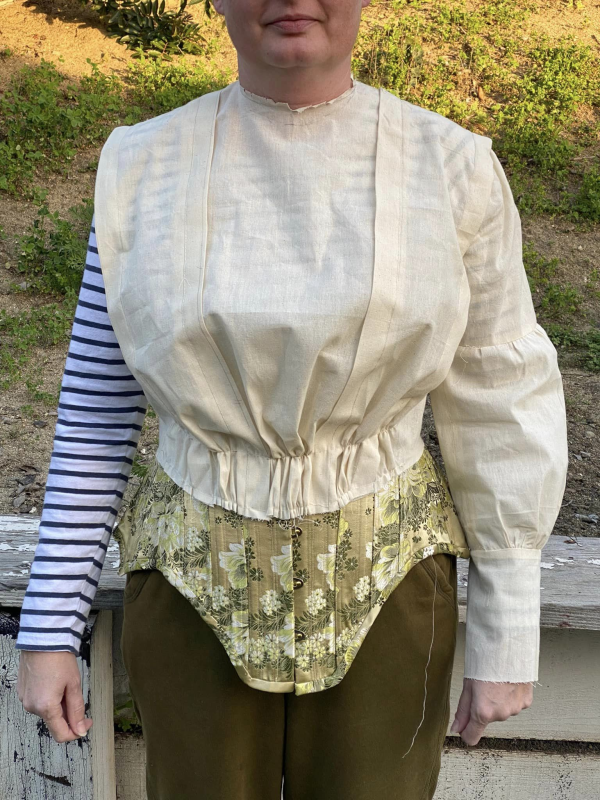
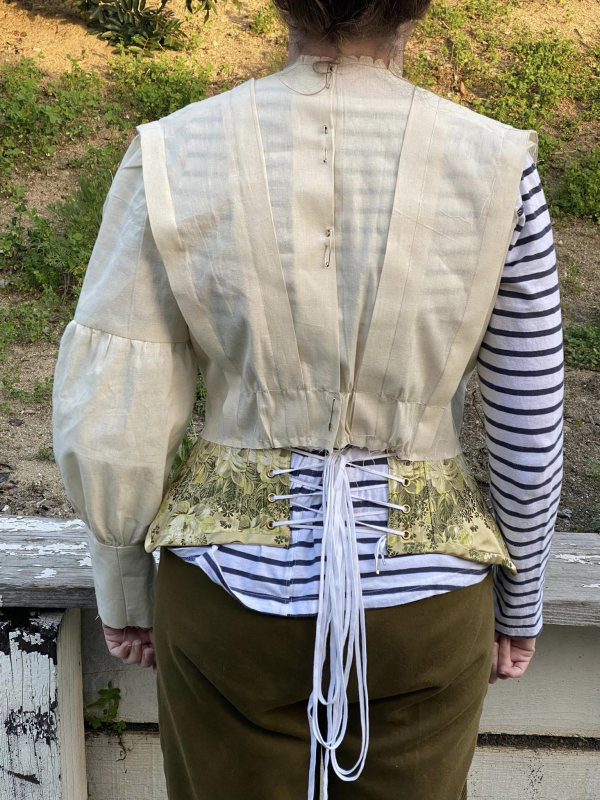
Do pay extra attention when fitting the back, as it runs quite narrow between the shoulder blades. I probably could have given myself an extra 1/2″ there for a better fit, when all was said and done.
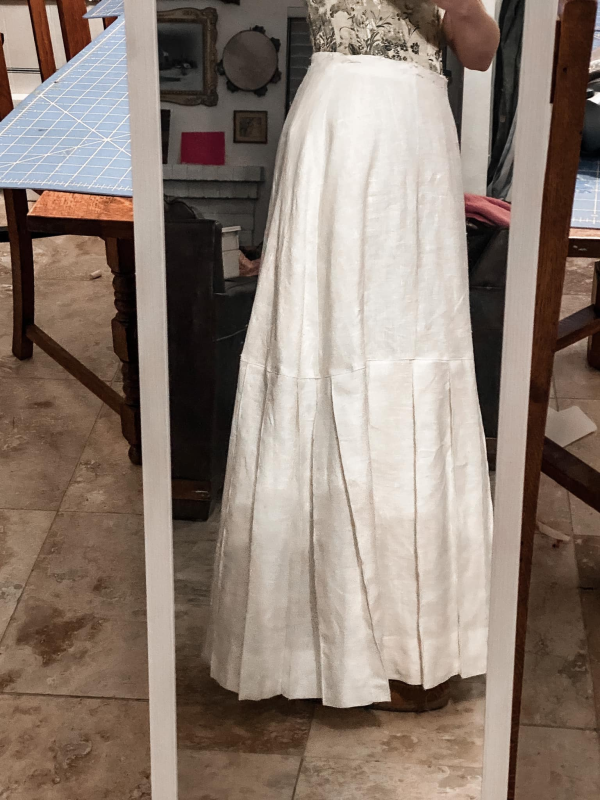
I also fitted my skirt. I decided that it looked best with *two* petticoats on under, intead of just one.
You can also tell that the skirt was quite a lot more full than the pattern illustration indiated. This was extremely common for home sewing patterns. They look like the fashionable silhoette in the illustration, but the skirts still retained the earlier Edwardian fullness. They figured the home sewer would take it in depending on how *daring* they wanted to be!
Side note: in the 19-teens (a good 5+ years after this pattern) this more “conservative” fashion sense of home sewers meant that the skirt lengths were still super long and you’d have to take them up to get the fashionable 19-teens silhouette. Which is hilarious when they say “no hem allowed”, but you really need to take up a 3-4″ hem to make it look like the drawing. Like I said, not for this one, but for later patterns!
In process sewing:
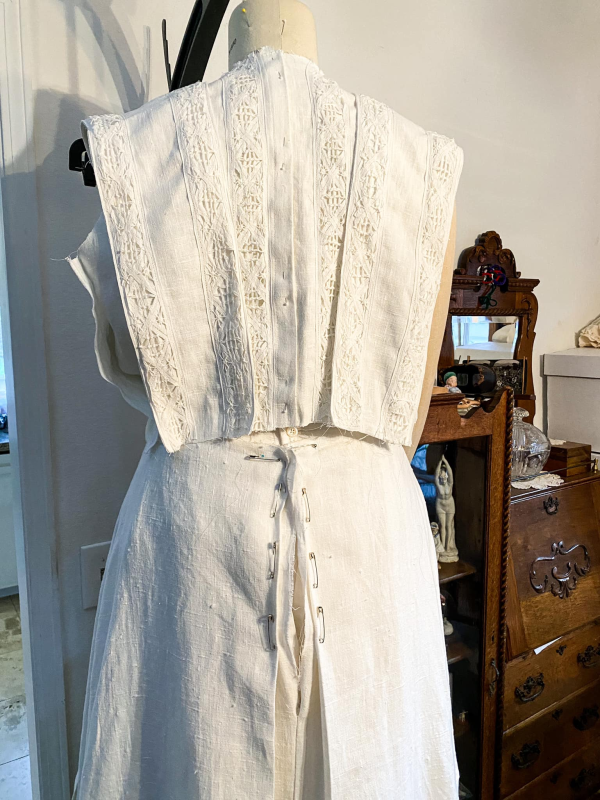
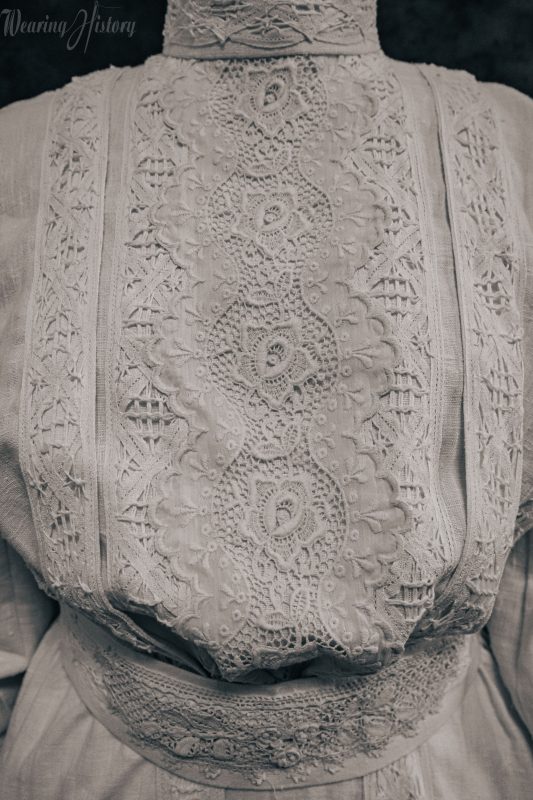
You can really see the “bretelles” and the center back skirt pleat in this in-process photo.
Photo of it just almost finished:
And then… after that… I got a massive toe infection. And the antibiotics made me horribly ill for months! So the dress was put away all Spring and Summer, until I finally remembered to pull it out and finish it.
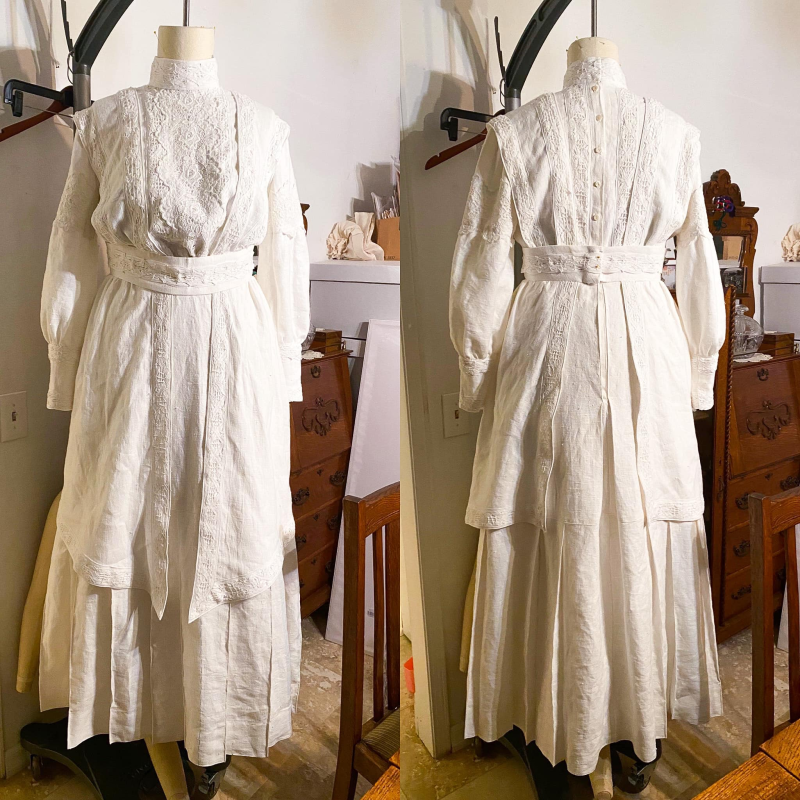
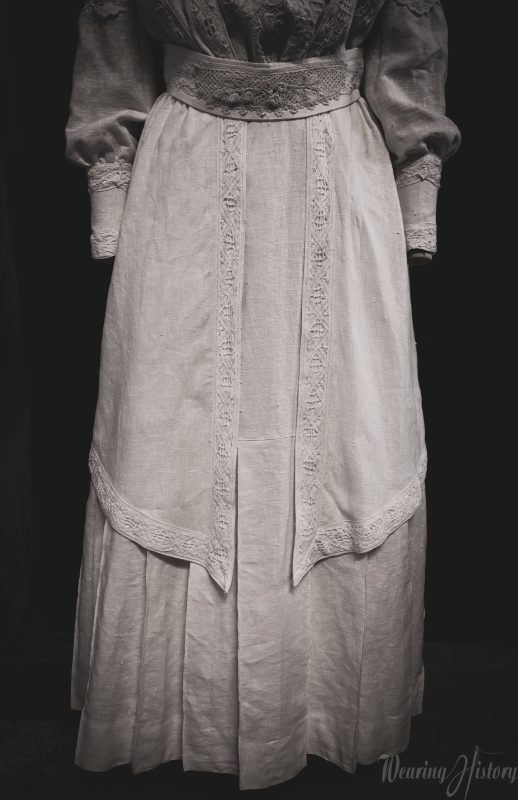
And here, though it’s still not on me (I can’t wear historical shoes yet), here it is on the dress form! All finished!
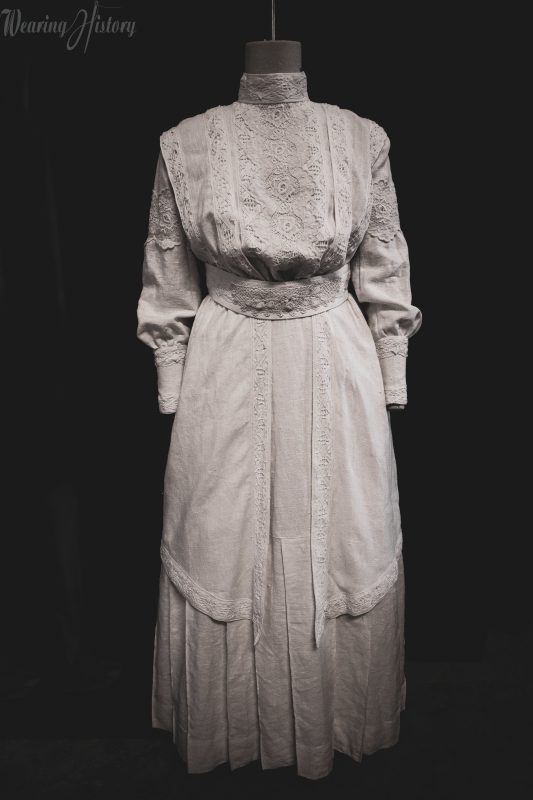
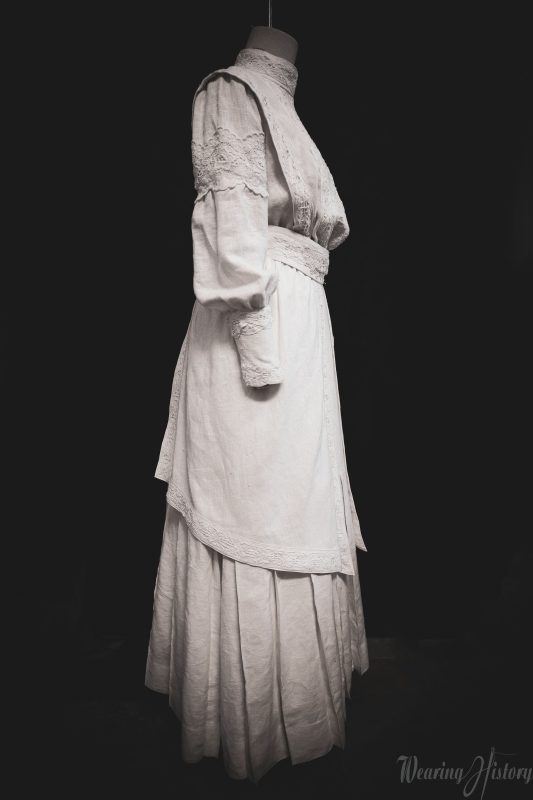
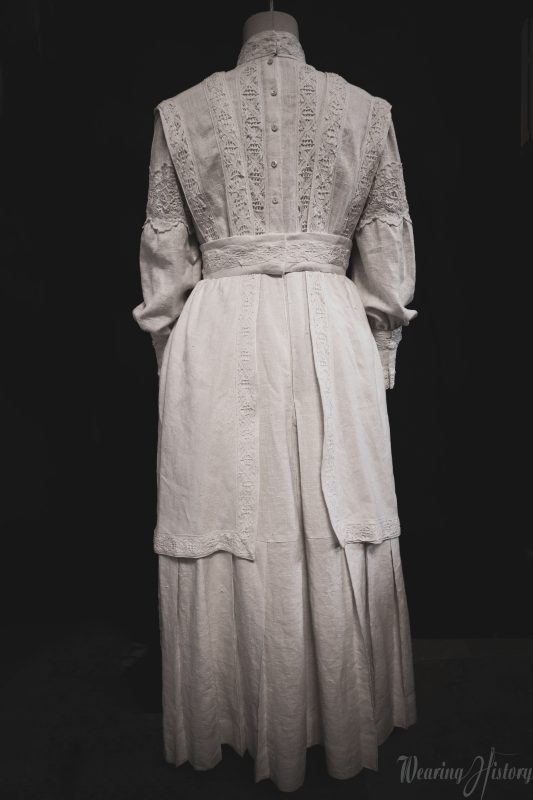
Notice especially how the “tunic” skirt has longer points in front and tapers at the side to a shorter length at back. I love that, and it’s *so iconic* of this period.
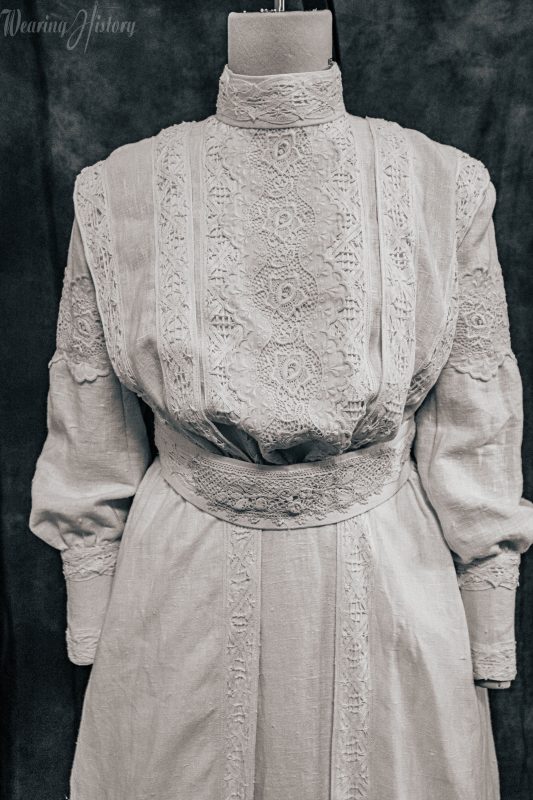
The original period patterns didn’t show where to put any trims. The patterns were unprinted, with tissue paper with holes for markings, so showing trim placement wasn’t really possible! Home sewers of the era would simply refer to the pattern illustration, fashion plates, magazine images, or other places to get idea for how to put their trims on. They would keep their trimming in mind while constructing the garments (for example, I sewed the lace on the bretelles before I sewed my waist seam).
My trims are a combination of antique trims and modern cotton lace tape trim (I’m blanking on the name of this style). Because I’m a bit of a budget shopper, my entire trimming for the dress probably cost under $40. And the linen I used for the dress came from estate sale and worked out to about $2/yard. So, for my whole dress (minus the pattern of course), materials were likely under $60. Not bad!
Bit I digress. More photos!


There’s a few little things I’d do differently if I did it again (and I might just eventually go back and change this one. I would add trim with crocheted “dingle balls” at the points of the skirt. I have even *made* most of them, but I got hung up on how to weight them, so I put them aside.
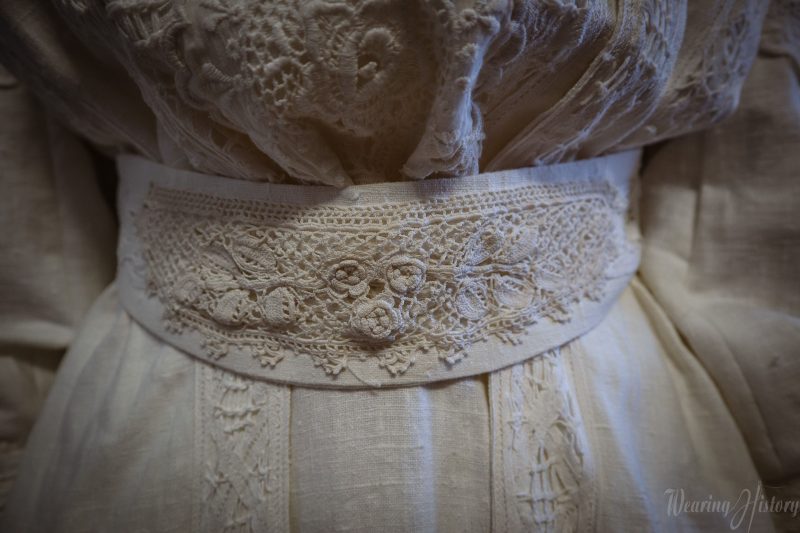
I’d add a trim at the center back belt closure. I don’t like how it laps. If I had a pretty bow or lace trim to hide that join I think I’d like it better. I also think my belt is a bit bulky and I should have used a thinner cotton for the belt facing instead of the same self fabric.
And I’d love to make tiny little crocheted dingle balls as faux “buttons” for the cuffs.
But, on a whole, I’m pretty pleased! It gets the authentic Edwardian aesthetic, and I could use up a bunch of fun stash trims and fabrics doing it!
Eventually I’d love to get dressed up in a big hat and parasol and go visit an Edwardian house to take proper photos <3
If you’d like to attempt to make this pattern, you can find it in my Etsy shop and on my website. It’s available as both a printed pattern and an e-pattern (includes print-at-home and A0 files). It’s called the Eliza 1910s dress and is available in size 36″ bust, 25″ Waist.
http://wearinghistory.etsy.com
http://wearinghistorypatterns.com
Thanks for reading!
Nicole
September 4, 2023 at 8:13 am (3 years ago)It’s beautiful! I love how you trimmed it.
Andrea
September 8, 2023 at 4:18 pm (3 years ago)What a beautiful dress. I especially like the belt/waistband trim you did, as well as the bluse front. I always blank out on how best to creatively use and place lace and trim, so it’s really inspiring to see how other people do it!