
Introducing the first pattern of 2023! This pajama pattern includes THREE GARMENTS and is a big pattern pack! Included are a short sleeve shirt, trousers, and a long sleeve robe! Instead of only one size, this pattern is multi-sized to include sizes 30″-44″ bust. It includes all sizes in the same packet. Creative sewists can adapt all three garments to be worn outside the home as sportswear, as well as inside! Just change fabrics!
If you don’t have the pattern yet, you can find the pattern on http://wearinghistory.etsy.com or http://wearinghistorypatterns.com
The waistband is, by far, the trickiest part of making this pattern, so I’m reviving ye olde photo tutorials for an in-depth step-by-step visual of how this waistband goes together.
Before you start, note that ease is built into the waistband to accommodate a tucked in shirt and some comfort. Be sure to mock this up to test the fit before making it from your final fabric!

Sewing The Opening
This pattern can either open with a zipper, or with snaps on a placket. For a zipper tutorial please see this video before proceeding to attaching the waistband. If you wish to do a snap fastening, continue here. Personally, I find the snap fastener closure much more comfortable for lounging. If I was adapting this pattern to be trousers worn outside the house, I might choose the zipper method.
Prepare the Side Seam
This pattern has 3/4″ side seams allowed, with the rest of the pattern having 1/2″ seam allowance. This is very common in certain old patterns, as the extra seam allowance would let you let it out if you selected a size that was somewhat too small, or if you wanted extra ease. Make sure you’re satisfied with the trouser fit FIRST, before you attempt to attach any sort of opening!
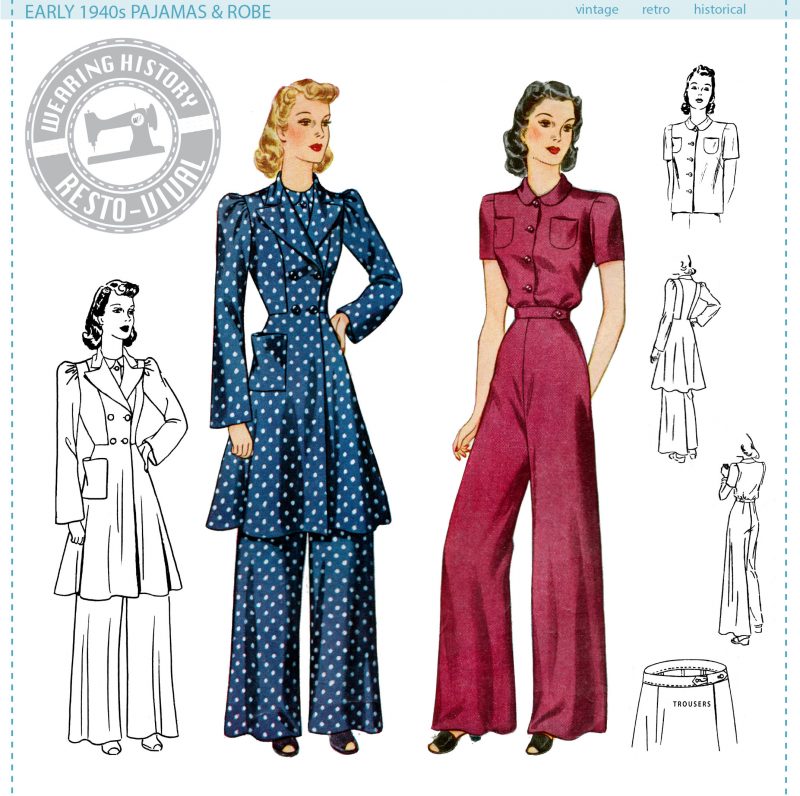
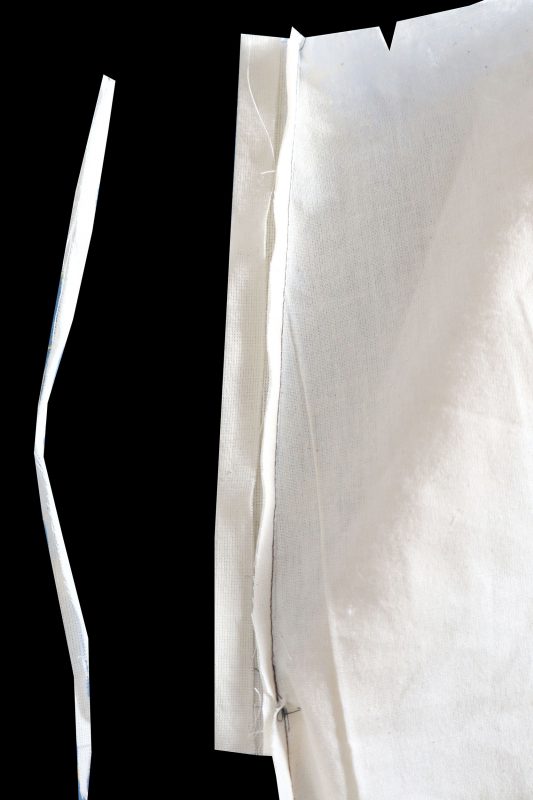
Before we attach any plackets, you need to get that seam allowance to be not as bulky as the 3/4″ width. Trim down your seam allowance above the side notch to 1/2″. We will use the same seam allowance on our placket pieces. In this image you can see I’ve drawn my seam allowance on at 3/4″ from the cut edge, then measured out from that seam line to 1/2″ and cut off the extra. Since this is muslin, it’s just pencil. Adapt your marking method to the type of fabric you use (you want it to come out!)
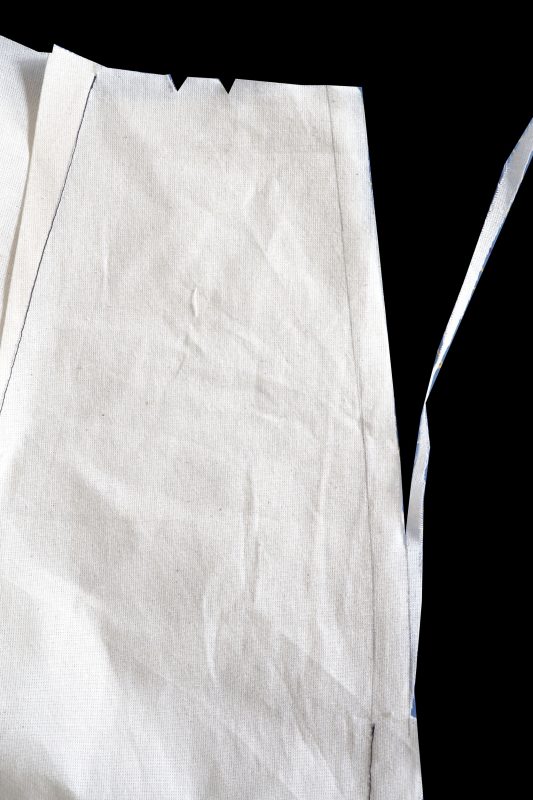
Cut Your Extension and Facing
Next up, use the measurements supplied in the pattern to cut your facing piece and your extension piece. The facing piece is the NARROWER width one. This will finish the front of the trousers. The extension is the WIDER piece. This will lap under the facing so your snaps can fasten. This will make sense in a minute… hang with me.
Sew The Extension
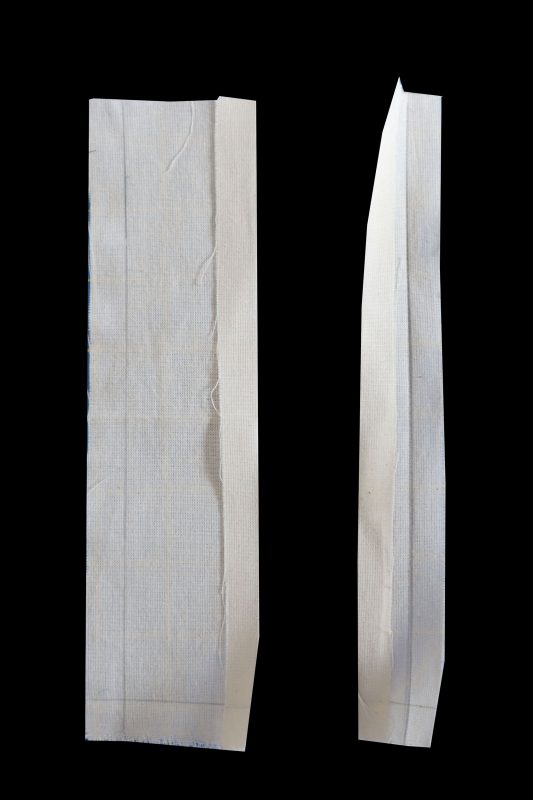
The Extension (wider piece) attaches to the BACK. Place one long edge of the extension to the back trouser side-seam, right sides together. Stitch it with 1/2″ seam allowance, leaving the extension free about 1/2″ from the bottom. We’re going to flip that bottom end up so it’s nice and finished on the inside. You can see the pencil mark on it in my photo, marking 1/2″ from the bottom cut edge, if you’re not sure where the end of the placket is.
Press under the un-sewn long end of the packet 1/2″
Now, fold the placket in half, right sides together, so that the folded under edge you just pressed matches the seamline.
In this photo the RIGHT SIDE of the trousers are facing you. The seam that was just sewn is facing the table, if that helps orientate you!
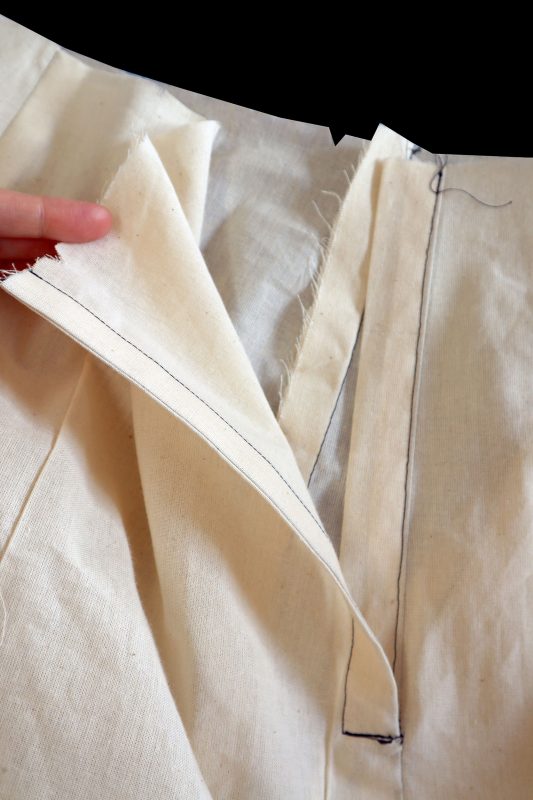
THEN- stitch right there across the bottom of the extension, using 1/2″ seam allowance. You can see the stitch line IN BLACK at the bottom of the extension. Clip your corners, turn it right side out. You may need to clip in at the diagonal to the seam line of where the extension was sewn to the trousers, too.
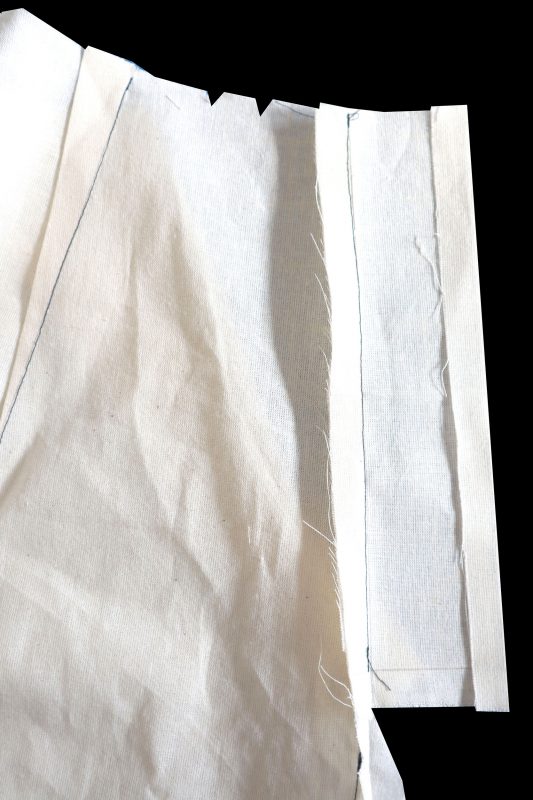
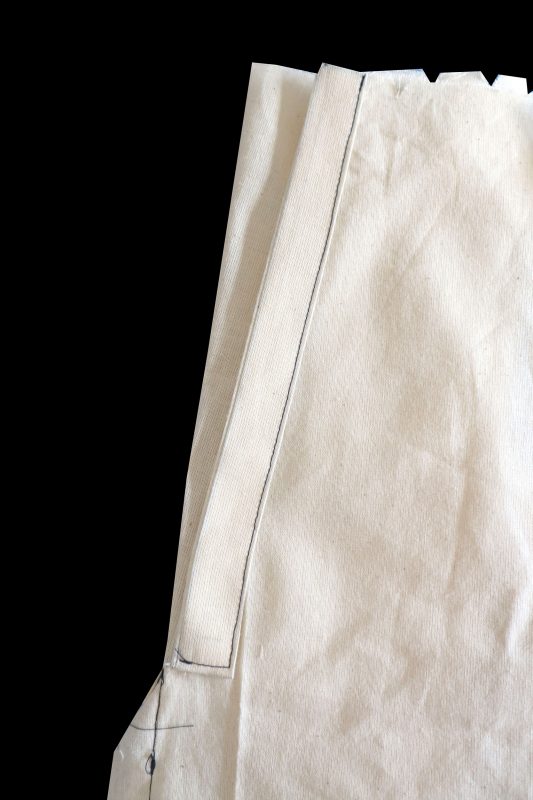
Press the extension so it’s nice and flat, and stitch it by hand or machine (skip down the post to a view of the placket for a visual)
Sew the Facing
Now we’re working on the FRONT trousers.
Stitch the facing to the trouser front, right sides together, using 1/2″ seam allowance. Stop your stitching 1/2″ from the bottom edge of the facing, the same as done with the extension.
Turn under the remaining long raw edge 1/2″.
The facing can get a little bulky since it is somewhat narrow, so I suggest trimming that seam just sewn to 1/4″ to reduce bulk.
Now, turn the facing to the WRONG SIDE of the trousers front. Press it right along that seamline you just sewed. Turn up the bottom edge 1/2″. Now all your seam allowances are encased! Narrowly top stitch by machine or stitch it to place by hand.
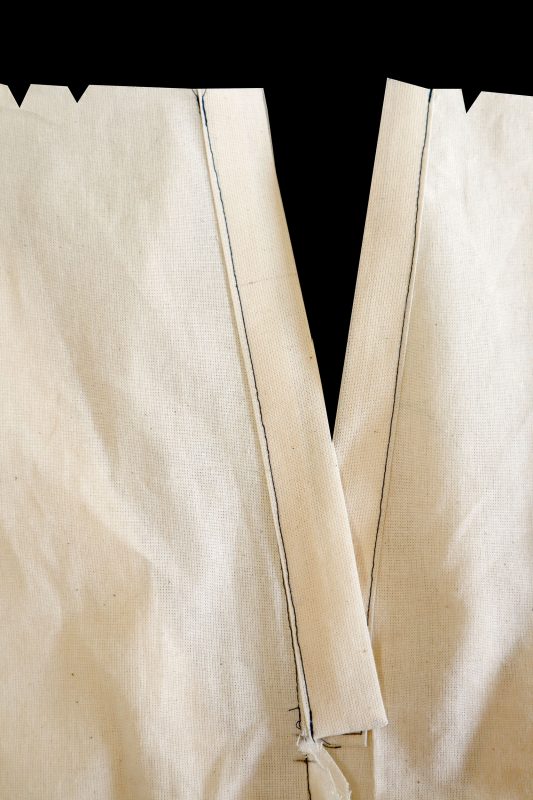
Check the Opening
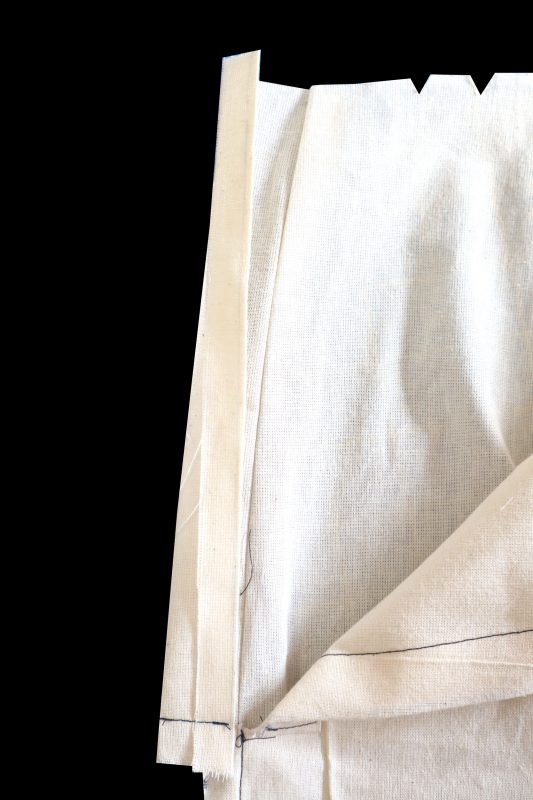
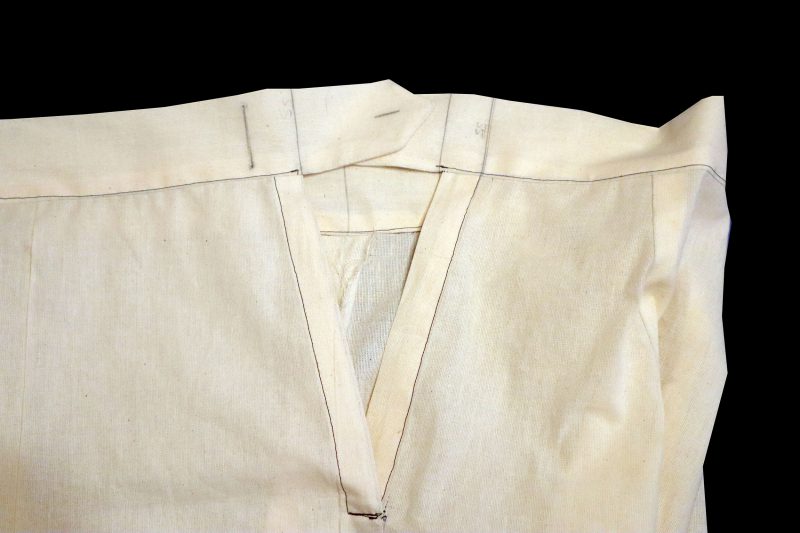
This is how the opening should look after your facing is sewn (to the right with the single notch at front) and the extension sewn (to the left with the double notches at back). We are looking at the opening with the WRONG SIDE of the fabric facing us (the inside of the pants).
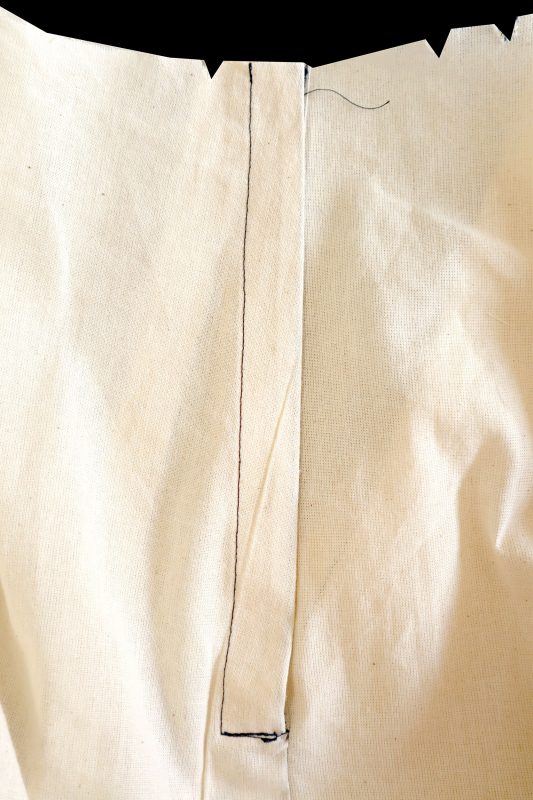
Finish The Opening
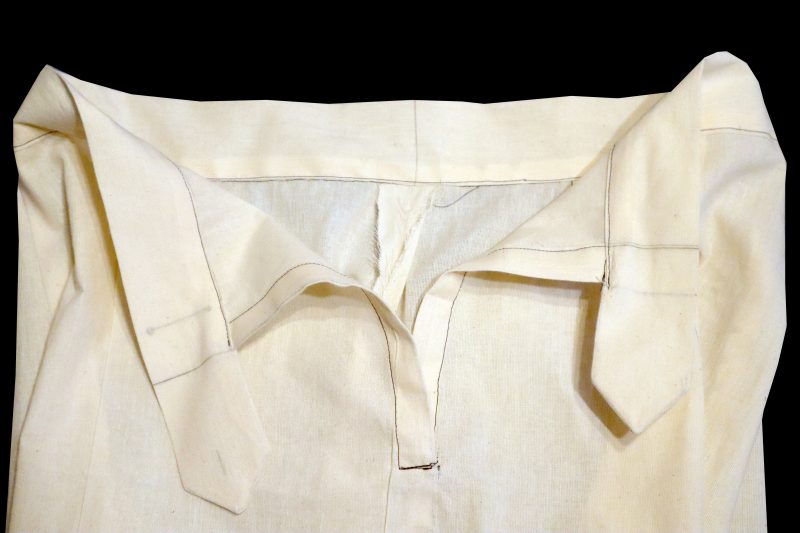
Now, turn the pants RIGHT SIDE OUT, with the RIGHT SIDE (outside) of the trousers facing you. Arrange the extension underneath the facing so it lays nice and flat. The edge of the front trousers should lap just to the seam line of the extension where it attaches to the back trousers.
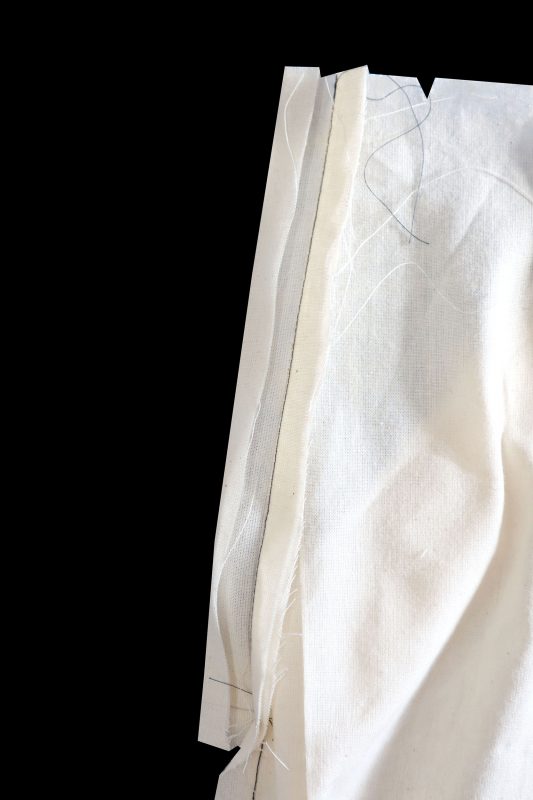
Now, to extra secure that opening and make sure you don’t get any rips or bubbles, TOP STITCH across the lower edge, attaching the facing to the extension. It helps to pin it entirely closed before stitching.
You will attach the snaps after the waistband is attached (I don’t show that step).
Sewing the Waistband
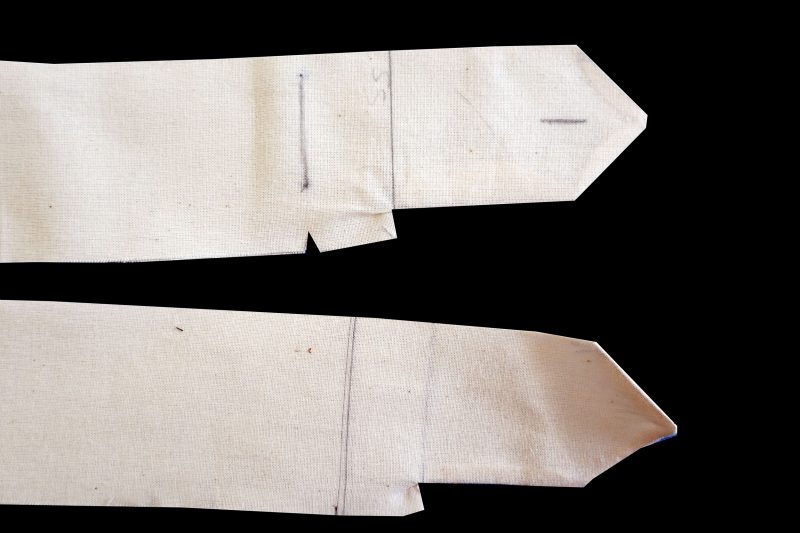
The waistband piece of the original period pattern was missing. This waistband piece in the Wearing History pattern is drafted based on the illustration, cutting guide, and sewing instructions. The bonus of drafting my own was that I could clearly mark and label all the critical matching points for you on the waistband piece. Of course, this new draft includes all notches so you know which is the front and back!
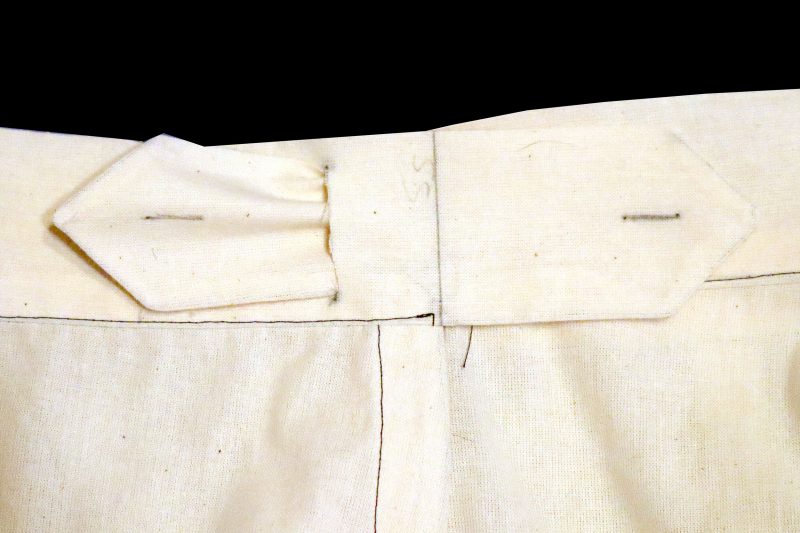
The waistband has construction that can be seen in the 1930s through the 1950s for waistband specific to pajama pants. The waistband is pointed at both ends, and it has a slit that is finished like a buttonhole on one side. When the side seam markings are lapped, one end of the waistband slips through the stitched opening and buttons to the other side. In this way, both sides of the waistband have buttons and buttonholes. The benefit to this is that additional buttons can be sewn to the waistband to allow for, say, more holiday eating! But this doesn’t allow for a larger hip opening, so expect a gap at the waistband side if you let it out a bit. Easy to just cover with an un-tucked top! I’m sure our 1940s sisters practiced the same thing. In fact I’ve *seen* vintage examples with just this sort of thing done, extra buttons and moved snaps, in my vintage wanderings!
What if you’re making this for outside-the-house wear? Either simply don’t care that it’s got the points (chances are, only blog readers or supreme nerds will know any differently), or simply omit the slit and make the back trousers waistband a straight piece that finishes exactly at the end of the extension. That converts into into a traditional waistband. Easy, peasy!
Side Note- I’ve seen vintage sellers mistakenly identify this double pointed style of waistband with the slit as “maternity”. They are, most definitely, NOT maternity when constructed in this way. Period sewing patterns clearly label a style as “maternity” somewhere on the envelope, maternity trousers of this era had entirely different construction, with either an open stomach, openings on both side seams, or very large placket underneath (often curved) that allowed “growth”. This pattern possessed none of those things, and it’s just a plain ol’ misses’ size pajama pattern of the early 1940s. The pattern itself is uncommon, but the styling is not!
Prep the Waistband Piece
Before you start sewing the waistband, make sure all the markings are clearly labeled on your piece. Clip your notches. You’re REALLY going to need the markings and notches when making this!
I’m just using muslin, so I used pen/pencil to mark the markings. On your final version make sure the markings will come out in the wash. Test on a scrap first.
It’s also optional to INTERFACE your waistband. Usually, patterns of this period did not indicate to interface. I, personally, use fusible tricot interfacing in my finished objects (for the most part). Interface before continuing.
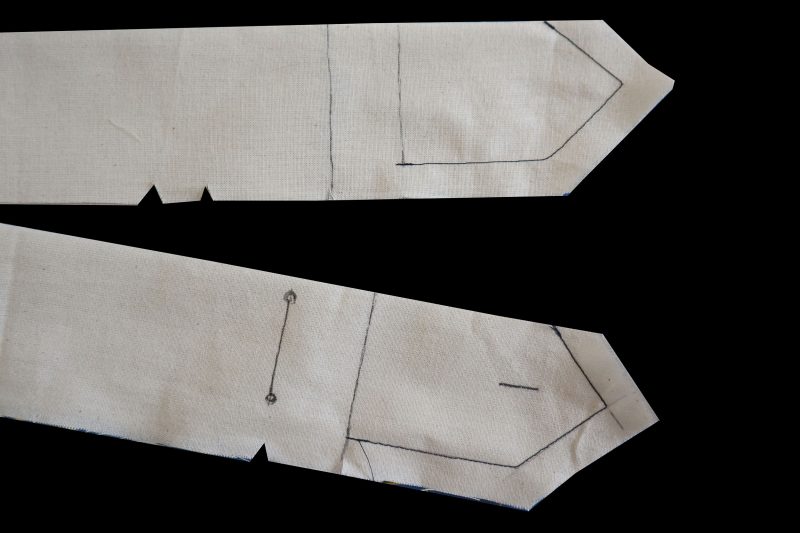
Fold the waistband, right sides together, as shown. Stitch around the points on the ends, using 1/2″ seam allowance. ON THE FRONT- start the stitching at the side seam marking (seen above with single waist dart). ON THE BACK- start the stitching at the marking for the extension. NOT the side seam. This will make sense in a minute.
Clip those curves, turn it right side out, and press.
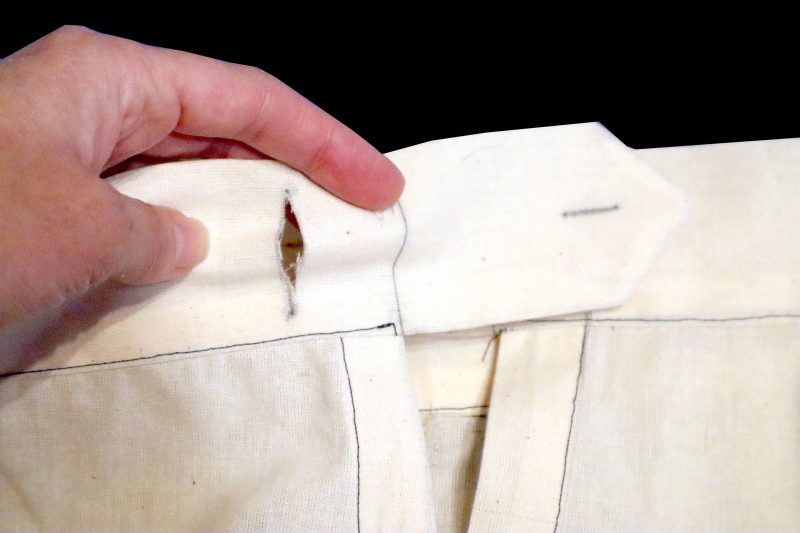
(Both sides of the waistband should have the buttonholes marked. I neglected that until later in the photo tutorial).

Now you’ll play matchy-matchy. Pin ONE edge of the waistband (leave other side free), right sides together, to the trousers.
Match together:
- FRONT trouser side seam to the side seam marking on the waistband.
- Match the front notches
- Match center fronts. You’ll have a bit to ease in at the front, most likely, so spread it across and pin it to place so it’s evenly distributed.
- Match the side seams together
- Match the back notches and center backs together
- And then, on the right of the photo above, you’ll see that the extension edge matches exactly where the waistband marking was for the edge of the extension.
Once you’ve got that all pinned, matching all your markings and notches, stitch one edge of the waistband to the trousers, right sides together, using 1/2″ seam allowance and easing any fullness in.
If you’re using a wiggly fabric this can be a bit tedious, so feel free to hand baste first, if needed. Interfaced waistbands are also essential for wiggly fabric and will help you have something solid to ease the pants into.
Press your sewn seam UP TOWARDS THE WAISTBAND.
Now, turn under the free edge of the waistband 1/2″ towards the INSIDE. Lap that to the waistband seam, enclosing all the raw edges. Then match your critical points again (side seams, center fronts, center backs) and topstitch by machine or sew to place by hand. TA DA! All seams enclosed and nothing to unravel!
It might be scary, but remind yourself these are *just pajamas*. And if you’re worried, make a test buttonhole in a scrap of your real fabric before you make your final version. Practice helps!
You can see that the point of the back trouser waistband passes through the slit on the front trousers waistband. Work those two buttonholes on the waistband by hand or machine. Then attach your buttons! Note that the button placement should have the shank on the OUTSIDE EDGE of the buttonholes. That gives you the tension to keep the waistband closed.
The line marked SS is for Side Seam. The side seam of the back waistband will lap exactly on that line.
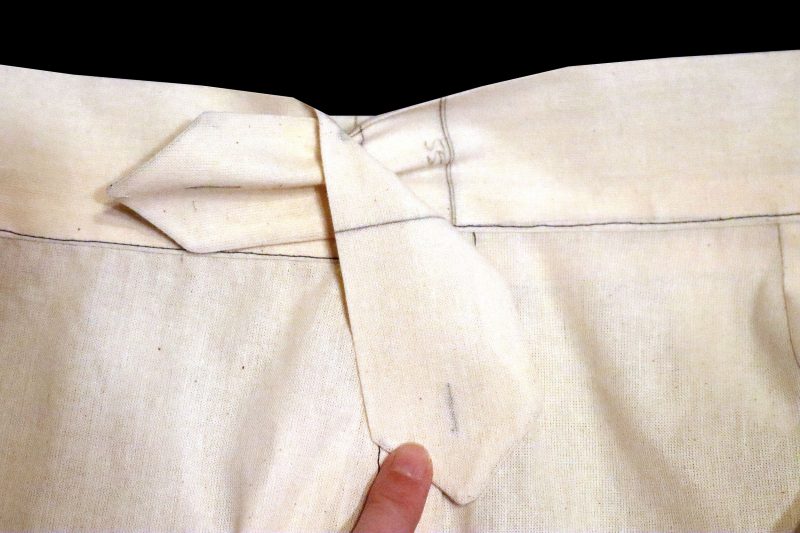
You can see here, when I fold down one edge of the waistband, that the two lines were lapped for closure.
After this simply sew on your snaps and you’re finished! Yay!
Sandra
March 1, 2023 at 12:42 am (3 years ago)Thank you for this interesting guidance! The images are very helpful.
Lauren
March 1, 2023 at 12:23 pm (3 years ago)Thank you! I’m so glad the tutorial helped! Happy sewing :)