
It has come to our attention that there was a pattern error in Wearing History #4005- 1940s Panties & Bloomers. This was one of the very first patterns I did and was recently re-issued. This pattern was based on an original historical sewing pattern and retains all period pattern lines and construction in order to retain the period accurate silhouette, as with the Resto-Vival patterns. However, I didn’t catch that there was an error in the original period pattern that this was based off of, in that the crotch gusset was not symmetrical. I apologize profusely that this was not caught before releasing the pattern. I have created a PDF download for prior customers that includes the corrected panties crotch piece, and also has a correction on the notches of one pattern piece.
Saving & Printing The PDF Pattern Correction
-
You can download the PDF here.
- SAVE the file to your computer. DO NOT PRINT FROM YOUR WEB BROWSER. We found print justification incorrect when printing from a web browser, but printing from a PDF reader makes the pattern centered and print correctly.
- Open your PDF Reader (such as ADOBE READER).
- Open the file
- Select PRINT to 100% scale or “ACTUAL SIZE”. DO NOT PRINT TO “FIT”, or the pattern will not align correctly.
- Your pattern correction is 4 pages, which I will show how to apply to your printed pattern below
Assembling Pattern Correction and Applying to Your Printed Pattern or Printed E-Pattern.
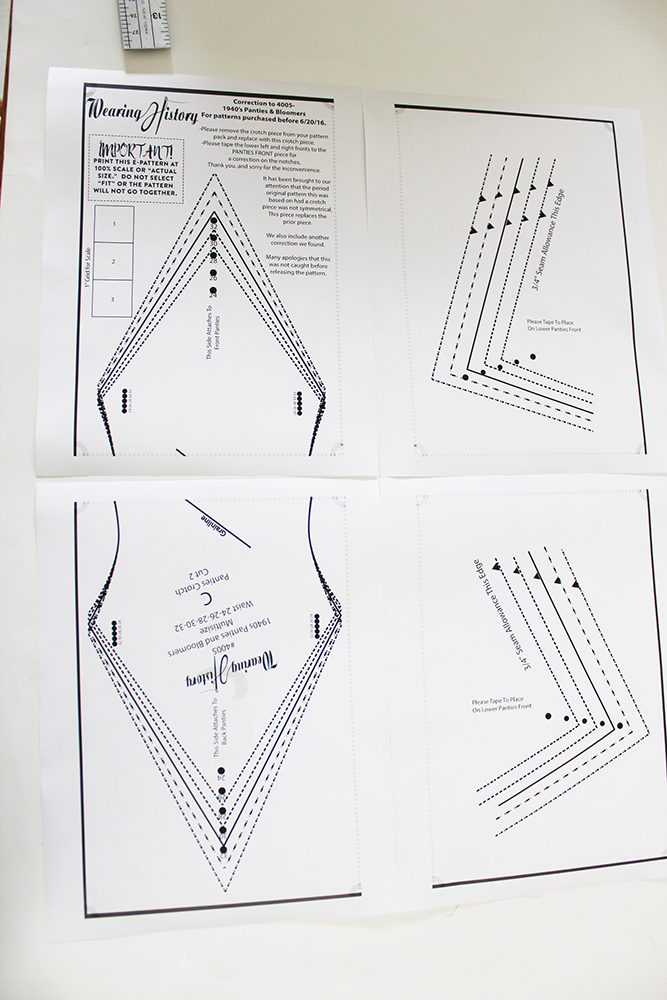
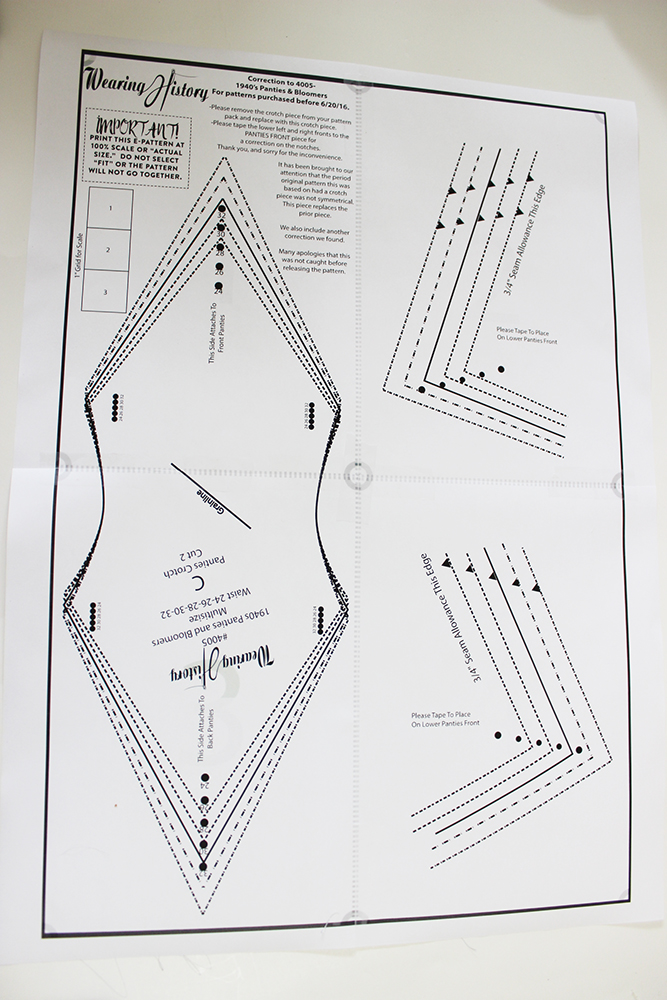
- Print your pattern pieces. The layout will go like this. Note: The piece on page 2 will extend into page 1 on the correction you download (this was taken before updated).
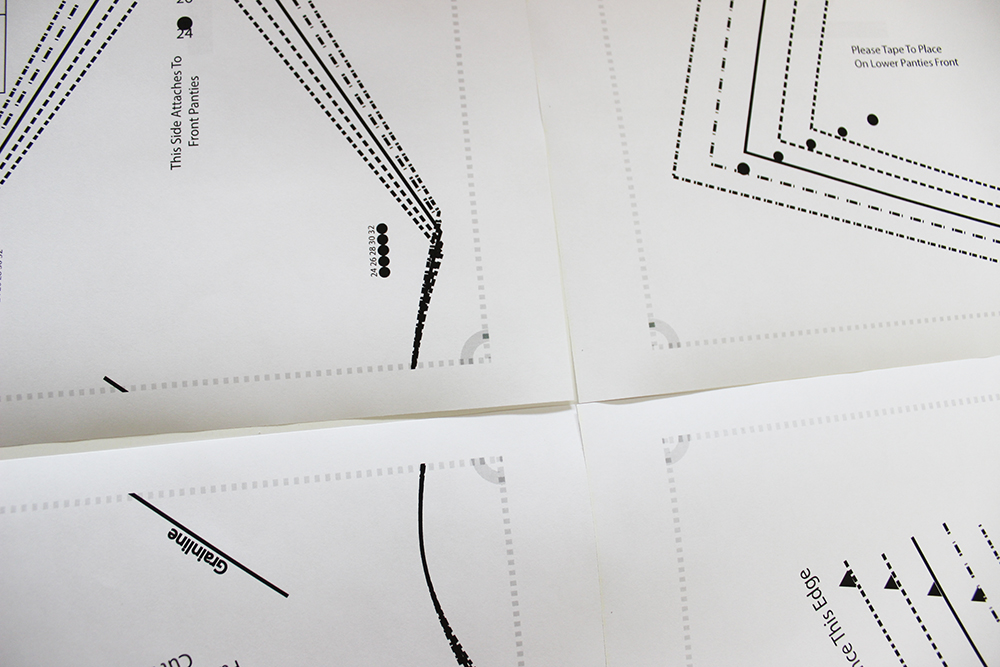
2. The circles and lines are for pattern justification. Cut away the blank paper at the top of pages 3 & 4. Do not cut the gray dotted line.
3. Tape page 3 to page 1, matching justification lines (do not overlap dotted line- but abut it right next to the other one). Do the same with pages 4 & 2.
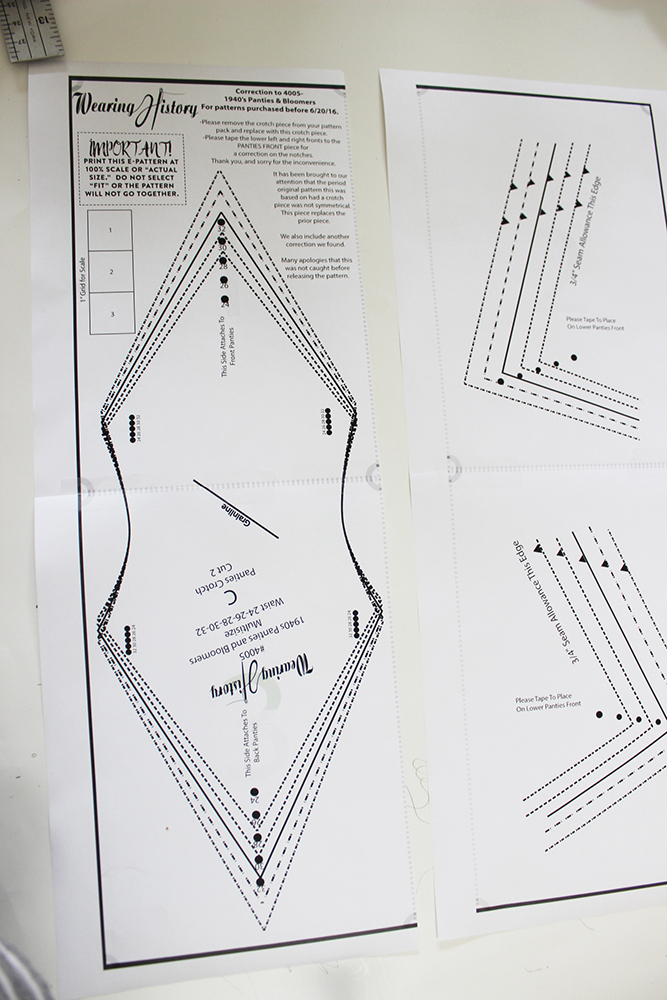
This is what it should look like after you have taped this piece.
4- Cut away the blank paper edge from piece 1 & 3 (you can see it’s already cut in the two pictures above)
5- Tape to pages 2 & 4, as shown above. Your pattern sheet is now assembled. (remember, yours looks slightly different).
This is the same method used to assemble any Wearing History E-Patterns.
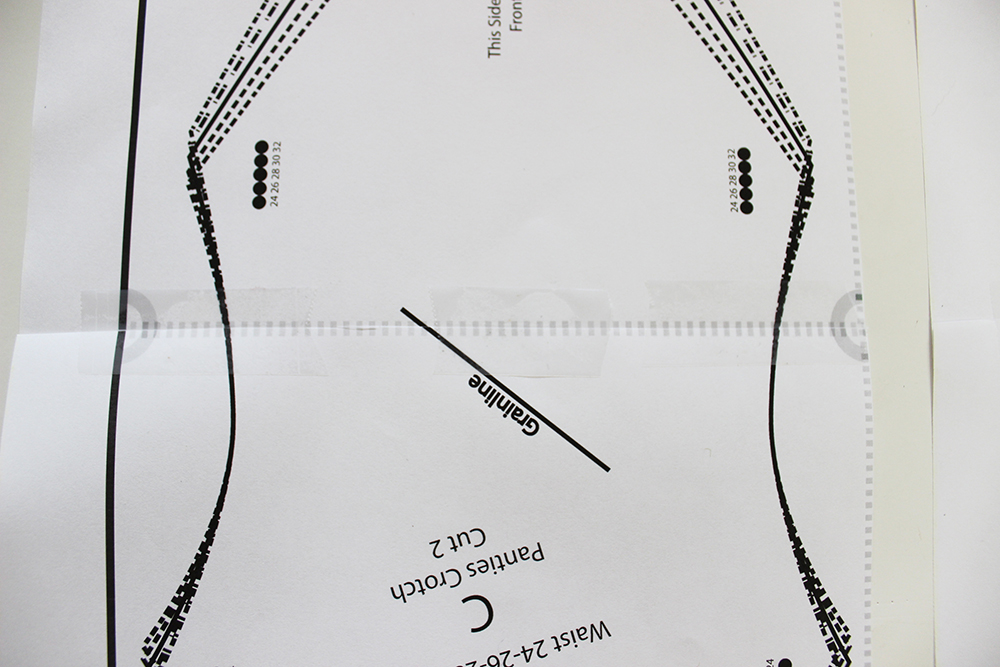
6- REMOVE CROTCH PIECE FROM ORIGINAL PATTERN. Throw it away. Replace with the crotch piece of this supplement.
7- Cut out the crotch piece and two notch supplements from the supplement pattern.
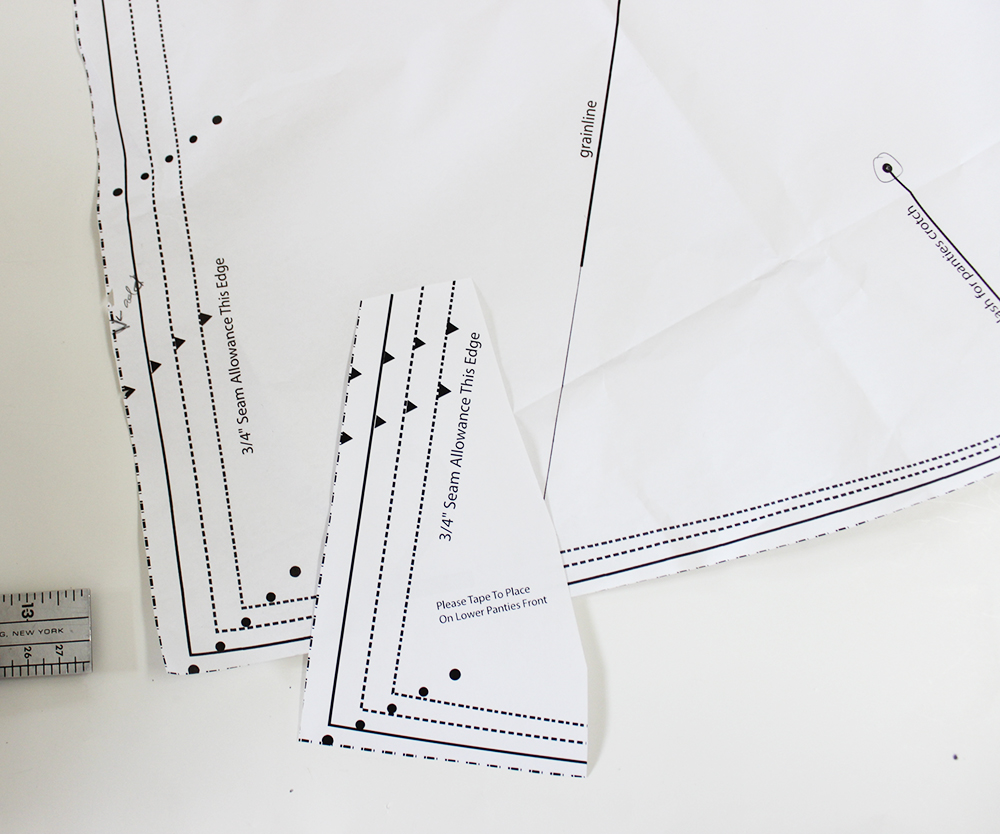
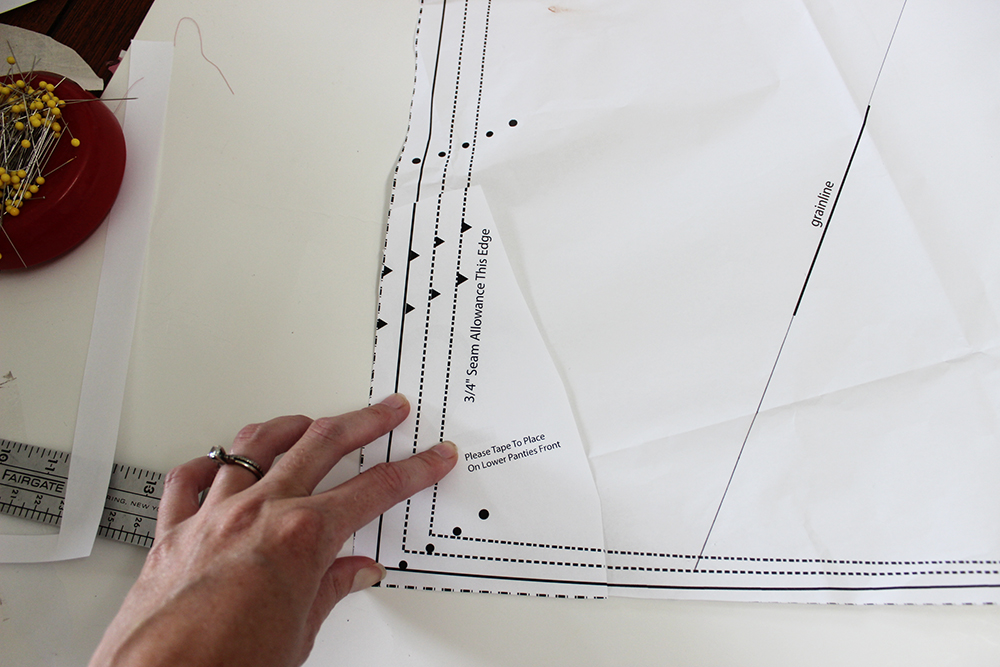
8- Place the correction on top of the pattern piece. Tape to place.

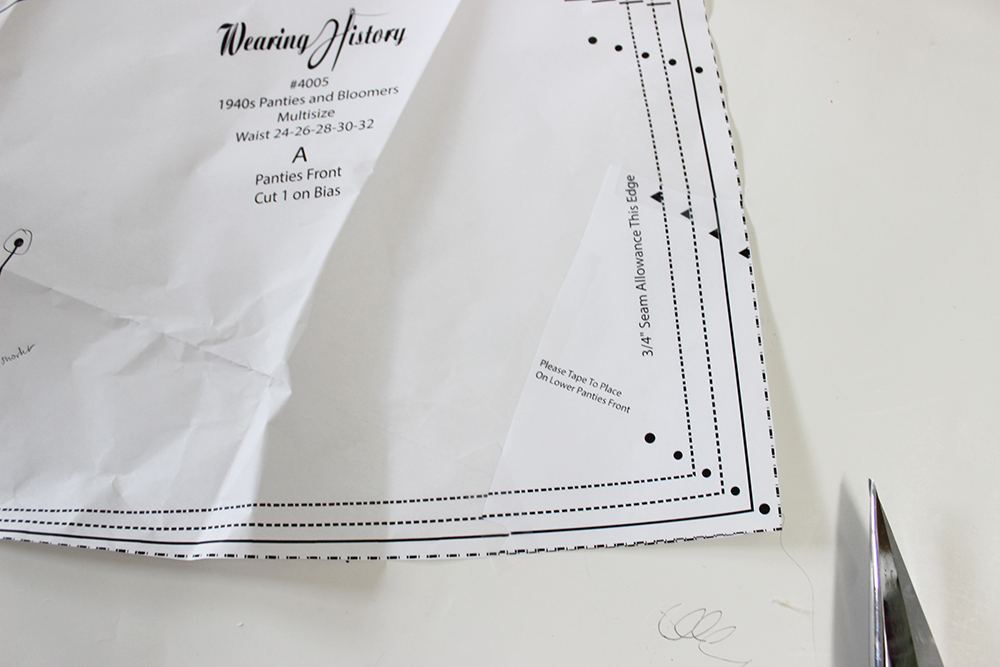
9. Do the same to the other side of the piece.
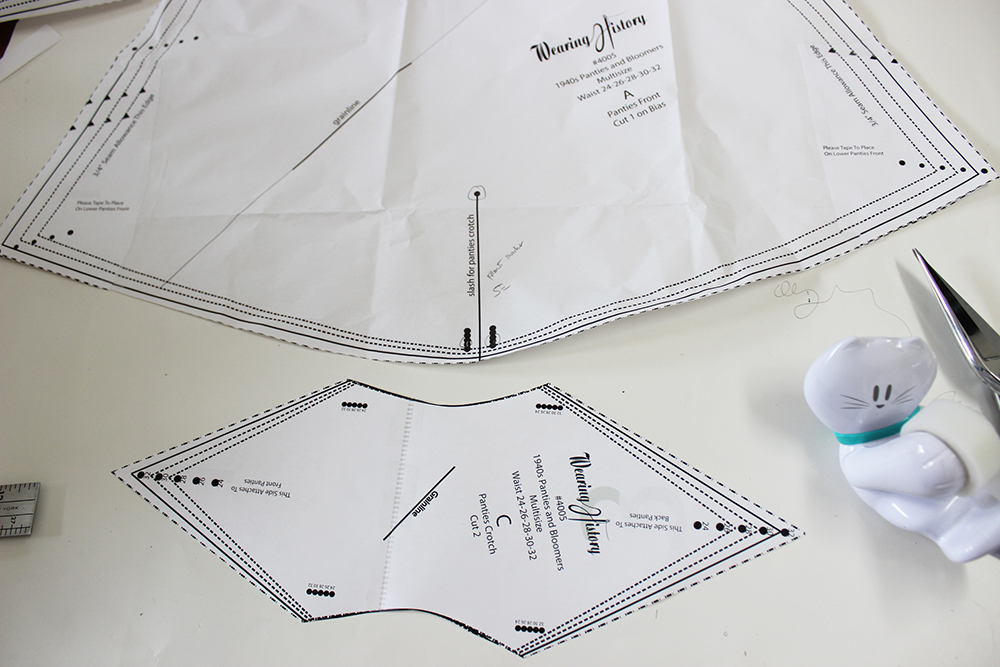
10 Your pattern pieces should now look like this! All done!
So sorry again that I didn’t catch this in the original pattern. I hope these corrections and photo instructions are beneficial to you.
Best wishes.
Lauren