This is the final post of detail shots of the 1910s white blouse. Today we’re going to look at the waistline and the back fastening.
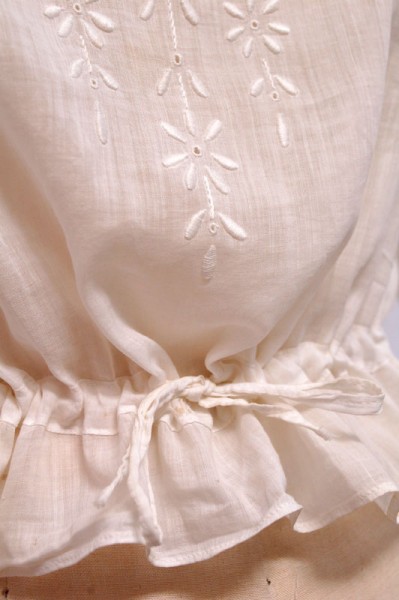
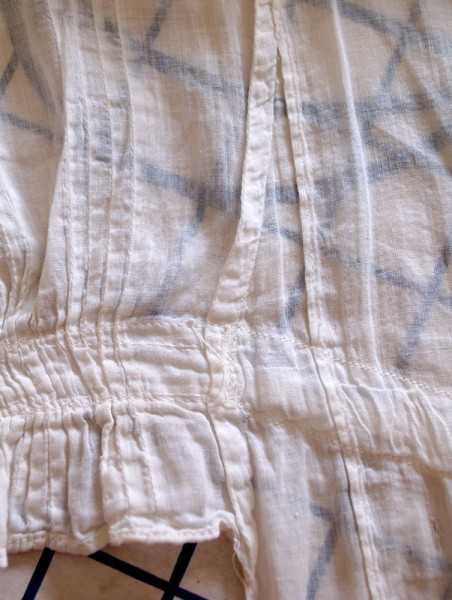
This blouse is a fun combination of several different techniques that were used in the lingerie blouses or shirtwaists of the period. Often you’ll find that they are gathered and stitched to a band at the back and then left loose at the front, the excess of which would to be pulled in with ties. The concept is similar to blouses today that have ties sewn into the side seam that pull the excess fabric and tied together in a bow at the back to make the front fitted. Think of the reverse of that, to pull the excess to the front and create a smooth back. In other instances you’d see a drawstring or elastic in a casing all the way around (which is what we have in the 1910s Blouse Pattern). There’s variations on all of these, but this one is fun in that it has the back gathered to a band with a shorter peplum at the back, and then in the front we have a longer length with an applied casing and drawstring.
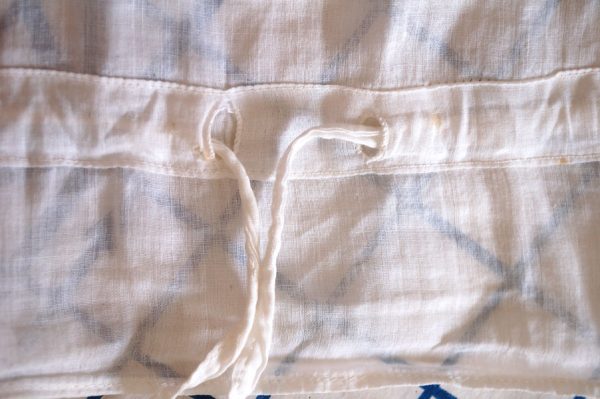
The casing, interestingly, is applied to the right side of the garment and the drawstring comes out of the garment at the center front through two hand finished openings. This makes the front of the garment lie flat for ironing and makes it somewhat adjustable for waist size. Here we have a view of it flat and ungathered.
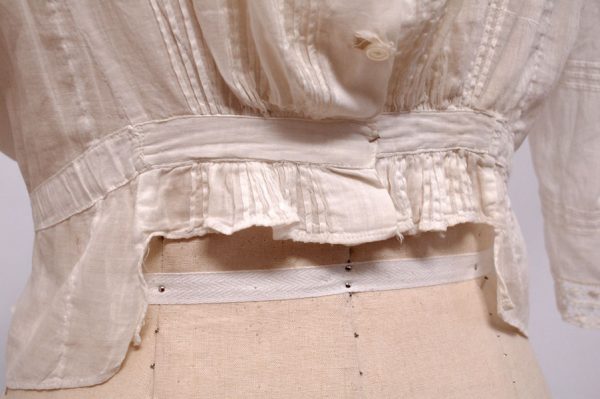
Here is a closer shot of the back so you can see the variation of garment length below the casing.
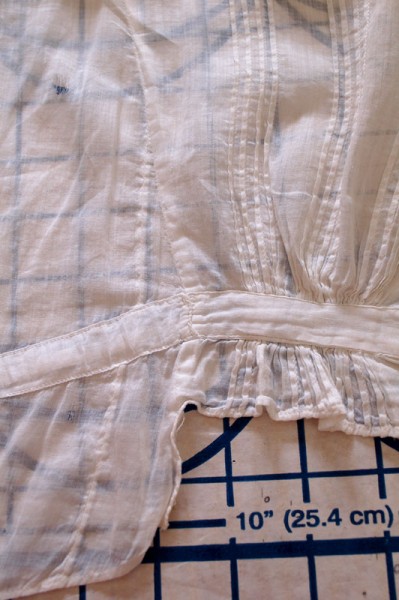
This garment is interesting in that it has gussets added at the side back. Perhaps the garment was homemade and the seamstress neglected to make a muslin before constructing ;) It’s also likely that these were added later, especially if the owner of the garment needed extra room across the back. I’ve never found any references to this in my books or magazines if this was constructed this way originally and intentionally so would be interested to hear if anyone has run across anything in their studies.
Here’s an inside shot of the above, as I thought you may be interested to see the seam finishes and catch a glimpse of the back side of where the band is applied at the back. Also notice the very narrow hem.
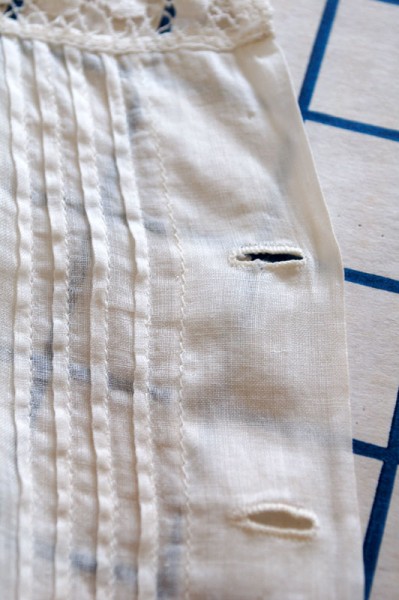
Now to the back fastening, you can see here the self facing made and the buttonholes, and also a close up of the pintucks. As mentioned in a previous post, it is uncommon in my research to find the back self facing plackets interfaced.
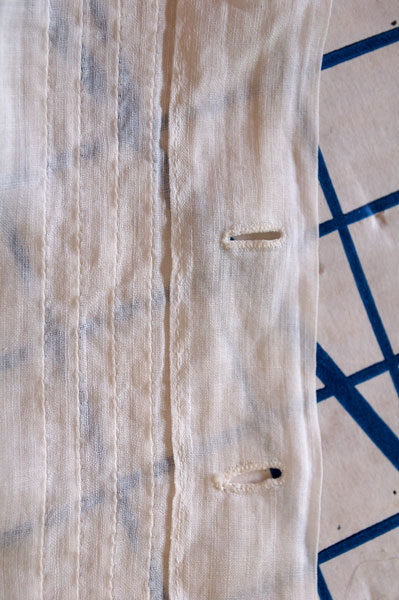
Here is a shot of the inside.
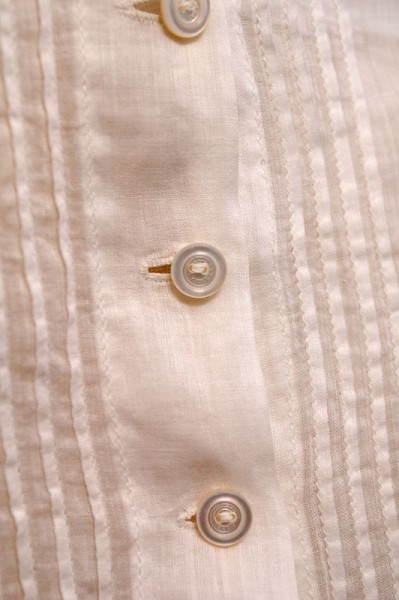
And lastly, here is a picture of the back of the blouse when fastened and detail of the cute mother of pearl buttons. The buttons are small, about 3/8″. The back placket is about 1″ wide.
That’s all for this little blouse’s debut! I hope you’ve enjoyed seeing the close up and construction shots of this original blouse, and I hope it inspires you for your clothing creations!

Summer
March 29, 2012 at 12:47 am (13 years ago)Beautiful blouse! I’ve enjoyed seeing the details.
I believe it was common for women to alter clothes to fit after having the first child, mainly at the waist and hips. The flat front for ironing is so clever, I’ll have to remember that.
Elizabeth
March 29, 2012 at 11:51 am (13 years ago)I’ve never seen gussets like that on an edwardian piece but I own an 1850’s piece that has a gusset like that on it. It’s a bodice for a young lady and there are gussets that I think were put in as she grew.
Here are the two edwardian blouses: http://elizalives.blogspot.com/2011/09/dressing-grace-livingston-hill.html