As promised, in honor of the new 1910s Blouse and Guimpe pattern, here is the basic lace insertion tutorial!
Lace insertion is a wonderful technique to have under your belt. When I personally think of lace insertion, I think of the gorgeous Edwardian garments and undergarments that were literally festooned with lace and trimmings, yet still retained a simplicity and elegance. This technique is not limited to that era alone, however, and you can see it on garments from many time periods. It gained a resurgence of sorts in the late 1930s to early 1940s, as the “Gibson Girl” mode came back in style, and we saw it again on garments- especially blouses and evening gowns. This continued to be in fashion off and on, and today it is mostly used for children’s wear, as shown often by the heirloom sewing aficionado, Martha Pullen, and her magazine Sew Beautiful (which, I might add, is fantastic as inspiration for adults as well. Most images and projects are for babies and children but the techniques can move into adult wear easily, especially when used for historic or vintage dress.)
Heirloom sewing can be quite addictive, and after you master the basic techniques you may find yourself wondering what other projects you can add lace and embellishment to, and be on the hunt for trims to use.
I am sharing here the methods that I personally use for lace insertion by machine. There are many different methods out there. For me the most important factor is how well something will launder and how often I am going to launder it.
Basic Pointers and Tools Needed
You will need the following tools:
- A method of marking which will come out of your finished garment. I used a special pencil I bought at an heirloom sewing supply store, but you may find you want to use a special sewing pen or other mode of marking. Test it on a scrap of your fabric first to make sure it will come out when laundered.
- Fine pins. I use silk pins.
- Scissors
- Insertion style lace (with two straight edges, called “headers”). I find those with a high cotton content work best. A standard for heirloom quality laces are 90% cotton, 10% nylon. Many are imported from places like France or Switzerland.
- Your fabric. I am using Swiss batiste, but cotton lawn or handkerchief linen also work well.
- Spray starch
- Good quality thread (I use Gutermann)
- Fine sewing machine needles. Use a new, sharp one to prevent snags in your fabrics or laces.
- A sewing machine with a zig zag stitch.
- A pattern you plan on using (of course, I recommend my new blouse pattern. I specifically designed it to use used with heirloom sewing techniques! :) )
Before Sewing
- Test your marking method (as mentioned above) on a scrap fabric.
- Pre-wash your laces and fabrics on a gentle cycle and with a gentle soap to prevent future puckering or stretching when cleaning your finished garment. Lay them flat and let them air dry.
- Spray starch your fabric and lace after it has dried. This is an important step, as when these fine laces and fabrics are washed they loose body which is necessary to keep them smooth and not puckering while sewing.
- Test your tension on your sewing machine using your zigzag stitch. Sewing machine tension plays a huge factor in successful heirloom sewing. If your machine needs to be serviced or is due for a tune up, you may consider getting it before trying this, especially if using expensive laces and fabrics.
- Make a sample of your insertion and test it in your method you will wash the finished garment to be sure it will not fray and cause the lace to separate from the garment. Always hand wash with a mild soap or dry clean heirloom garments. They will not stand up to a normal machine washing and do not throw them in a dryer- make sure they air dry flat. Doing a test sample also helps you learn techniques before you start your final garment so your final garment will be your best work.
How to Plan Your Design
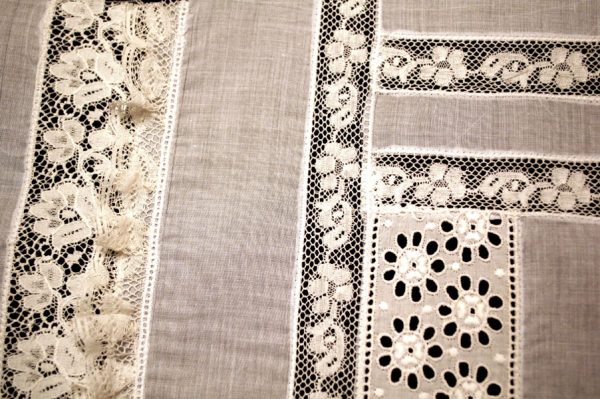
Plan the design of your garment and draw your guides on your fabric. Insertion lace is sort of like patchwork- you are building a design from the bottom up- if edges need to be finished take into account what needs to go first, second, etc, to make sure all edges are finished properly and will not fray. The example above is a close up of the work I did on one of the samples of the 1910s blouse pattern, which I based on an illustration from a period catalog. You can see that I added the horizontal insertion pieces first, then added the vertical pieces which finished the edge of the horizontal piece. The horizontal pieces had an extra “tail” which extended into where the vertical piece was placed. I clipped off the “tail” when I clipped away the backing of the vertical piece, in order to have a finished edge (no hole at the ending, as would happen if I cut it right where it was to end design-wise). This will make more sense as you keep reading the basic technique below.
How to Sew Insertion Lace by Machine
Since we’re doing basic technique, I’m going to assume we’re just doing a vertical insertion from either the shoulder to hem or from the center front to hem. This tutorial only covers insertion lace that is straight- curved lace insertion requires an additional technique. I find it usually is best to do insertion lace before constructing a garment, unless that garment is going to have lace which travels, say, around a neckline- and in that case I’ll do it after attaching the shoulder seams.
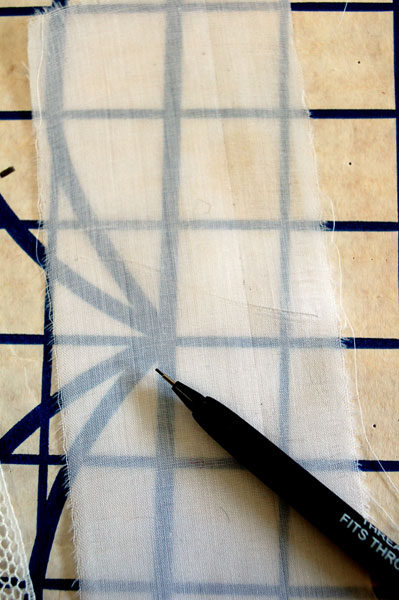
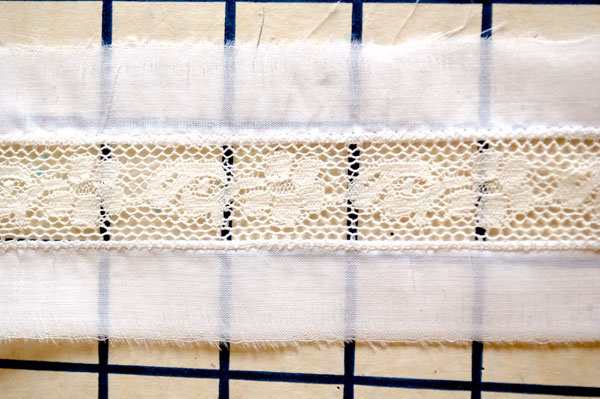
1- Draw your design lines using your water soluble marking and a clear ruler. Keep in mind the grain of the fabric as it relates to your design. I have drawn two lines here that are the width of my insertion lace.
2- Pin your lace to your design. I’m kind of haphazardly pinned my lace here- use as many pins as you need to get your lace lined up on your fabric and be sure you don’t create tension between the lace and fabric as this will cause puckers. They should lay smoothly together.
Click on the link to continue reading. If you see no link you’re on the right page!
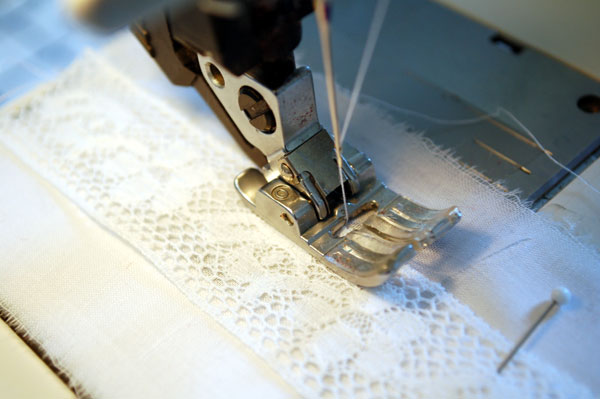
3- Zigzag your lace to your fabric. Your stitch should be wide enough to encase the header of your lace (the border). The idea is to create a sort of “bridge” over the lace, zigzagging it to secure it and nicely finish the edges (the needle goes just at the edge of the lace and the fabric on both sides). Test it on your machine and set your width as needed. The stitch length should be standard- not too long as that can cause puckering or raveling, and not too short as that can cause too much bulk.
4- Do the same zigzag on the other side. Give it a good press and smooth it out so it irons flat. The image above shows one side zigzagged and one side straight stitched, but the zigzag tends to hold better, in my opinion.
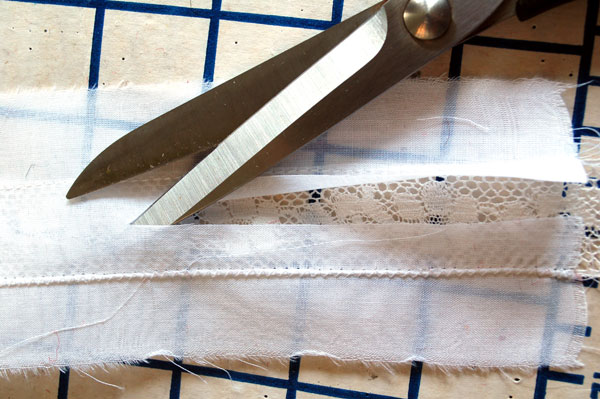
5- Flip the piece so it is face down. VERY CAREFULLY snip down the center of where you zigzagged the lace to the fabric, being sure to avoid clipping your lace. Use small scissors if you need to.
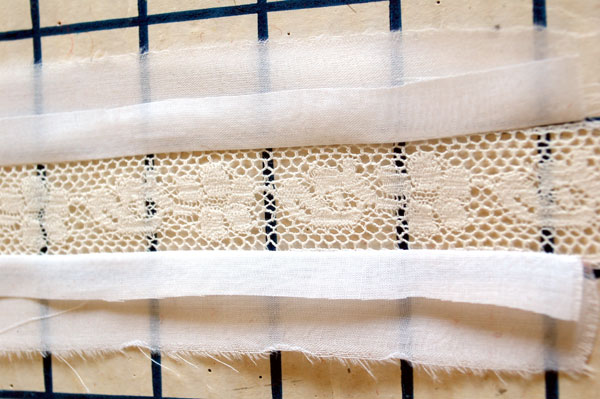
6- Press your clipped edges open, towards the body of the fabric on each side. Make sure your fold is nice and crisp, and right next to the stitching (no bubbles of fabric at the edge).
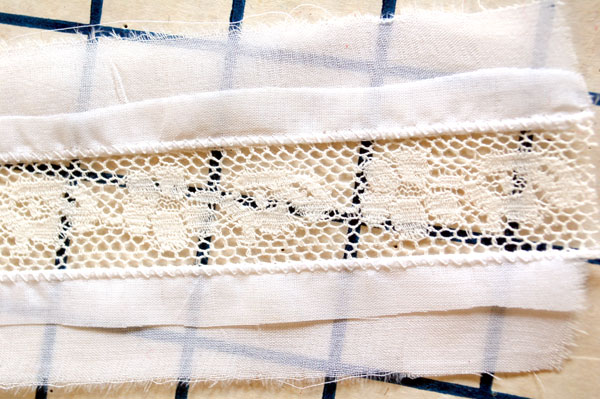
7- Zigzag the folded fabric into place, using the same method as used when attaching the lace- using a zigzag stitch wide enough to “bridge” the lace header. It is perfectly ok for the needle to fall off of the edge on the lace side of the fabric so do not fret, but try to keep it close to the edge so that the stitching is uniform in width. This step binds the edges, similar to an overlock stitch. Make sure your stitch is narrow enough to prevent fraying.
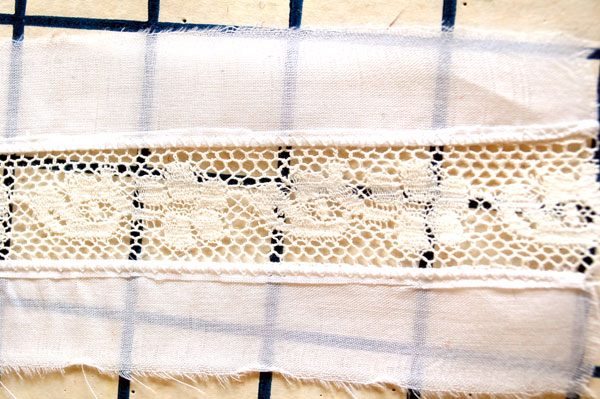
8- VERY CAREFULLY clip away your extra folded back fabric from the edges. I use small scissors for this step. Be sure to avoid clipping your fabric body and lace! I have done this several times and it’s no fun, as snips in the fabric cause holes and fraying later. And try to be tidier than I was in clipping ;) Give it a good press.
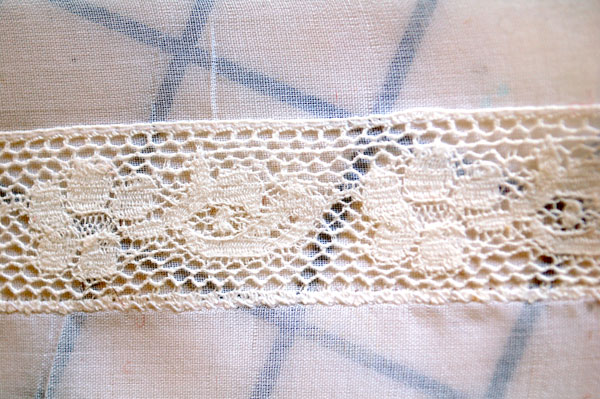
Here it is on the right side. Ta da!! Basic machine insertion lace.
I hope you’ve enjoyed this tutorial!
Of course, if you’re interested in doing lace insertion in the traditional way, my e-book of authentic technique and inspiration images from original 1910s sources can be purchased on my website. I have a few lovely Edwardian style collars I have added to my website for purchase which can be great fun when combined with lace insertion on a blouse, and I have some laces suitable for these techniques which are coming to the site soon as well.
If you have an alternate method you use for doing insertion lace by machine, please do let me know in the comments.
Coming up will be tutorials of adding laces to each other and doing French seams, so stay tuned!
*Disclaimer- Martha Pullen and Sew Beautiful magazine did in no way compensate me for mentioning them in this post.


Esz
April 3, 2012 at 8:31 pm (12 years ago)You make it look so easy! I want to try this one day :-) Must find an appropriate project for it.
Lauren
April 3, 2012 at 9:11 pm (12 years ago)It actually is quite easy once you get the hang of it :)
Libby Gohn
April 3, 2012 at 8:56 pm (12 years ago)Thank you for the tutorial! Do you have any suggestions for where to get lace? I’ve only been able to find 100% nylon.
Lauren
April 3, 2012 at 9:10 pm (12 years ago)You’re welcome!
Yes, I do. I have a few basic laces to list on my website, and I’m hoping to get to that soon, but I generally look for them at Martha Pullen’s website:
https://store.marthapullen.com/c-4-laces-trims.aspx
Or Farmhouse Fabrics:
http://www.farmhousefabrics.com/
You can sometimes find vintage laces on Etsy or on Ebay. Occasionally I’ll run across vintage laces at antique stores or flea markets. I love vintage lace, but it’s best if you can handle it (sometimes it’s packaged in plastic), to be sure it’s not dry rotted. I got part way though a project and then realized my vintage lace was not quite as strong as I had hoped! Lesson learned :)
Dawn
April 4, 2012 at 5:37 am (12 years ago)I really need to get a machine that zig zags. I think for my birthday and Christmas I will ask for gift cards for a certain store and pool them all together and buy myself a machine that does more than forwards and backwards. I want zig zag, button holes, and fancy embroidery. I also want it to not weigh 100 pounds.
Lauren
April 4, 2012 at 9:50 am (12 years ago)You can also do this with a straight stitch, which is the more traditional method. You sew on the headers, then cut away, and you have to do a tiny hand rolled hem on either side of the lace. That’s a more authentic to the period technique.
Do you have an antique machine? I know you can get zigzag attachments :)
Dawn
April 5, 2012 at 5:25 am (12 years ago)Yeah, my machine is old. I’m fairly sure it is from the 60’s or 70’s. I know you can get attachements. I once found a buttonholer at a thrift store. But, it was made for a different machine and didn’t work. I was so disappointed. I should go on line and see if I can find attachements. I am really attracted to the new machines that embroider as well. It would be nice to put some small details on a finished product. Then again I’d be restricted to what the machine could do but there is no restrictions on hand work (just how lazy I feel!)
Mimi O
April 4, 2012 at 11:20 am (12 years ago)Enjoyed the post and tutorial! ~m
Lauren
April 4, 2012 at 2:00 pm (12 years ago)Thank you! I’m so glad you enjoyed it!
Cait
April 4, 2012 at 1:51 pm (12 years ago)That was a great tutorial! You explain every detail so well. I already know which project I’m going to practice this on :)
Thank you so much for sharing a price of your vast knowledge!
Lauren
April 4, 2012 at 2:01 pm (12 years ago)Thank you so much, Cait! :) Glad to share!
MB@YarnUiPhoneAppv2.3
April 5, 2012 at 8:58 am (12 years ago)I”m not not a fan of spray starch…it can burn fabric under the heat of an iron. Better to use Sullivan Fabric Stabilizer spray. Stiffens the fabric temporarily and can be washed away in a heartbeat. BTW, your tips here are great for sewing lingerie!
Lauren
April 5, 2012 at 9:03 am (12 years ago)I had never heard of that spray! Thank you so much for the recommendation- I will certainly check it out :)
Maddie
April 6, 2012 at 7:45 pm (12 years ago)Very simple but informative. What a difference it makes using a zigzag versus a straight stitch. I’m a sucker for anything lacy and feminine so this was right up my ally
Val
April 9, 2012 at 9:12 pm (12 years ago)I have a pair of scissors specifically for cutting away the fabric on back that have a curved part. I’ve never used them but bought them after I took a lace insertion class years ago at Costume College, and stocked up on lace to try it. Now seems a good time to do that. :)
Val