
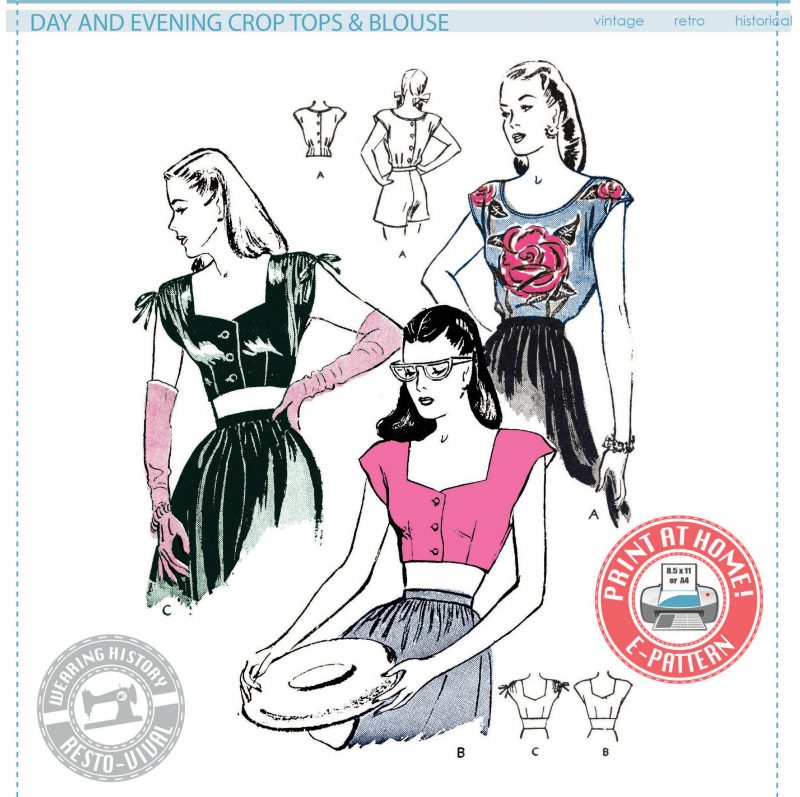
I’ve been sewing View C of the “Lana” 1940s crop top pattern, and I came across a “pattern hack” to share! I made this “Resto-vival” pattern back in 2016. Can you believe it? I can’t!
Side note before we start- this pattern is MUCH simpler to sew in a stable fabric like a cotton. After doing it in a rayon, I would highly suggest steering you in the right direction by choosing a fabric like a cotton or linen, with little “wiggle room”, especially if doing the crop top views B and C.
This post isn’t actually a “hack”, as much as a trick for those, like me, who experience the shoulders slipping off on things cut low in front and in back, no matter how many mock-ups, and no matter what pattern it’s from. This is a combo of taping the neckline and adding a back strap.
While it, apparently, worked for the original 1940s makers, and for several people I know who have sewn this pattern, I find this “low + low” combo will not, ever, stay on my shoulders. If you’re like me, this post is for you!
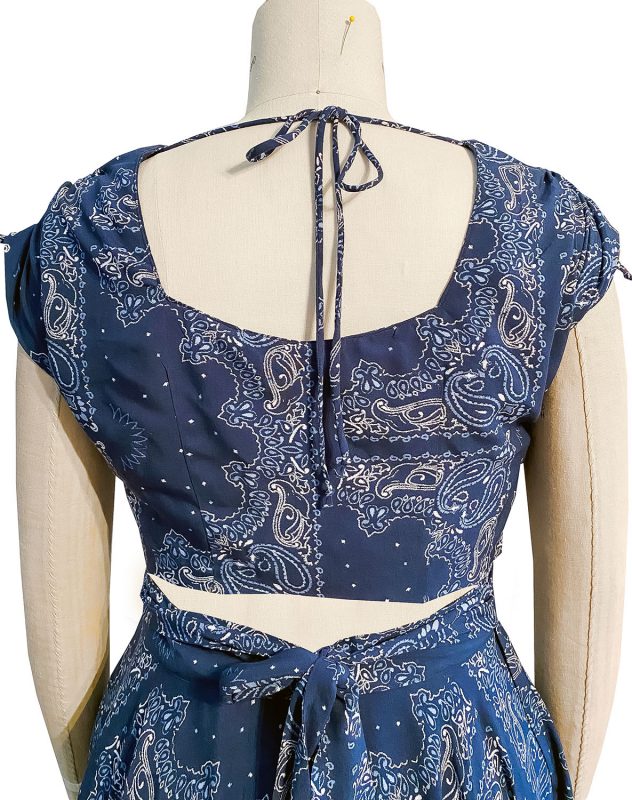
The first “hack” is actually quite simple! Just add back ties!
I wish I could claim I was the genius who thought of this, but it, ironically, came from am Amazon dress I purchased last year that had the “low in front and low in back” combo, just like this pattern. The straps, I thought, were quite clever in their simplicity!
Plus, I find this bias tube straps are ridiculously satisfying to sew. So much so, that I actually made a video for how to make the tube (or cord) when I did the “Harriet” blouse pattern. So I didn’t bother to photograph steps. Just watch the video! Or if you don’t want to make your own cording, you can always substitute matching ribbon. I just, personally, like the matchy-matchy of self-made trim.
When making the ties, cut about a full fabric width of strip on the bias. If you don’t know how to cut bias tape, check out this post by another maker. Terry’s Tips: How to Cut Bias Binding – YouTube
You will want your bias strips to be 1″ wide, by about the full width of your fabric. You want enough length to be able to meet at center back and then make a bow. And don’t forget, the fabric will STRETCH! Thats what bias does! Really, check out the video and it will help you visualize this.
After your cording is made, simply make a knot in each end, or finish the bottom edge by hand stitching it closed. Cut the cording in half so you have two ties of equal length.
Pin the unknotted edge of one cord to the inside of the Lana blouse at the shoulder seam. You’ll want to allow about an inch, so you can turn under the raw edge of the cording. Then secure it to place by hand sewing it snuggly. This will take a decent amount of tension to keep your top up while you move all about, so make sure it’s on there good!
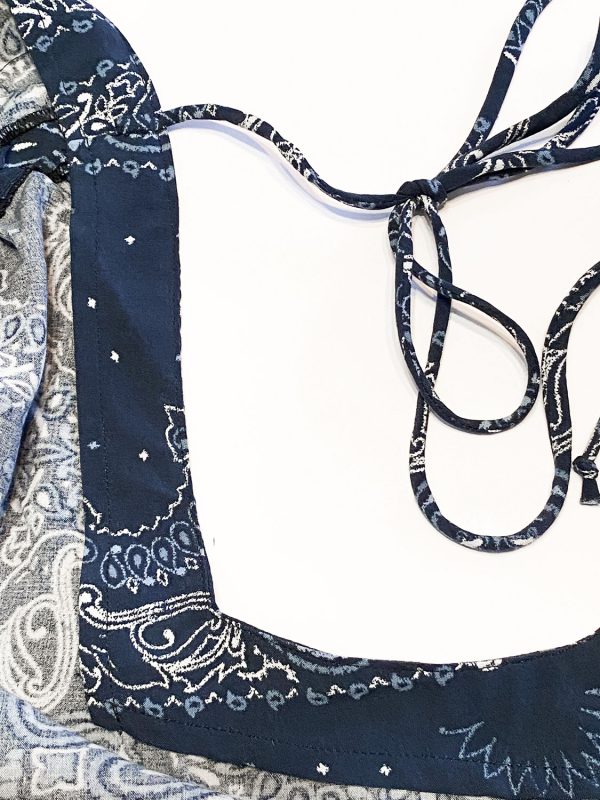
This is what it looks like on the inside.
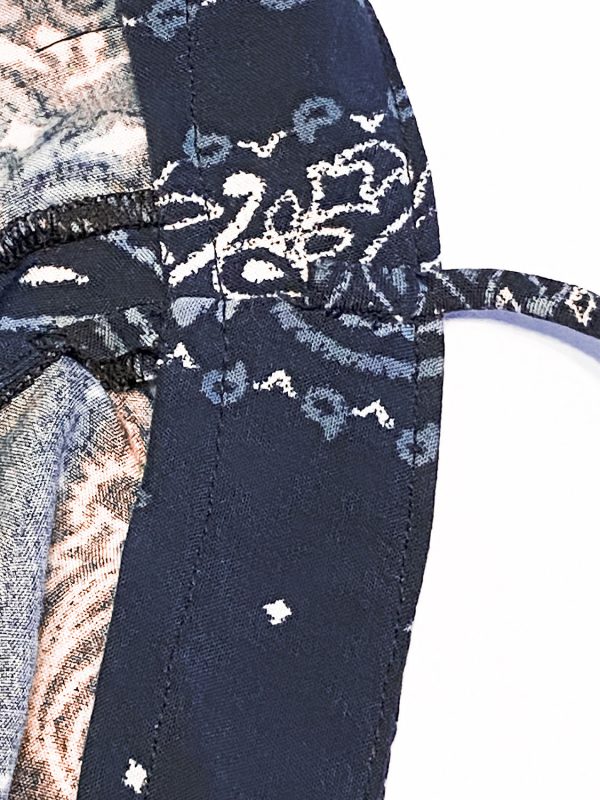
And here’s a close up!
Added bonus that this blouse *will* cover bra straps when you add the ties!
*Edited to Add* A lovely facebook follower suggested Lingerie Straps. These are straps on the inside of your garment that make the garment snap to place around your bra straps. This is a totally period way to keep the garment on your shoulders (In the 1910s and 1920s they even had little pretty pins for this purpose). This will work for most people, unless you deal with bra strap slippage anyways (like me). Here’s a video that will help show how to make lingerie straps (unaffiliated).
Another tip! To help keep your neckline from stretching out, especially if you’ve made this in a wiggly fabric, like I did, make sure you STAY STITCH your neckline, or TAPE it!
Taping necklines is another sewing trick I love. It makes *so much difference* in helping things stay put.
Here’s a video I did for the 1939 wrap dress, but I used the same method for this neckline. You want to mark on your pattern where your seam allowance is, walk your tape with the pattern on that seam allowance line, and mark each “point” where the neckline turns with a pin. Then ease the neck in to fit the tape, using a copious amount of pins to hold that tape in place while you stitch. Unfortunately, it’s another thing I neglected to take photos of while sewing my own version, but watch the video below for a general idea of how it works. Taping it truly did help keep my rayon from going completely out of control.
If you don’t have the pattern yet, you can grab it in my Etsy shop and also on my Website. It’s available in both e-pattern and printed pattern form.
Happy Sewing!
P.S- I did just recently change the color combo on the Lana Crop Tops pattern, so if yours looks slightly different, that’s why! The music note print was replaced with solid pink. <3