
Hello! Sorry for my lack of posting.
I spent 5 very busy days driving up from San Diego area to San Fransisco to attend seminars and a trade expo for my upcoming clothing line launch (more on the trip in a future post), so I wasn’t able to give much thought to blogging! We got back on Wednesday, and after playing catch up I feel like I can finally take some pictures and share another step in the Suit A Long.
So, we’ve covered fabrics, sizing, and how to grade the skirt if you need a different size. Aren’t you itching to get sewing yet?
I thought long and hard about how the best way to illustrate this would be, and I’ve settled on it. We’re using a period pattern to make this suit, so I think a period example that’s close in silhouette would be the PERFECT way to show how it would have been assembled.
Luckily, I have had this 1910s skirt for quite a while, so she’s happy to illustrate for us how she would have gone together.
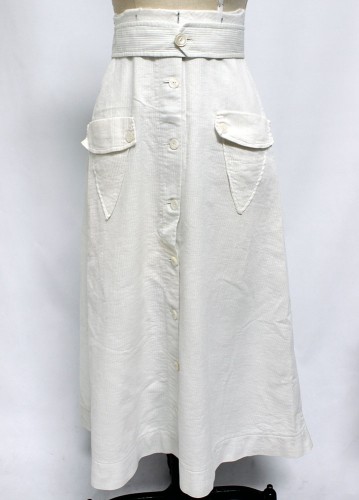
 Just like our skirt pattern, there are four main pieces to this skirt. There’s a front skirt piece, a back skirt piece, an external belt, and an internal belt. Basically if you ignore the pockets, it’s nearly our exact same skirt! But hey, you could always add pockets to yours, too…
You can see that the skirt hits higher than the natural waist. Please ignore the padding and the marks, that’s for me to pad out my form to what I need to be doing and is NOT part of this skirt. But if you look in this picture, you can see that it hits about two inches above the natural waist. You can also see that the belt that we see is EXTERNAL, and NOT ATTACHED all the way around.
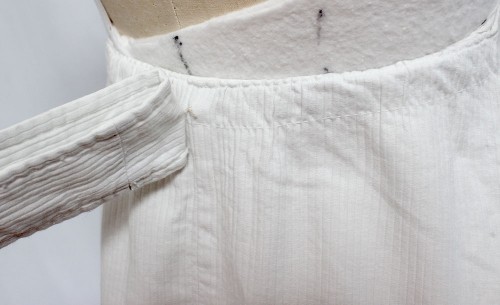
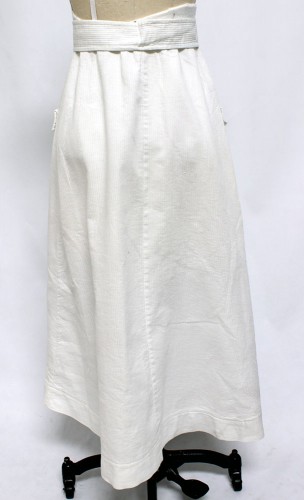
In fact, this particular belt is just attached with a swing tack (or French tack) at center back of the skirt. If you don’t know how to make a swing tack, check out this video on YouTube.
In this close up you can also see the stitch lines for gathering the back skirt to the internal waistband. Ours will have more gathers at the back.
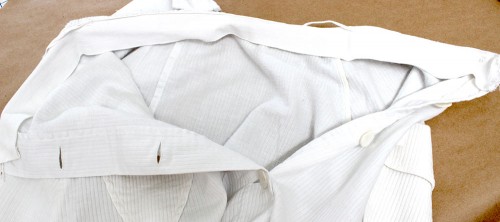
What does the internal waistband look like? Here it is, inside the skirt. You can see that it’s basically just a long, wide piece of grosgrain ribbon. This was most common in the period. In fact, skirts with this type of construction continued in until the mid 1930s, if not later. The grograin ribbon snugs your waist, but it is hearty enough to hold up the skirt and not collapse on itself.
This waistband does not have darts on the inside. In fact, the couple of skirts I have do not have the darts. Our pattern, however, does have darts.
Personally, I’m thinking of leaving the darts out of the interior waistband because I don’t think I have enough of a difference in my corseted waist size to need that extra shaping there. If you have a pretty strong curve in your corseted shape, you may find you need to keep the darts in. The waist size on the pattern is given for the darted waistband, so if you leave them off you may need some adjustments (because without darts the waist size would be bigger). When you make your mock up, test it out and see which one works better for you. Either way, the top of the skirt’s raised waist should fit you snuggly, and not gape. But MAKE SURE TO LEAVE ROOM for your blouse to tuck in and allow room for your petticoat waistbands it you’re making this before you’ve made your underthings.

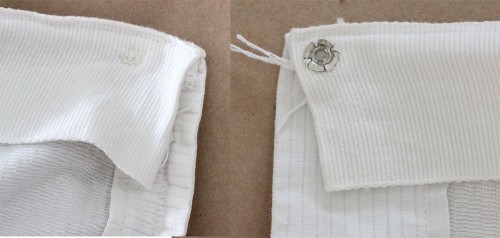
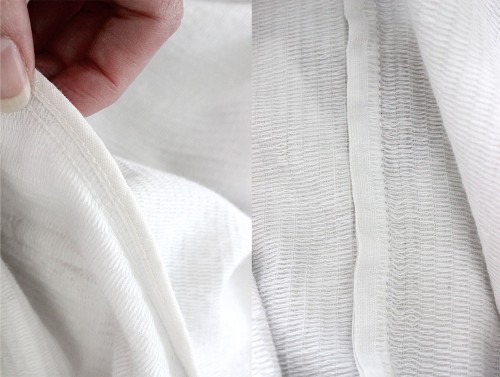
This illustrates how the waistband was attached. Like out pattern, the front skirt is attached smoothly, with no gathers. The back skirt has some gathers that are pulled in to fit the interior waistband circumference.
To do this, stay stitch the waistline on the skirt. Next, press the seam allowance toward the inside (wrong side) of the skirt, so you have a nice fold. After this, run your gathering stitches along the top of the back skirt. Now, pin everything together, matching the top of the skirt to the top of the waistband and pulling in your gathering stitches to fit. Topstitch through all layers, about 1/8″ in from the edge. In the photo above you can see the outside of the skirt, then the inside of the skirt. You can see the stitch line is visible from both the inside and outside, because this stitch was done in one step like topstitching.
What about the center front fasteners? 1/2″ or so is just turned under at front and back. This example has the waistband free below the top, though I have seen some examples where they fasten at the lower part of the waistband as well, to help if hug the figure. When I used to be able to wear this one, I would have trouble with the snap coming unfastened. I’d suggest you supplement a skirt hook and eye for the snap if you’re worried about that happening to you.
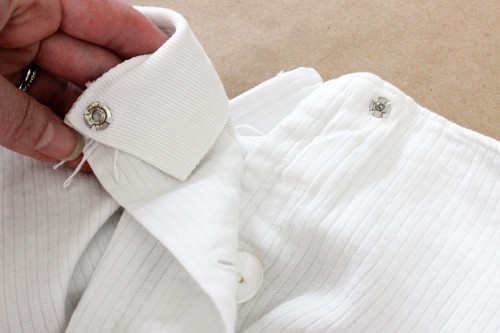
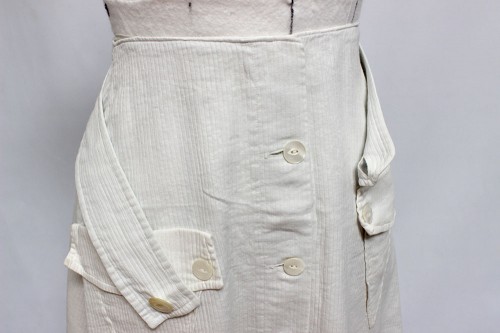
Here you can see how the button lap and the snap work together at the front, just like they will on our skirt. Easier than you thought, right?
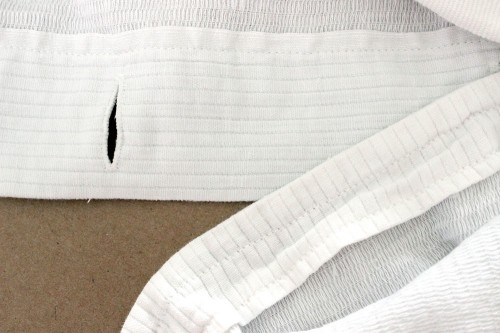
What about that front button lap? Well, you can see it’s simplified. In this original garment the front lap was not interfaced in any way. If you had a lighter weight fabric you might consider interfacing it for added stability to the buttonholes and buttons. But, you see the buttonhole side? It’s simply the selvage edge of the fabric there, not turned under. On the side where the buttons attach, you can see they did turn under the seam allowance and there’s also topstitching near the edge on that side for added stability.
The seam finishes were quite simple. At center back they simply used the selvage to finish the edge. We don’t have a center back, so we can’t do this (the selvage needs to fall on the straight of grain, and our side seams are shaped), but we can do this for the front underlap, like shown above. The shaped seams are finished with a simple stitch (in this case, it’s a chain stitch, but since most of us don’t have chain stitch machines, that doesn’t matter so much). But these side seams were finished as quickly and simply as possible, which makes me think that this skirt might have been readymade instead of home made. It’s sewn, then just finished with a double fold bias binding. If you don’t know how to do this, check out my past post here.
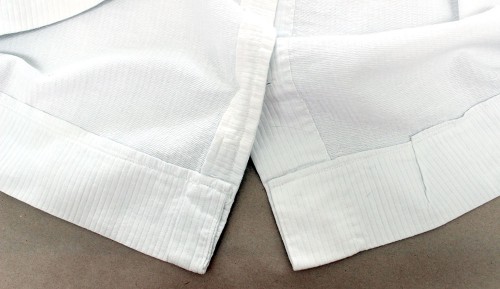
And for the hem? They didn’t face it, like our pattern calls for. Instead, the just turned the hem up on itself like you usually do and stitched it down by machine.
I hope this post really helps you visualize how the skirt goes together! I think once you get to see the “guts” of these period pieces, it makes construction kind of click.
So go ahead and get started on your skirt mock up! And once that’s done, go for the finished article!
If you need any help, or need clarification, please leave me a comment letting me know. And don’t forget, you can ask questions and participate on our Facebook group!