
Hello there!
Smart gal that I was, I took photos of my process as I sewed up my sample of the Sophie Jacket last year! My plan was to show you photos of the more advanced techniques you can use as you construct this jacket. Of course, these can all be simplified, or omitted, if you want a simpler jacket.
The collar is the most difficult part of the Sophie jacket, so instead of starting at the beginning, I’m going to start at this part.
To Fuse or Not to Fuse, That is the Question
There are TWO different ways to do the collar. My sample was pad-stitched. Pad stitching is used to hold the hair canvas to the fabric. It’s sort of like quilting, from the reverse side, and then the stitches are covered up. When the stitches are covering a piece of fabric, the fabric has more stiffness and body to it. Pad stitching is a quite old technique, and most often seen in men’s clothing. Modern tailors often omit this, and go for fusible interfacings (which you can also do, if you chose), but tailoring, especially in periods like the 1890’s, when things were “man-tailored”, can help you obtain a really sharp period look. If you’re looking for a quicker way to assemble this, stick with a heavy fusible interfacing. You really want the body. You can also buy fusible hair canvas, which may be better for this project than store bought regular fusible interfacings.
Prepping the Collar Pieces
Cut your collar pieces from the fashion fabric.
Cut your hymo (hair canvas) from the same pattern pieces.
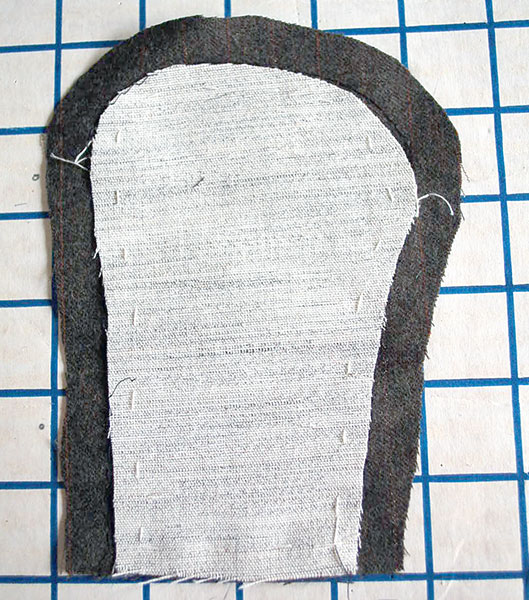
Using a clear ruler, measure and mark 1/2″ from the edge all around the sides and tops of the pieces. Cut off this 1/2″, so you don’t have the excess bulk in your seams. I actually cut a hair more than 1/2″, because you don’t want your stitching when you assemble the collar to catch ANY of the hymo, but be right next to it. On the front collar, this edge would be taped, but I did not tape this edge for the stand up collar.
DO NOT cut the hymo from the bottom edge, where the collar is sewn to the jacket. You need the hymo there for support.
Baste the hymo to your jacket fabric like this:
I use a nice Japanese cotton basting thread. It feels so nice! I’d rather use thread I like, when I have a bunch of handwork to do, than thread I don’t like the texture of.
Now you can either pad stitch these for more body, or set them aside to be assembled if you’re not worried about the collar stiffness. On my sample, I pad stitched all the collar pieces.
The Pad Stitch
You will need-
-nice, sharp hand sewing needles
-waxed tailoring thread OR thread and wax (you wax, then iron the thread between a cloth so it doesn’t get on your iron, and the iron melts it nice and smooth)
-hair canvas and your project
The idea of pad stitching is to go through the hair canvas, catch a thread or two of the jacket fabric, and then come back up. This is done in a single motion- you will work on the wrong side of the piece, and not bother putting your needle all the way through, pulling it, then putting the needle back in, and pulling it back to where you started. That’s too time consuming. One easy motion- in, grab a thread or two, out- I rock it back and forth on my finger, to make it easier, but my finger does get a lot of pin pricks in it by the time I’m done with a big collar or a lot of pieces. People tell me that’s what thimbles are for, but I’d rather just poke myself.
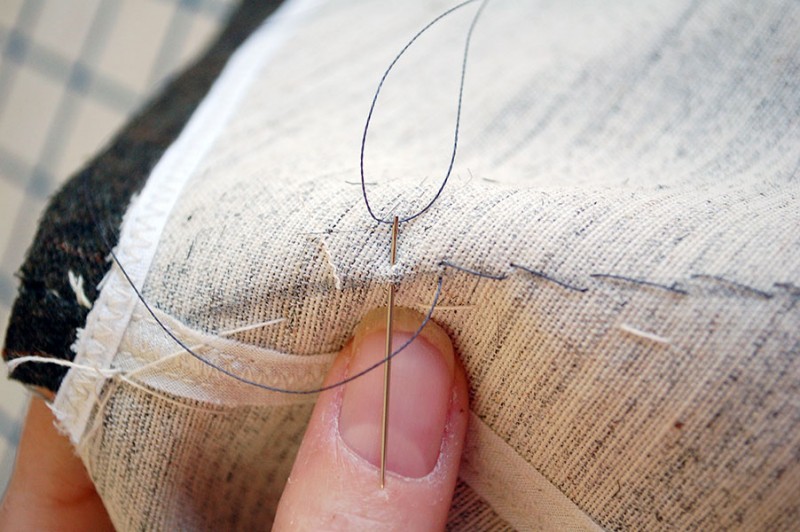
Here you can see, in and out with a single motion. The way it curves over my hand is GOOD. This curve will help you get a nice roll to your collar. If you lat it flat, it won’t roll away as nicely. This picture is sideways and I’m too lazy to fix it, but you can see it. You go all in a row, up the piece, so it forms a little diagonal line. Here I follow the tape at the roll line of the collar.
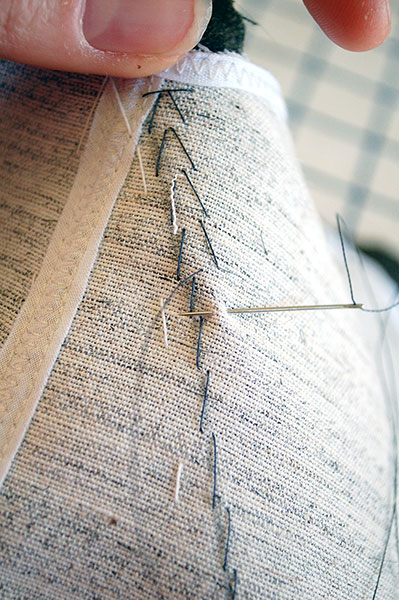
And then back down the other side, so you get neat little “V”s.
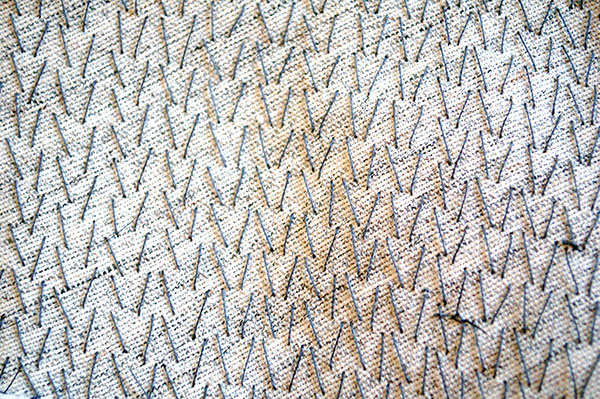
When you’re all done you get a neat look like this. It’s almost a shame to cover it up after all your hard work! This is the larger part of the fold back collar.

Here you can see one of the collar pieces all done and ready for assembly! Notice I didn’t pad stitch all the way into the seam allowance at where the collar attaches to the jacket body. Since some of this might need to get trimmed away, I didn’t want to have to cut away my stitching!
OR you could just fuse it and call it a day. But fusible will never have the final effect of hand tailoring. Both have their pros and cons.
That’s it for this time!
Next time I will show you how to assemble these little collar pieces to make the upper collar that goes around your neck.
Krisome
January 16, 2014 at 2:42 am (10 years ago)A small (and possibly stupid) question about pad stitching, as I’m hoping to try it out myself one day – what does it look like on the underside and just how visible is it?
Lauren
January 17, 2014 at 4:49 pm (10 years ago)Not a stupid question at all! It should be nearly invisible from the outside, because you’re only catching a few threads. I suggest a fabric with a bit of a fuzzy texture to it if you do pad stitching. I know there’s a technical term for that, and I can’t think of it ;) But it’s MUCH harder on something like a wool twill or gaberdine. I usually just skip it if I’m not using a fabric with a bit of a texture, because it usually shows more than I like.
Ikti
January 16, 2014 at 4:01 am (10 years ago)…cause you take only a few thread of the jacket you will see nothing..is nearly invisible :)
Siri Andersen
January 16, 2014 at 6:20 am (10 years ago)I really like construction posts! I can’t wait until I am skilled enough to make this jacket :)
wundermary
January 16, 2014 at 10:38 am (10 years ago)I’ve always wanted to try hand tailoring techniques. I really enjoy hand sewing and embroidery, so, I think I’d enjoy this. Thank you for the inspiration!