
In this post we’re going to focus on the upper portion of the collar, which is probably the most complicated of the whole jacket pattern. After you have this down, you’re home free!
If you missed the first post, on pad-stitching and hymo, you can find it here.

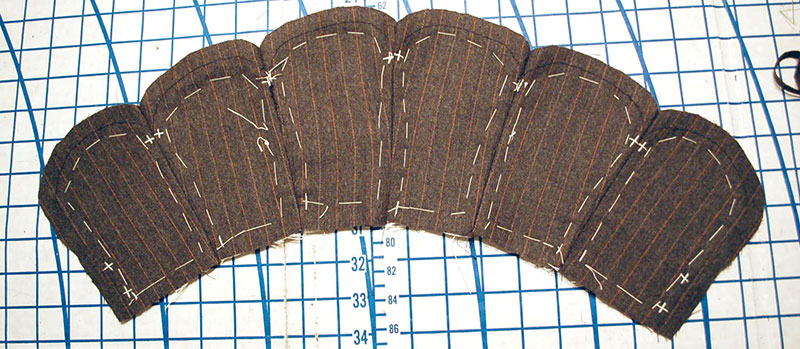
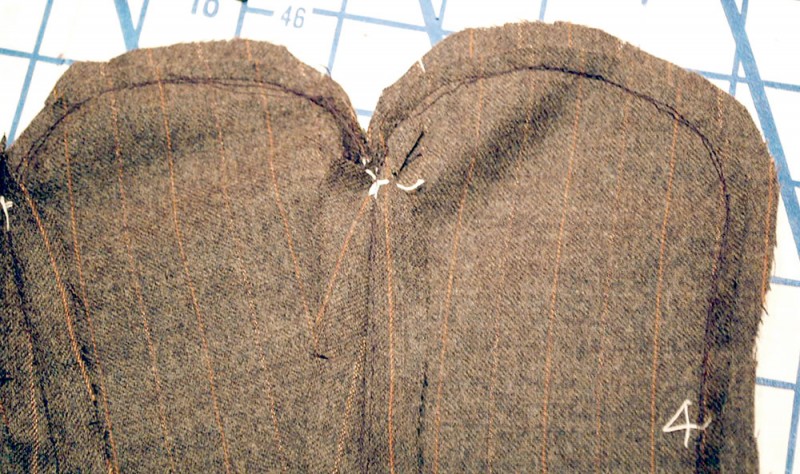
Assemble all the collar pieces together, matching the notches. Don’t catch the hymo! And stop at the dots, leaving the top edge free. Press these seams open.
This is what it looks like from the back side. My basting is still in, as you can see.
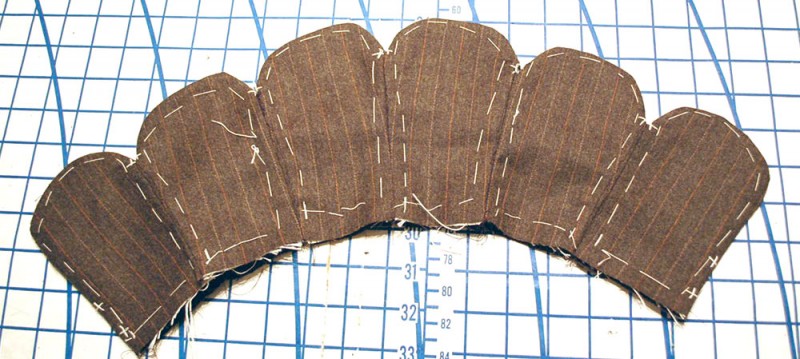
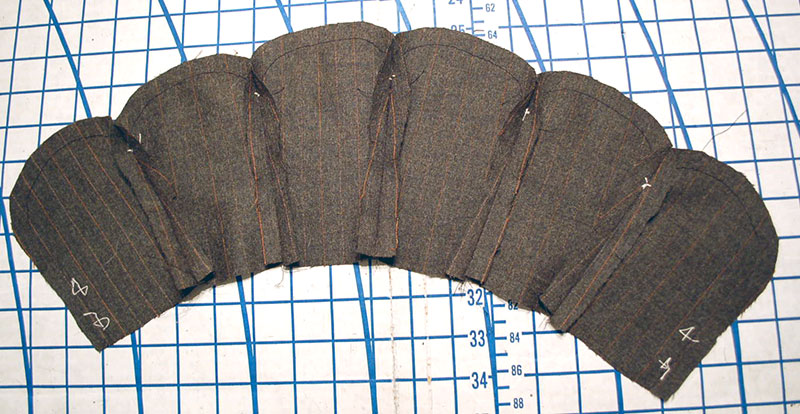 Assemble the collar facing in the same way, leaving free above the dots. You can see here that I had thread marked where to stop my stitching at the top pieces, and also the placement for the hooks and eyes. It’s a good idea to do this on yours, too.
NOW, the tricky part. I didn’t take as many photos as I should have of this process, so if you need help, please comment and I will make a mock up of the collar as I am able, to walk you through it further.
Put your collars right side together. The collar with the hymo, and the collar facing. The hymo should be facing you. Match all your little dots at the top of where each piece joined, where you stopped your stitching.
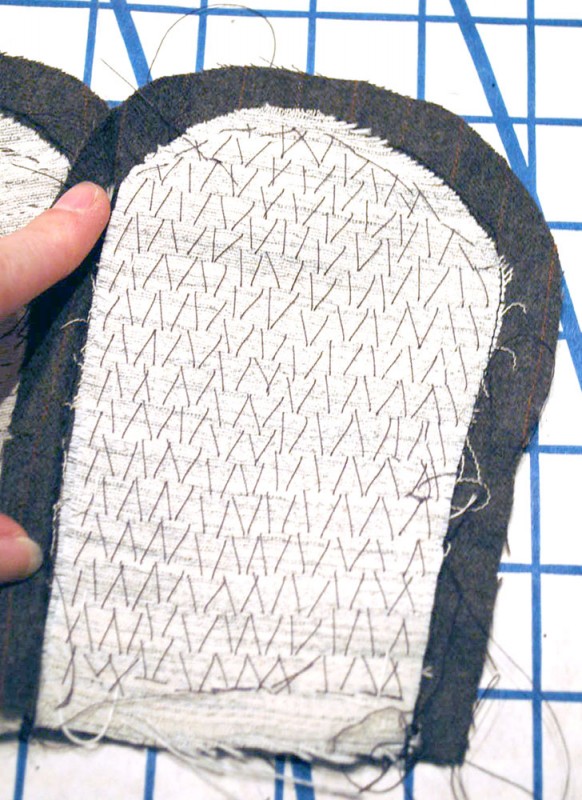
Start at the front, and stitch the collar and collar facing together, all the way around to the top dot, where you stopped your join between the collar pieces. All seam allowance should be pushed AWAY, from this seam, so you can get in there without any bulk. Notice my finger is holding it away from this piece, so you can see what I mean. Back stitch.
Now you’re going to do the same, around the top of the next piece. Push the seam allowance toward where you just stitched, so you only have two layers to go through, do the curve from that dot, to the next dot, making sure that seam allowance is pushed away also. You continue in the same way, all around the top of the collar, making sure that you aren’t catching any extra seam allowance, because that creates extra bulk and won’t make our scallops so nice and flat.
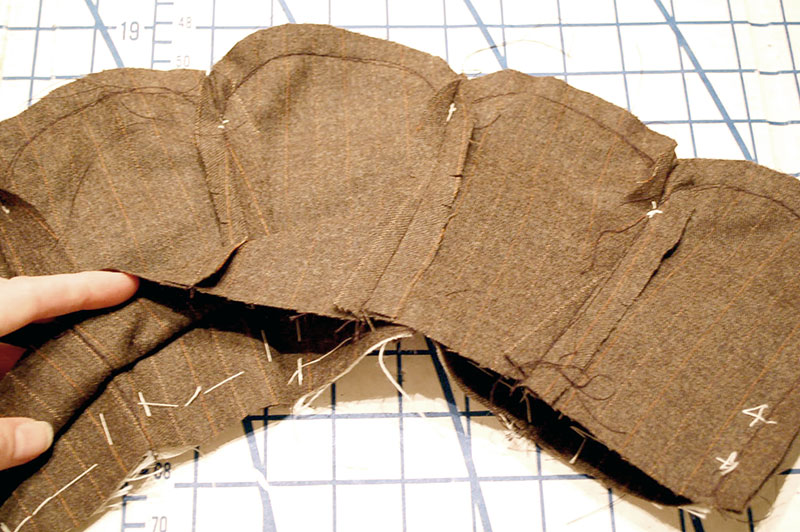
In the end, your piece should look something like this. Notice my seam allowance between all the collar pieces are free, just the top edges are sewn together.
Now, clip, clip clip, and grade, grade, grade those seams! You don’t want ANY bulk. Of course, be careful not to get into the seam allowance, or to get too close so that it will fray, but you’ll need to clip pretty close to get those sharp little points of where the collar pieces join.
Now, flip the collar right side out. If you need to go back in and trim more, you should know because it will either be too bulky, or it will have pull lines at the seam joins. This is what your collar should look like, after you iron it. Some of your little stress lines MAY steam out, but not the big ones, so make sure you clip well! If you have a “clapper” to press with, it’s a good idea to use it now. Use lots of steam! Wool likes steam.
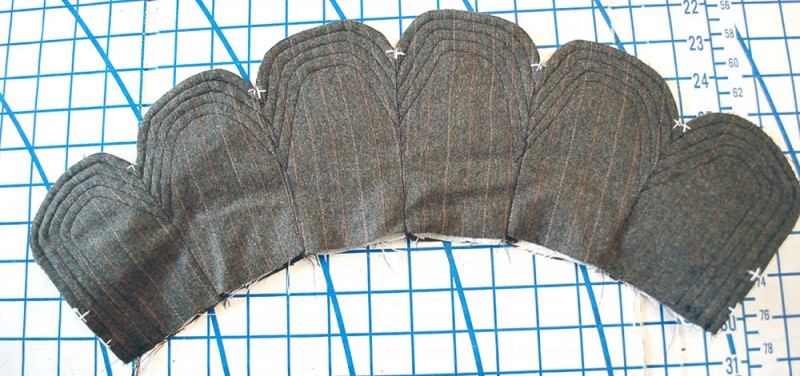
You may want to do your top-stitching now. The topstitching gives the collar even MORE body, so you’ve got extra support with hymo, pad stitching, and top stitching! There’s pros and cons to doing it now, vs doing it after the jacket’s done. I actually had trouble matching my stitch lines once I added topstitching to the front of the jacket, so I may try topstitching last next time.
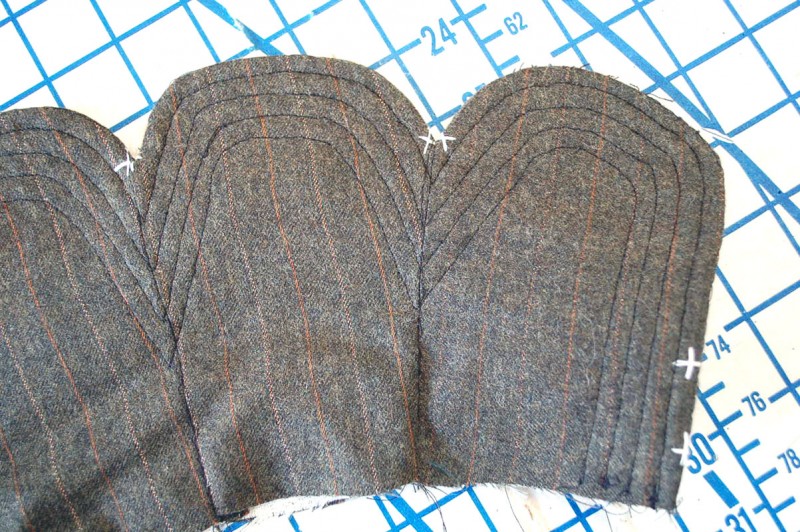
And here I got lazy! I should have drawn my lines, but instead I just went a sewing machine foot’s width between stitches. Some got kind of wonky. Whoops? But you really can’t tell if you see the finished garment anyway (and if anyone gets close enough to tell, they’re kicking distance ;) )
That’s it for this time! See, that wasn’t so bad, right? That’s the worst part! If you’ve got the collar down, you’re golden on the rest of the project!
Laura Mae
January 18, 2014 at 7:31 pm (10 years ago)“Kicking distance” – I love that!
Siri Andersen
January 19, 2014 at 3:37 am (10 years ago)Some day I hope to master this jacket, until then I love your construction posts!
Thank you for doing this ;)