This post is continuing on how to bind edges with one step bias binding. If you missed the previous post, you can find it here.
Binding Curves
In the apron pattern these tutorials were made for, there are two somewhat more extreme curves for the heart pocket. In this tutorial I will show a method to make binding these curves easier. Of course, all these tutorials can be applied to a variety of dressmaking or crafting circumstances. In fact, the first time I learned this technique was when I was being mentored by the milliner at the Opera where I worked. She used this method both for bias binding and for shaping petersham ribbon for the inside of hat bands. This method might take a few practices, but once you’ve got it down it’s so much easier than trying to ease in a lot of bias edge into a small space! The problem with pulling the bias tight to fit is that when it’s sewn down the piece will not lay flat. It will force the fabric to pull in and “pucker”. You can use this same technique of pressing your curves to make sewing easier for bias binding, bias facings, and petersham ribbon.
For binding edges with curves, you want to make sure to fit the bias, without tension or pulling, to the largest curve. In this case, the longest or outside edge of the curve to be bound is at the cut edge. If you were binding an curve that goes inside a garment (like an armscye or a scooped neckline) your longer or outside part of the curve to be bound would be at the seam allowance line, where you attach your binding, so you’d do this process in the opposite way and make the curve in the opposite way. But I’m getting ahead of myself. Hard to teach this without being in person, but here ‘goes ;)
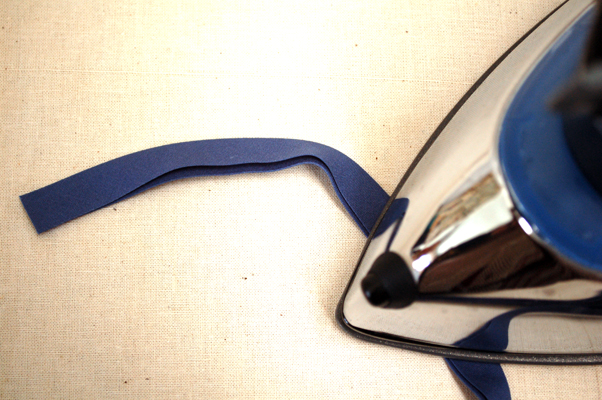
First, take your bias tape, just like in the previous post, with the longer edge of the fold to be on the WRONG side of the fabric. To ease around this curve we are going to first shape the bias tape with our iron and some steam. I have the iron sitting on top here so you can see what sort of curve we’re going to try to get, with the outside edge of the curve being the fold (where it will snug into the outside of the pocket piece.) If you were doing a neckline or armscyes, you’d do this the opposite way, with the outside end of the curve being the open end and the fold being the inside end of the curve (if you were to measure each side of the bias, you would find one is shorter in measurement than the other).
Click on the link below to keep reading! If you don’t see a link you’re in the right place :)
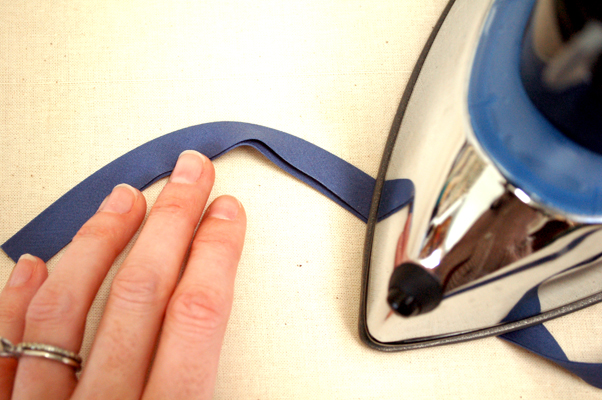
You’re going to be VERY careful (don’t burn yourself with the iron or the steam!) and use the point of the iron. You create a sort of tension with one edge of the bias using your hand to guide the bias, and the other hand to create pressure on the iron, and slowly press the bias tape into submission, being careful not to create folds or creases in the bias tape.
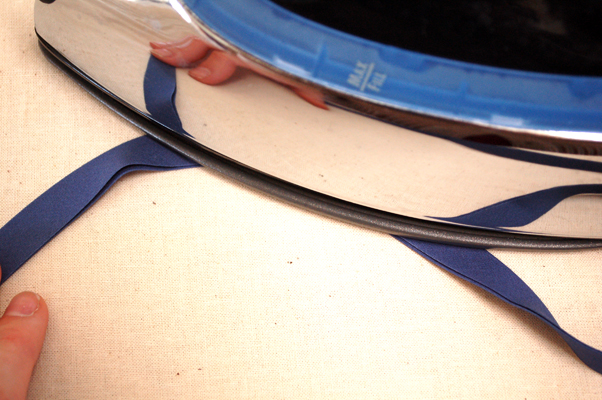
After I get my curve started I’ll often use the longer part of the iron to help press it in place, then keep moving down the bias tape, using a combination of these two pressing techniques.
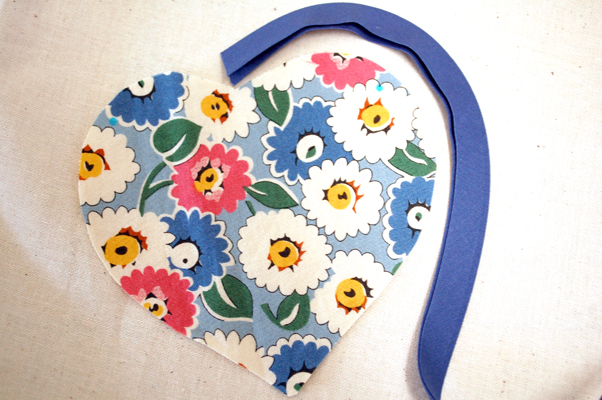
Once I’ve got a pretty good curve going on my bias, I’ll compare it to the piece to be bound. Here you can see it’s pretty close, so I kept this piece as is. The little extra I’ll have to ease in is nothing in comparison to what I would have had to ease in before pressing!
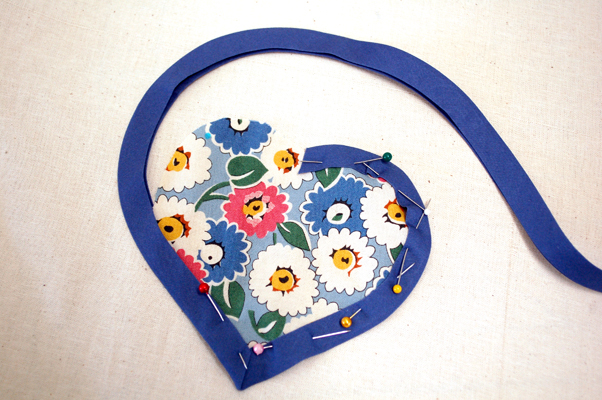
Here I have pinned the curve to place. At the bottom of the heart I’ve bound it in a similar method we learned in the last post, on mitering outside edges. After I got my point pinned to place I went ahead and shaped the other side of the curve. I think I actually moved the pin after this picture was taken to be closer to the point so I had more leverage with the bias.
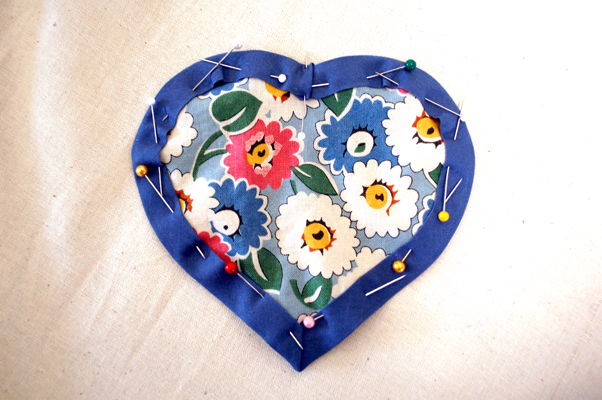
Here you can see the bias pinned to the heart pocket. Don’t forget to fold under your bias to finish the edge at the join! The excess length of the bias binding was cut off AFTER I got to the end of working my way around the piece and a little extra was left on to fold uuder to finish the edge. If I did this again, I might have started at the bottom point, since it was rather fiddly to get the bias to fold in at the top point ;)
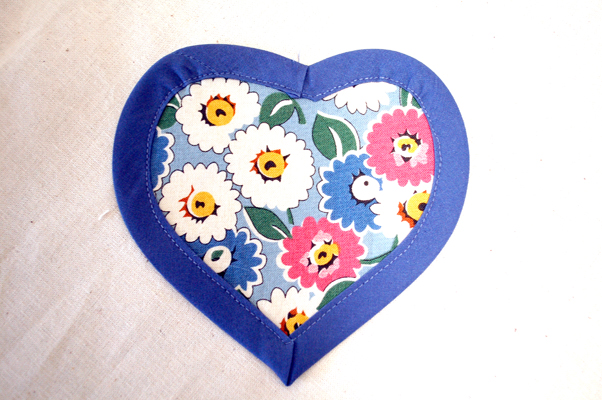
Stitch on your bias, through all layers at once. Go slowly, removing pins as you go. When you get to the bottom point pivot your pocket so the unsewn edge is facing you and then keep stitching! When you’re done don’t forget to give it one final press to make sure everything’s laying nice and smooth and flat before attaching it to your apron (or whatever you’re making using this technique!)
Remember, practice makes perfect, so don’t worry if you don’t get it right first try! And if you’re having problems with your ends, you can always selvage your piece by adding a bit of trim or a button to cover it. Don’t toss it just because the end isn’t perfect- you can always try again!
Stay tuned for a few more bias tutorials coming up on the blog. Hope you all had a great weekend!

MademoiselleCoco
December 13, 2011 at 12:09 am (12 years ago)I don’t know how to sew but this is such a lovely and easy way to learn ! x x x
Lauren
December 14, 2011 at 8:32 am (12 years ago)Thank you, Mme Coco!
Heide
December 13, 2011 at 9:08 am (12 years ago)I haven’t thought of pressing it before sewing it on. Thanks for the tip!
Lauren
December 14, 2011 at 8:32 am (12 years ago)You’re very welcome, Heidi :) Glad to help!
Beth
December 13, 2011 at 8:03 pm (12 years ago)I tried to comment yesterday, but my stupid work computer lost the comment. Drat!
Sunni just did a similar tutorial about pre-curving petersham ribbon, like you mentioned. You girls are geniuses! I would have just struggled and struggled with this.
http://www.afashionablestitch.com/2011/sewing/gettin-my-fix/
Lauren
December 14, 2011 at 8:32 am (12 years ago)Ooh! What a great tutorial! I had missed that one. Thanks for sharing!