Continuing the how-to tutorials on bias binding and bias facing, here is how to use bias tape to face the outside corners. You can find the intro to bias facing here, and you can find the tutorial for finishing outside corners with bias binding here. We will be building upon techniques already learned in these tutorials, so if you feel like you’re missing out on something go back and read the previous posts in this how-to series.
Facing Outside Corners with Bias Tape
This technique is not actually used in the 1940’s apron pattern that prompted me to do these tutorials, but for future reference I thought it would be a good idea to include this, in case you are following a pattern that needs outside corners faced.
For this tutorial I am using contrast thread so that you can see my stitching. Don’t be like me. Use thread that matches the fashion fabric of your project!
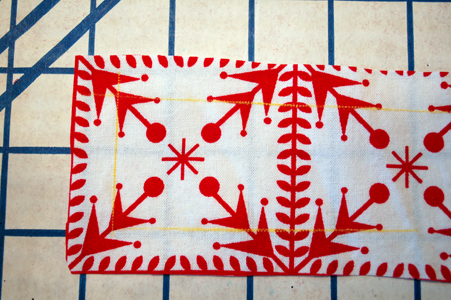
First step to to is to figure out your seam allowance. We’re pretending the seam allowance of this hypothetical project is 1/2″. Draw your seam lines in 1/2″ from the edges to be bound using a clear ruler and a method of marking that will come out of my fashion fabric when I wash it. Important! If you are making a garment using a fabric that will not be washed by machine (like dry clean only materials) you will not want to draw on your seam line on your fashion fabric. Either pre-cut your edge or draw the line to match up with the cut edge of the bias binding, as described in a previous post. For all following instructions, substitute either method for the one that shows drawing on seam allowance lines.
Click the link below to continue reading. If you don’t see a link you’re in the right place!
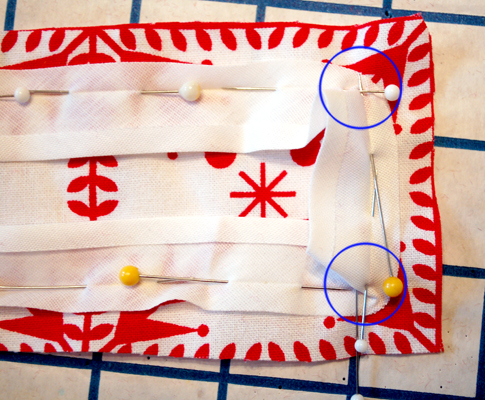
Like we did in the last post, we’re matching our two stitch lines together at 1/2″ from the cut edge of the project. Leave tails on the bias at the beginning and end of your project- you can always cut the extra bias off later! Go along your straight edge and when you get to the corners you need to turn, make sure the STITCH LINE (the folded crease in the bias tape) matches the POINT of your drawn stitch line on your fashion fabric. Don’t pay any attention to where the bias folds, or what the cut edges are doing since you’ve already tamed them to where they need to be with pins. The most important part is to get those corners of those stitch lines matched up, as you can see above in the circles. Mine’s got a little bit of a tuck there (again, don’t be like me ;) ). It is best to not have that tuck, to make it nice and smooth, and get your line to pivot at that point just right.
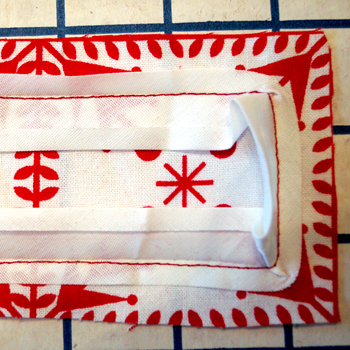
Stitch the two pieces together following the stitch lines and pivoting your stitching at the points. I find it best to put the machine into “needle down” position at that point, then turn the piece to be facing towards you, then continue stitching.
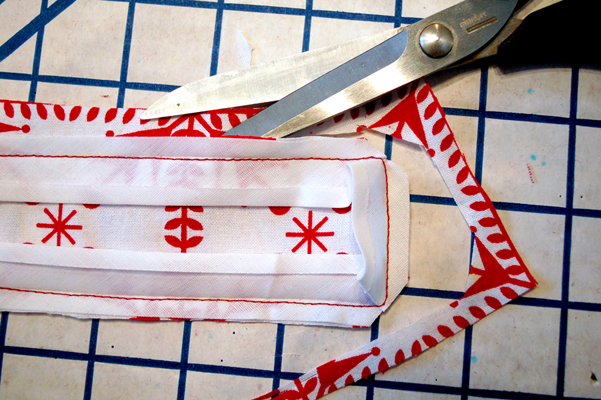
Next, clip off your seam allowances to match. See the corners of the piece? You can see I trimmed them at an angle. When you turn the piece it will make the corners not as bulky. Do this for any facings (bias or otherwise) you do which have corners, it will make them lay nice and smoothly!
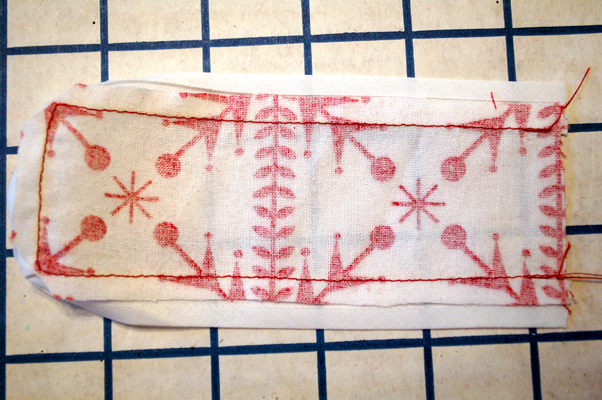
Press this piece, similar to the method you used in the last post, with all seam allowances pointing away from the fashion fabric, towards the bias facing.
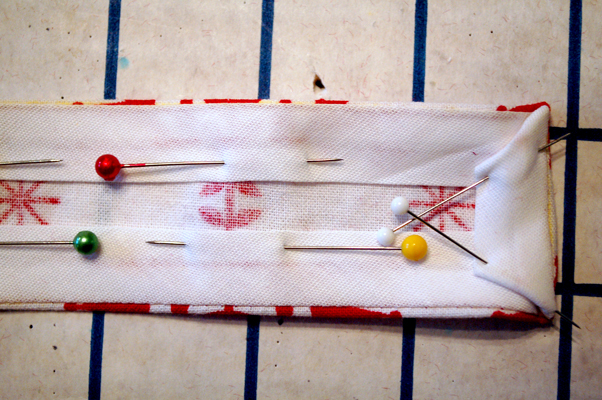
Then you turn the edges in and press again. Remember to give a tiny roll to the edge of the fabric (just enough! Like 1/16″, but not more). Notice the folds of the bias facing are at an angle where they fold back to bind the end of the piece. If you can get your bias tape to fold at an even sharper angle, so the edges of the tape match up flush with the fold, that would be better. The most important thing is that the bias lays flat and smoothly, and is not visible from the outside of the garment. If you can’t get a sharper angle, don’t worry. I don’t think the bias facing police are going to be checking on you ;)
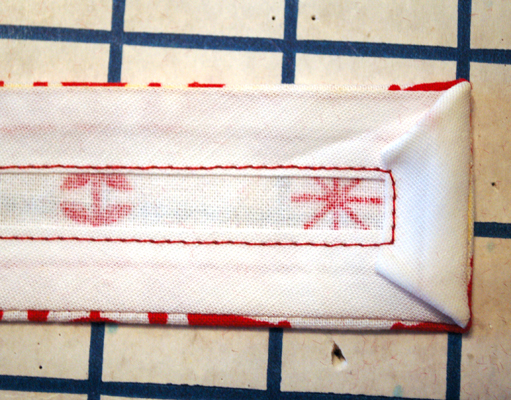
Now stitch on your bias facing, close to the fold, and pivoting at the corners, in a continuous stitch. Where your extra flaps might be at the folds you will want to tack down by hand. Doing this will help the facings stay in place and keep them from getting caught on things. Give it a final press and you’re done!
There we go! Outside edges! Next up we’re doing inside curves, which also aren’t used on the apron pattern, but are handy when doing armholes or scooped necklines.

Mrs. Hude
December 15, 2011 at 5:19 pm (12 years ago)I know that they’re a lot of work, but a big thanks for these tutorials, Lauren! It is neat to learn tricks that I would have never thought to do! And they are very clear and concise. Kudos!
Lauren
December 16, 2011 at 8:36 am (12 years ago)You’re very welcome, Addi! And thank you for the compliment and encouragement! *hugs* Miss you!