We’ve got bias binding under our belt, so now we’re moving on to bias facing. If you look at the 1940’s Apron Pattern sample photos, the one done with bias facing is the one in red and white. Unlike the blue apron, where you can see the binding externally in a contrast blue, kind of like a trim, the red and white apron has the facing tucked to the inside of the garment, invisible from the outside.
Bias Facing- The Basics
Bias facing can be made either from store bought pre-packaged SINGLE FOLD bias tape, or can be made from your fashion fabric. Most often times in vintage clothing it will be made to match the fashion fabric and cut from scraps. You would use the bias facing to finish edges like necklines, armscyes of sleeveless garments, the bottom of sleeves, or even a curved wrap skirt (like the Sunkissed Sweetheart pattern, where the top and the skirt are both finished with bias facing). In fact, the more you get into vintage sewing the more you’ll find that construction calls for edges to be finished with bias facing! In pre-1950’s patterns, as mentioned previously, it was more common for patterns to call for bias facing than to include facing pieces. It’s a great skill to have under your belt.
With all instructions given for marking make sure you use a fabric pen, chalk, or marker that will come out of your finished garment! Test it on a scrap of fabric before construction to make sure!
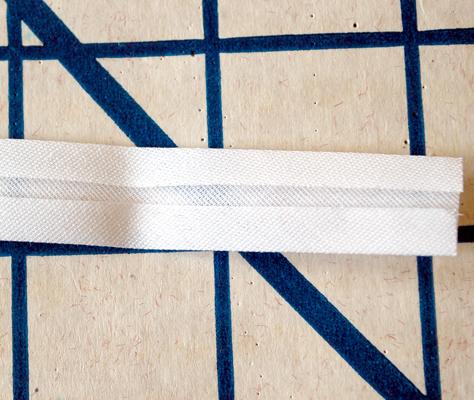
For this tutorial we will be using store bought single fold bias tape. You can apply the same methods for self fabric bias tape made from fashion fabric after you cut your strips and press them (which we aren’t going to cover in this tutorial). Above you see the single fold bias tape out of the package with the wrong side facing up so you can see how it’s pressed. I always wondered why it was called single fold bias tape when there’s obviously two pressed edges ;) But with the double fold bias tape, like you saw in the bias binding tutorials, you basically get one of these strips that’s then pressed in half lengthwise. So for bias facing make sure you get the single fold. For this apron we use 1/2″ single fold bias tape.
Click the link below to keep reading. If you don’t see a link, you’re in the right place!
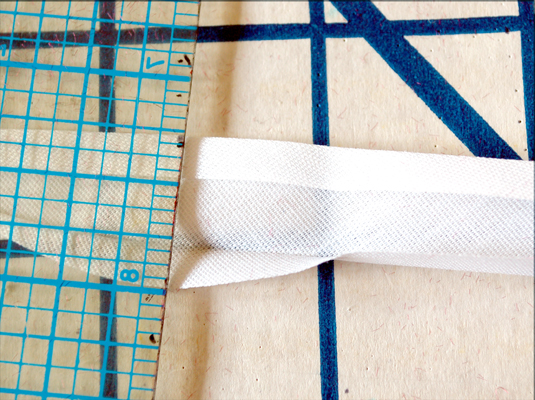
Here I have the bias tape opened with the ruler. See that fold line on the inside? You are going to use that for your stitch line guide. The standard for bias tape is 1/4″ seam allowance. Since the seam allowance on our pattern is 1/2″ we will need to make sure we finish the apron edge 1/2″ from the cut edge.
The first way to prepare your edge, which I didn’t photograph, is to pre-cut 1/4″ from the edge you are going to bind before you add the bias tape. Use a clear ruler and measure in 1/4″ from the cut edge you are going to bind and draw yourself a line. Then cut that 1/4″ off using the line you drew as a guide. When you attach the bias binding you will match cut edge to cut edge. The second way we are going to show below:
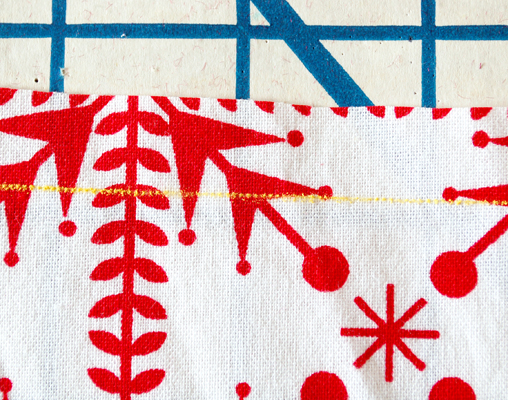
I forgot to take a photograph of this as I was constructing the apron, so I had to substitute the contrast fabric here. In reality, this should be the same fabric as the other images ;) Above we showed the 1/4″ fold of the bias tape that you use as a stitch guide. If the edge you’re binding has 1/2″ seam allowance, and you don’t want to pre-cut the edges, you are going to measure in 1/2″ from the edge. Here I have drawn a line, which is your apron stitch line. That line should match up with your stitch line (fold) of your bias tape.
Alternately, you could draw a 1/4″ line, like described before, and match up the bias tape cut edge to the 1/4″ line. Basically, what you want to do is make sure the bias tape cut edge is in 1/4″ from the fabric cut edge. Important! If you are making a garment using a delicate fabric that will not be washed by machine (like dry clean only materials) you will not want to draw on your seam line on your fashion fabric. Either pre-cut your edge or draw the line to match up with the edges, as described in this paragraph. For all following instructions, substitute that method for the one that shows drawing on seam allowance lines.
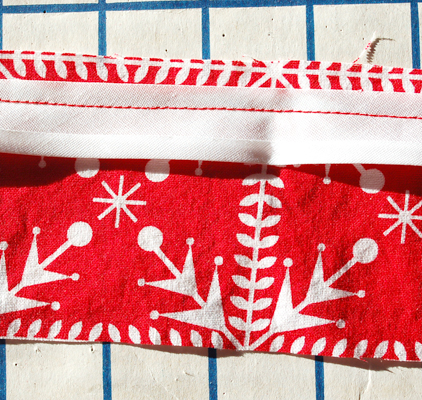
Here you see the bias tape on top of the fashion fabric, right sides together. Notice how the bias tape cut edge is in 1/4″ from the fabric cut edge. You stitch inside the bias fold, using the pressed fold as a guide, as you can see in the photo above.
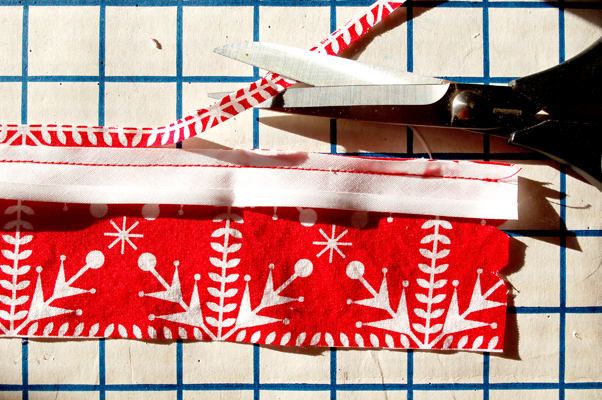
Next you cut your seam allowance down to match. “Wait a second,” you might say, “I thought trimming the seam allowance was an option?”. Sorry, gotta trim them sooner or later. If you don’t trim the seam allowance off before you finish your edges your fabric cut edge will match the finished fold edge of the bias on the inside and when you wash it you’ll get all sorts of little threads peeking out everywhere. No one wants that, right? More work now, less thread trimming later ;)
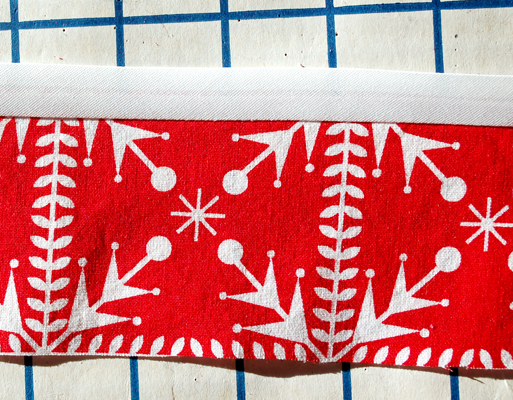
Next step is to press the bias fold and seam allowance up, like shown above. You want all the seam allowance and the bias to be going in the same direction. If I was finishing a garment like a blouse I would now run a line of stitching VERY close to the line where the fabric meets the bias, on top of the bias tape to secure the seam allowance all in the same direction, away from the body of the piece. That helps tame the seam allowance and gets your finished edge to lay nice and crisp. But right now, since it’s just an apron, we’re going to skip that step.
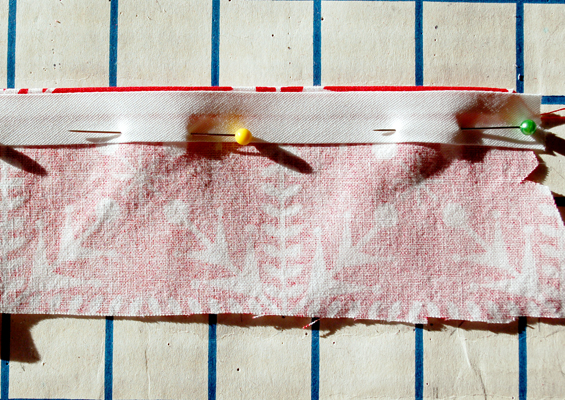
Back to the iron! Press the bias and all seam allowance to the inside of the garment. You can see in the photo above that I’ve got a teeny bit of a roll of where the fashion fabric is peeking through. That’s a good thing. That teeny little roll of fabric means that your facing will not be visible from the outside of your garment. Don’t add too much of a roll to the inside, though, or your pieces will not match up correctly. Just a smidge… say 1/16″. Pin your bias facing down, nice and smooth, on the inside of your garment.
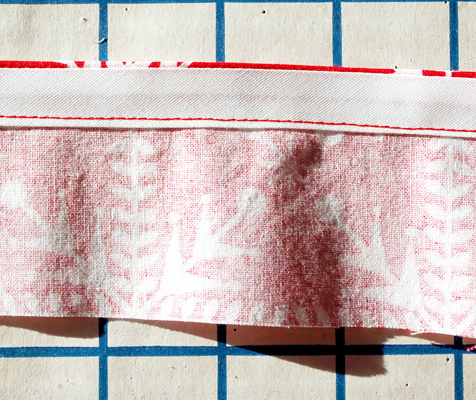
Now stitch down your bias facing close to the bias fold edge. Don’t forget to use a color that matches the outside of your garment! Since this is an apron (aka a useful object) I’m not stressing about the machine stitches being visible on the outside. If this was a blouse or garment, or if I wanted to get picky, I would stitch down this edge by hand so the stitching would not be as noticeable. If you’re a rick rack fan and you’re making a garment like this, an option would be to add trim on top of your machine stitching to cover it.
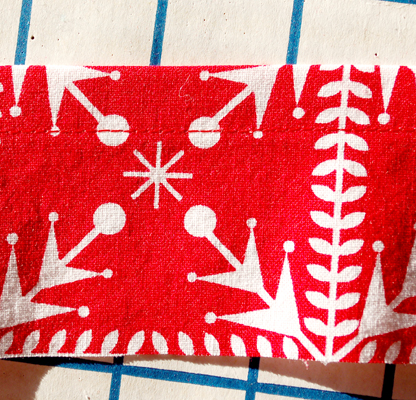
The last photo we see the edge we just finished on the outside (right side) of the garment. Ta Da!
So there we go! Basic bias facing. Next up we’ll go over corners, using the previous posts on bias binding as reference. Only a post or two left, then on to regular non-tutorial blog posts :)

Debi
December 14, 2011 at 2:31 pm (12 years ago)I LOVE all these posts! Thank you!!!!
Lauren
December 15, 2011 at 8:47 am (12 years ago)You’re welcome, and thanks!
Summer
December 14, 2011 at 3:23 pm (12 years ago)Thanks for the tutorials, the corner treatments are especially instructive. I used unfolded bias strips to face a vest, sewn the way you demonstrate. It’s a costume piece, though, and doesn’t get much wear.
Lauren
December 15, 2011 at 8:49 am (12 years ago)Sure thing! Glad to help! :)
Lauren R
December 14, 2011 at 5:24 pm (12 years ago)My favorite way to face, well, everything! Bias <3 best stuff ever
Lauren
December 15, 2011 at 8:49 am (12 years ago)Ditto! Prepackaged bias tape was one of the best inventions ever.
Maria
December 14, 2011 at 8:04 pm (12 years ago)Thank you so much for these tutorials! I am your customer on Etsy and learning to sew, so these posts are invaluable to me.
Lauren
December 15, 2011 at 8:50 am (12 years ago)You’re welcome! I’m so glad they’ve been useful to you :)
Jody
December 15, 2011 at 5:21 am (12 years ago)Hi Lauren,
I’m loving your tutorials. I’ve always had trouble with corners and curves and now, thanks to you, I’ve got it mastered! For hem facings I’ve always used a rayon tape (HugSnug). Is there an advantage to using a single fold bias binding, like you just demonstrated, over a “non-fold” type rayon tape?
Thanks for your tips and inspiration!
Lauren
December 15, 2011 at 8:44 am (12 years ago)Hi Jody!
Thanks for the comment. I’m glad you’ve found these helpful!
Rayon tape is perfect for hem facings! It’s the more vintage thing to do for hems. Store bought bias binding works, too, but it can be a bit bulky, while the rayon is drapey and smooth enough to lay nice, especially in more delicate fabrics. It’s also only one layer, so not folded like the tape, so you’ve got less bulk.
I use rayon seam tape, personally, for the insides of garments to finish edges if I’m not serging them. Laura Mae just posted an excellent tutorial on her blog Lilacs & Lace. http://lilacsandlace.blogspot.com/2011/12/how-to-apply-seam-binding-tutorial.html I’ll also use it for garment hems.
I use store bought bias binding sometimes on the inside of garments, but only garments which are well structured, like jackets or Victorian bodices. Like I mentioned before, it doesn’t drape like rayon tape, so it’s not good to use for binding garments with a drape.
If you make your own bias tape, however, from your fashion fabric, it’s still nice to use on the inside of garment edges. Let’s say I’m making a blouse. I’d use my bias tape made from my fashion fabric to finish the edges of my sleeves and my neckline (often in vintage patterns it calls for bias binding to hold on a collar at the back neck instead of a separate facing piece). I’d then use rayon seam binding to finish my inside seams like the sideseams, etc. Sometimes rayon tape can be a bit hard to bind the armholes if you have attached sleeves so I’ll use bias binding for those as well. If my blouse was sleeveless I’d use self made bias tape from my fashion fabric.
So basically, if I’m making a nice garment, and I’m finishing an edge, I use fashion fabric bias tape. If I’m binding the inside seams, or doing a hem, I’ll use rayon seam binding.
Purchased Bias binding and tape are great for more useful objects, like crafts or household items (like aprons), or even for pajamas or housedresses. Cotton items like these which were worn around the house often had bias binding done as both a contrast trim and as a way to bind the edges. It was not as common to use pre-packaged bias tape for trim or edge binding on items that would be worn outside the home. Of course, now that I’ve said that, I’m going to find an article somewhere that touts that as being the latest fashion ;)
Great question! Hope that helps!