
Hi everyone!
Yesterday I released the Phyllis Air Raid Suit or Coverall pattern. It’s also available as an e-pattern on my site, or on Etsy.
This pattern is VERY challenging because it has a lot of techniques we don’t often use in women’s wear, like flat felled seams and button plackets. It was made to last through the tough job of WWII defense work, so it was made to last! But because we’re so unaccustomed to some of these techniques in regular women’s wear, I took step-by-step photos of the harder parts of construction to help walk you through it. This is the first of these posts.
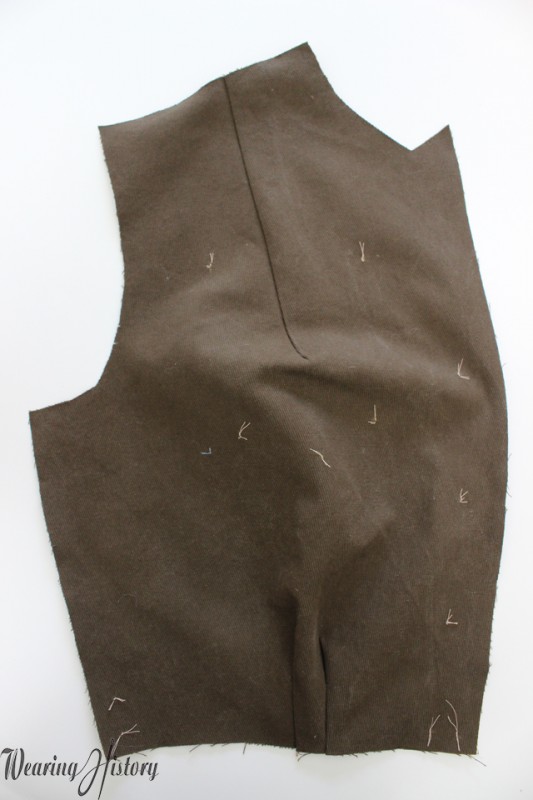
This first one’s not very tricky, but I thought it might help to have a visual, since this isn’t the standard way of attaching pockets to garments. The pockets on this suit are made of two layers and bagged out- not one layer with a hem at top like most pockets on garments.
My fabric I used was pretty heavy, so my pockets look a little bulky. Upon reading further, I found the original called for lining material for the pockets. Oh well, mine’s just extra heavy duty ;)
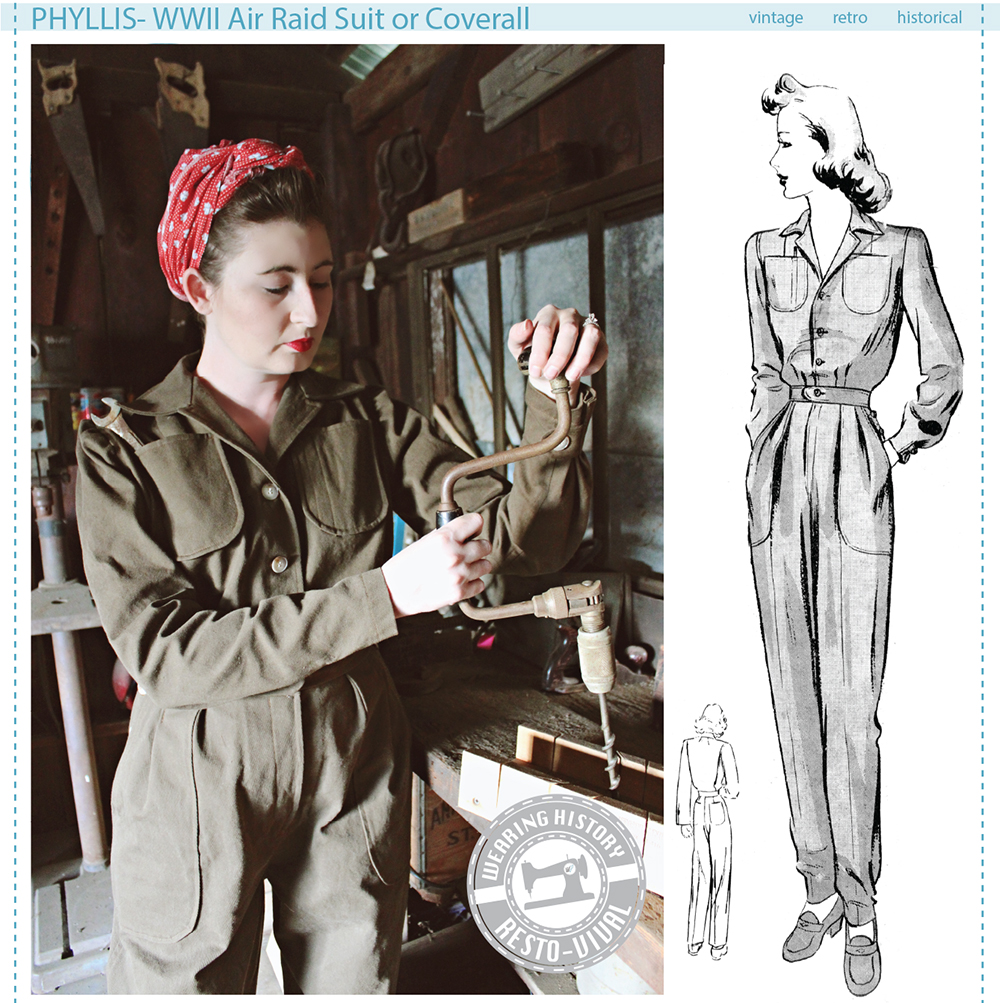
First you want to make sure you mark all your markings you might need. I used tailor’s tacks so they’re visible on both the right and wrong side of the fabric. For one way to thread mark or tailor tack, check out my previous blog post for the 1910s suit sew-a-long.
I am lazy and don’t usually mark the entire pocket on my fabric. Instead, I opt for marking the most crucial points and match to those. That’s why you see five dots on the image above and not a row of thread marking outlining a pocket.
Then do your front darts and tucks. Press them towards center front.
Ok! Now grab two pocket pieces (or pocket and pocket lining pieces) and put them right sides together. Stitch 1/2″, leaving an opening on the side. Don’t’ leave it right at the corner or your corner will look wonky. Leave the opening in the middle of the side, like the photo above.
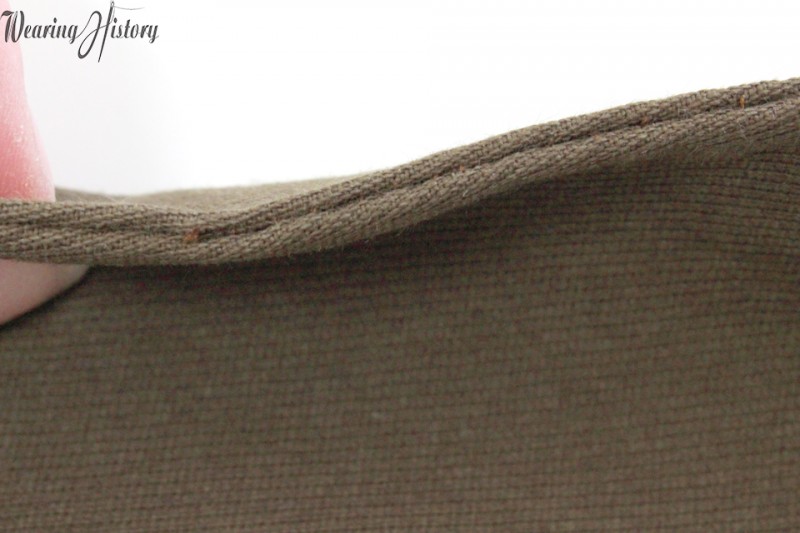
Now trim away the excess and clip your corners so it will lie nice and flat. Turn it right side out, get your corners nice and crisp, and press it.

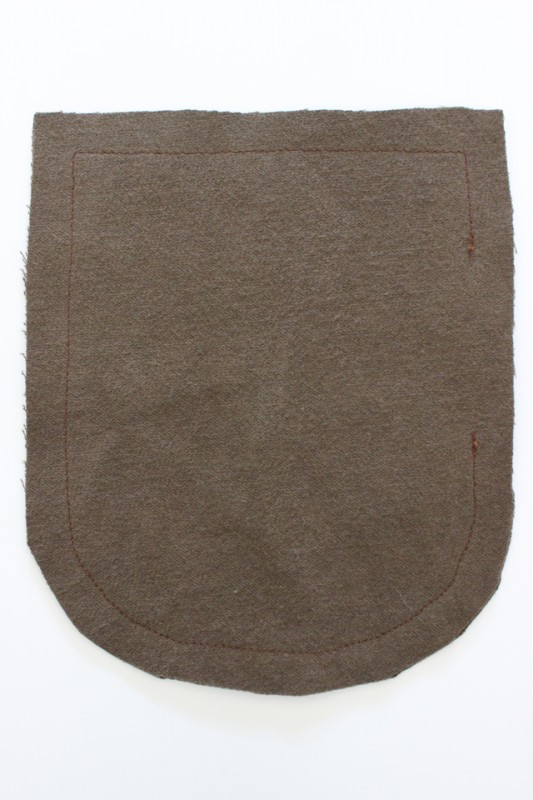
Now we’re going to slip stitch that opening closed. Go in and out of the fold on one side with your hand sewing needle.
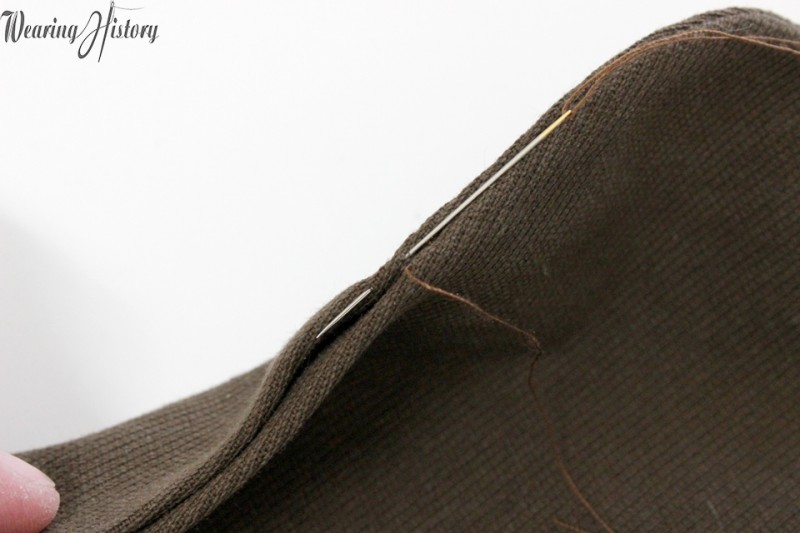
Then in and out of the other side of the fold with your hand sewing needle. Repeat these steps until you’ve sewn the length of the opening.
When you pull it taunt (but not too tight!), your stitches will be nearly invisible from the outside. It’s kind of like a ladder, with rungs going up the middle that pull the pieces together. Now give it another press for good measure.
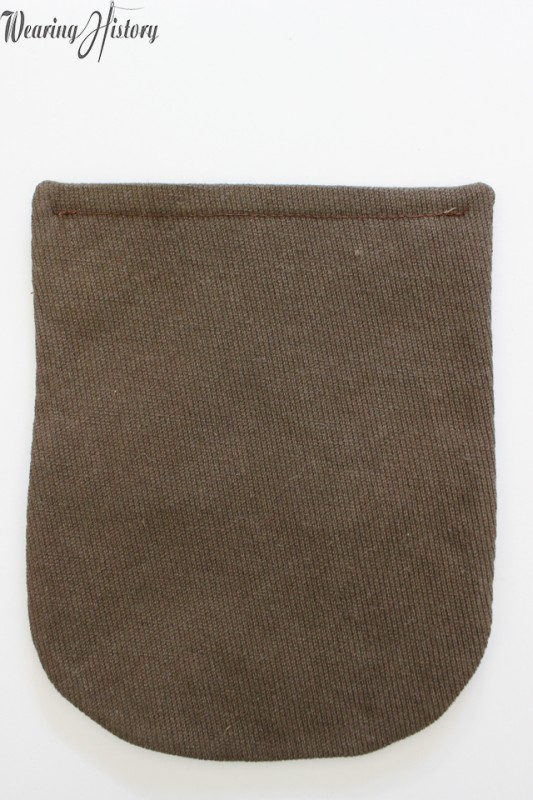
Now stitch 1/4″ from the top edge of the pocket, starting and ending 1/4″ in. This will all make sense in a minute.
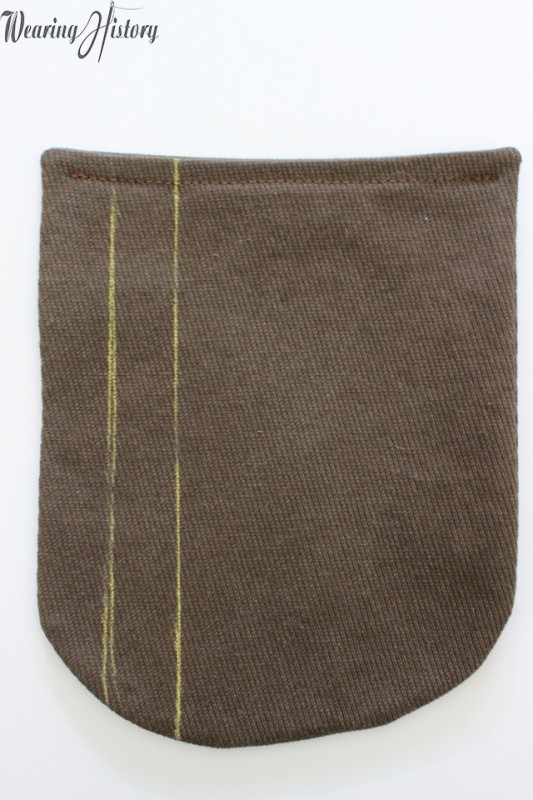
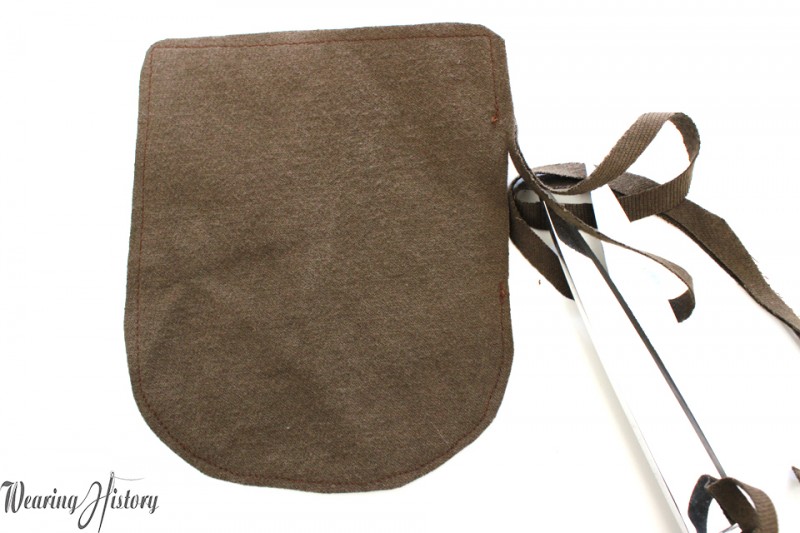
Now mark your pencil holder stitches (I’m blanking on the name right now) in chalk or another type of marking that will come out of your fabric. Test it on a scrap first. And maybe you won’t be as messy with it as I was ;)
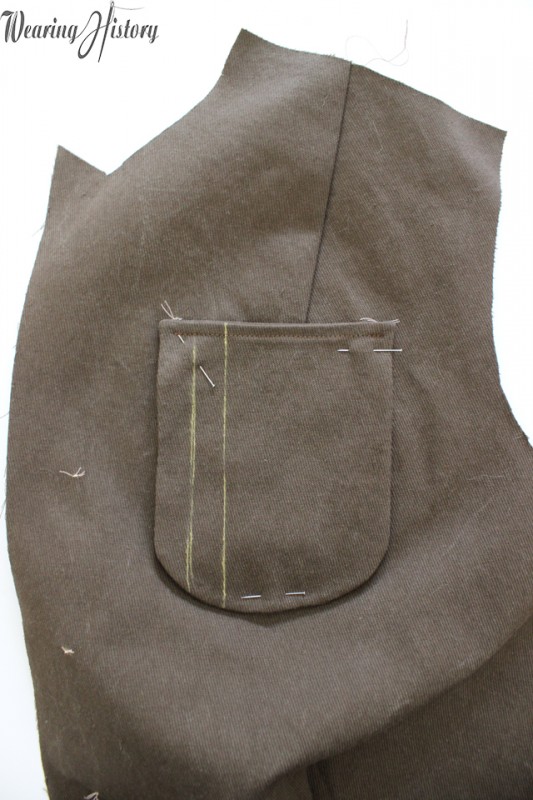
Now match that pocket to your dots (or lines) on the left front bodice piece. Pin it in place so it doesn’t wiggle around.
Now we’re going to take up topstitching where we left off and start at the 1/4″ in stitch corner where we stopped before and continue all around the bottom of the pocket and up the other side, stopping at the other 1/4″ in spot our last stitching stopped. See how nice and clean? No criss crossed stitches on the top!

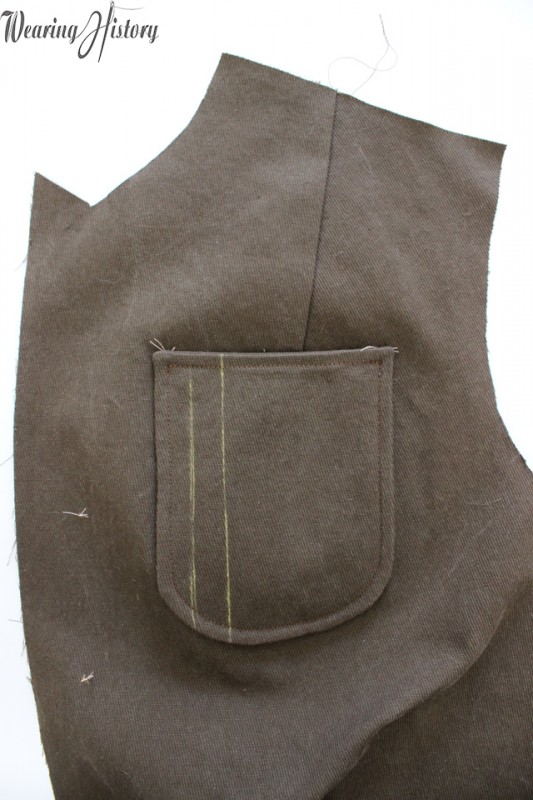
Now stitch down those markings for the pencil holder and then brush away (or otherwise remove) your markings.
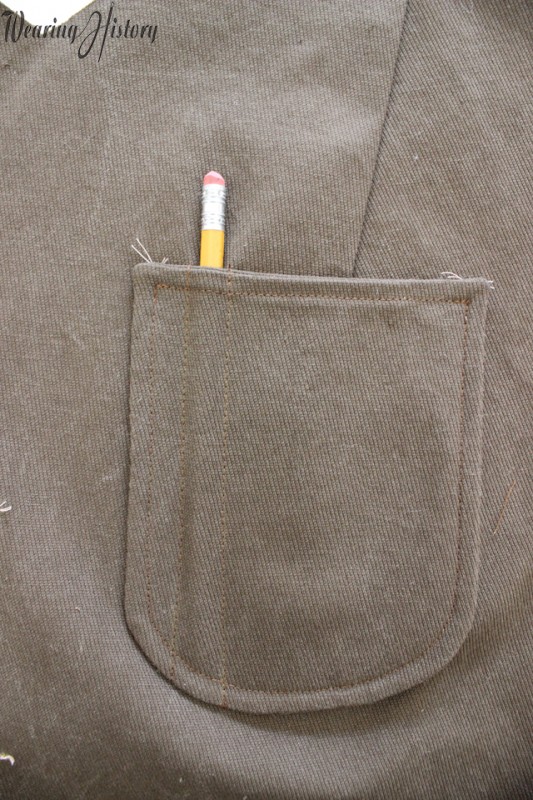
Now stick a pencil or pen in it and make sure it fits! It would be WAY easier now to unpick and widen it if you need to than it will be later!
Now do the same for the other side, omitting the pencil stitches for that side.
Ta Da! Pockets! When you do your pockets on the back slacks they’ll be done the same way, minus the pencil holder stitches, of course.
Hope that’s a helpful little tutorial!
xo
Lauren
Emily's Vintage Visions
April 2, 2015 at 11:58 am (9 years ago)I just ordered a copy of this pattern. I’m really excited for it!
-Emily
Lauren
April 3, 2015 at 11:40 am (9 years ago)Thank you so much, Emily!
Jan Marriott
April 3, 2015 at 9:07 am (9 years ago)I believe they were also called ‘siren suits’
Apparently I had one made from an old camelhair coat and another from a damson wooldressing gown.
Lauren
April 3, 2015 at 11:40 am (9 years ago)Yes, you’re right! They were called Siren Suits, especially in the UK.
Oh, that’s wonderful that you some originals!
Hari
April 3, 2015 at 4:22 pm (9 years ago)Oh I love love it! But I live in the subtropics, it would be a sauna suit here :( hmmmm wonder how a lightweight play suit version would be??