We’re going over how to attach laces to each other in this post. In the previous post we learned how to do basic lace insertion by machine. If you missed it, here is the link.
Attaching Laces to Each Other
When planning a garment you may decide you would like a wider insert- one composed of several pieces of laces attached one to the other. In this tutorial we will learn how to attach straight pieces of lace one to the other. This can look lovely going down the front of a bodice or used to edge a sleeve, or to create a collar.
You will need:
- A machine that does a zigzag stitch
- Lace. I recommend using one with a high cotton fibre content, and purchase extra, as I always have an tendency to run out of trims after inspiration strikes!
- Good quality thread
- A new sharp machine sewing needle
We are building upon techniques learned in the last post, so please read that post to help clarify steps if you’re new to these tutorials :)
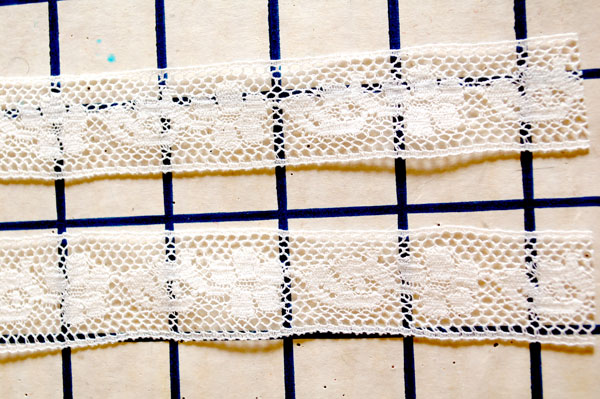
1- Prepare your lace as you did in the last post, by carefully hand washing with mild soap, letting it air dry flat, and then using spray starch to give it body. Figure out your design and, if needed, cut your lace pieces a little bit longer than the finished design (you can always cut it down later and you want to be sure the finished edge will be nice and crisp, not bunchy from where you start your stitching). When attaching laces of a similar design I find it looks best when the designs are lined up. Here you can see I’m planning the flowers of the two lace strips to attach so that they line up.
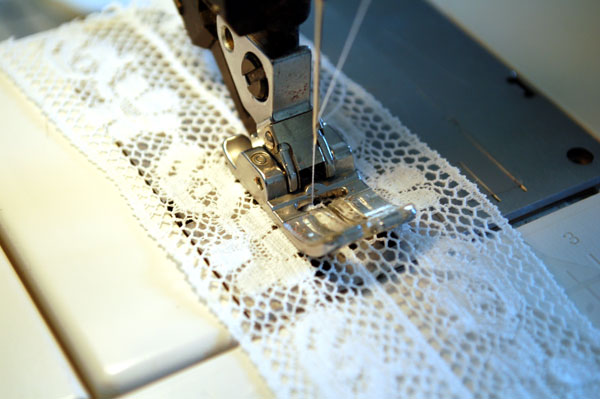
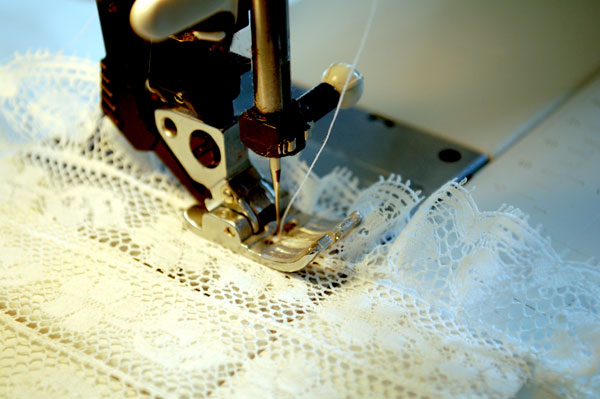
2- Zigzag the two laces together by machine. The idea is to attach the headers together. Use a similar zigzag stitch as used when attaching lace to fabric, using a width wide enough to create a sort of “bridge” over the header, encasing the two together, with the needle going down just on either side of the header. It’s perfectly ok if the needle falls off of your lace edge- in fact, I personally try to make it go on either side of the header- but be certain your lace pieces are starched and that your machine tension is correct so that they will not get “eaten” by your machine!
Click on the link below to continue reading. If you see no link, you’re in the right place!
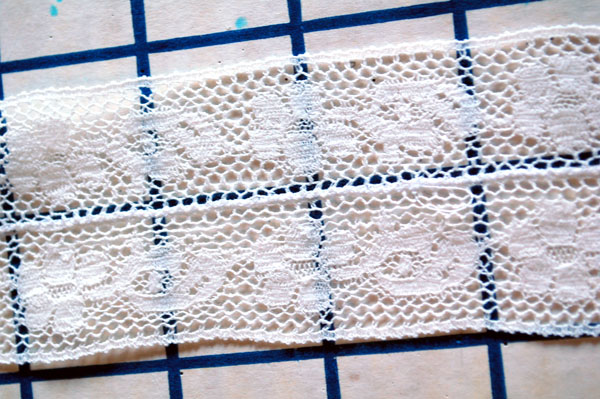
3- Give your lace a good press. That’s it! Now just keep adding lace or insert it into your garment!
4- (Optional) If using this for a sleeve or collar or neckline, you may wish to add another piece of lace to the end which has a scallop (called lace edging) for a pretty finish. Give it another press, then attach it to your garment.
Gathering Laces and Attaching Gathered Laces
Supplies needed:
- A machine that does a zigzag stitch
- Heirloom quality laces, such as those imported from France, which have gathering threads in the header. Cheaper laces generally do not have this, as it is a result of a certain way the laces are manufactured. As a rule of thumb I always get more lace than I think I will need, as I find that trim seems to disappear quickly once inspiration strikes!
- Good quality thread
- A new sharp machine sewing needle
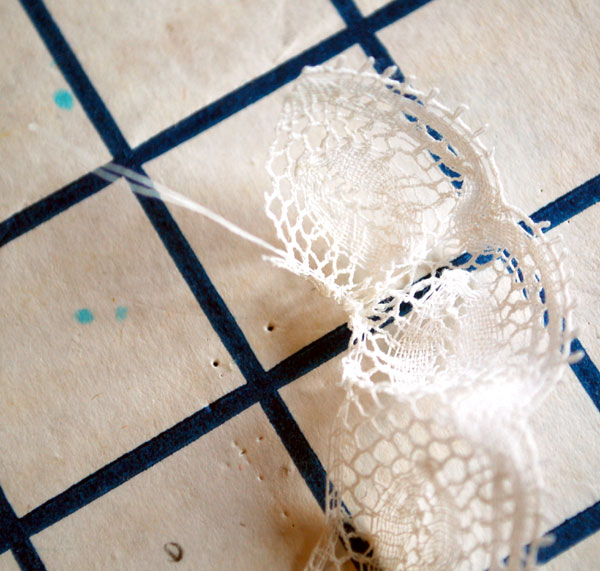
1- Heirloom quality cotton lace (often called French lace) should have threads in the header which can be used for gathering. The lace pictured here is antique, but it also has these threads. Very carefully, using your fingernails or a set of tweezers, grab a few of the threads in the header and slowly and carefully ease them from the lace. Sometimes you may need to grab one thread at a time.
2- Very slowly and carefully pull these threads to gather, easing the lace with your fingers to slowly gather it a small section at a time. This takes a bit of practice, so have some patience and go slowly, easing the gathers slowly over the length of the piece until the gathers are evenly spaced. It’s no fun to have those threads snap mid- gather! I have heard that easing the top most threads is the best, but I couldn’t get those ones to budge on this lace so used the ones that did! If you do not have a lace which gathers like this you can run hand gathering stitches down the header. I do find that laces with the threads already in the header work much better, however.
3- Zigzag the gathered lace to the straight lace, using the same technique as used when attaching straight laces to each other, by using the zig zag stitch to attach the laces header to header. Go very slowly, and be sure your gathers are evenly spaced.
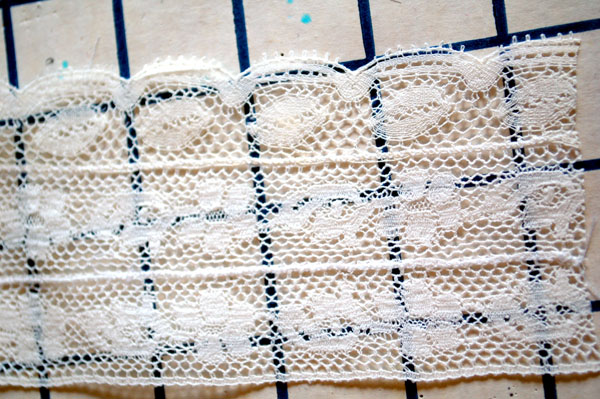
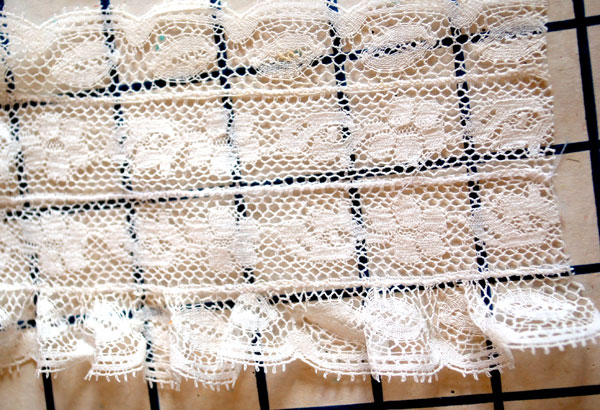
5- Carefully give it a press along the header (be careful not to press your gathered lace flat) and you’re finished! Here is a photo of my sample with one edging applied flat and one edging with gathers.
This is the end of the lace tutorials at present. The next tutorial will be how to sew French seams.


Sabrina
April 4, 2012 at 2:59 pm (12 years ago)Loved the lace tutorials! Thanks for putting them together! They make the whole process seem much more accessible. I’m thinking I’ll give it a try for a summer project. Maybe a nice lightweight blouse. :)
Lauren
April 6, 2012 at 9:51 am (12 years ago)I’m so glad you enjoyed them! Thanks so much!
If you do end up using the technique I’d love to see your finished project :)
MB@YarnUiPhoneAppv2.3
April 5, 2012 at 8:55 am (12 years ago)Great tutorial…there’s so much you can do with lace trim on a sewing machine, you’d be amazed. If I remember correctly, you’ll need your edge joining foot on a Viking to do attach lace together. Even a few strips joined together would make a stunning trim on a contemporary sleeveless blouse.
Lauren
April 6, 2012 at 9:50 am (12 years ago)Thanks! And very good to know about the special foot for the Viking!
I agree- I would love to see more lace on contemporary pieces.
Casey
April 11, 2012 at 9:51 am (12 years ago)Thank you so much for sharing this! I have a bunch of vintage laces I’ve been hanging on to for years, and am thinking if I get to making a 1910s daydress, I’ll definitely have to bust some out and utilize your tutorials. ;)